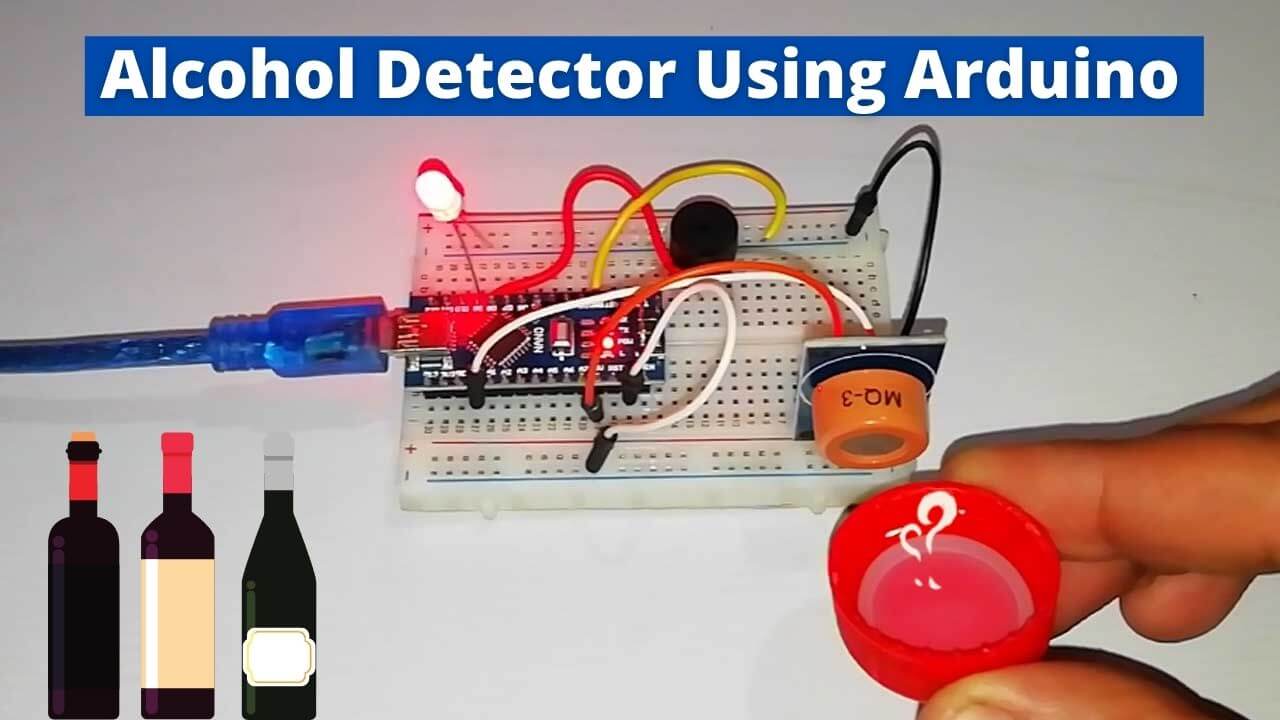
Nowadays drinking alcohol and driving are the most common threats to their lives and the lives of others. We can’t stop people from drinking alcohol but we can avoid such accidents by checking the person drinking and we can also keep such small devices in the vehicle to make sure there is no drink and drive. Today we are creating a simple Alcohol detector. We can use it in various application fields. So this is a small demonstration of a simple Alcohol detector using Arduino and MQ3 sensor.
Many advanced alcohol sensors are available in the market for a reasonable price, but we are here to make this project using some basic microcontroller like Arduino, LED, Buzzer and MQ3 alcohol sensors. This is a very simple project and you can just follow the instructions given below for this project.
What is an Alcohol detector using Arduino?
The equipment we use today to make alcohol detectors are Arduino, LEDs, Buzzer, and MQ3 alcohol sensors. There are many MQ-X sensors available in the market for different uses, but we are going to use MQ-3 sensor. Here as it is the best to detect alcohol. However, most MQ sensors work the same. They all contain a heating element that heats a layer of conductive material we constantly measure this resistance. Its resistance changes when the odor from smoking or alcohol comes into contact with the MQ-3 sensor.
The sensor also contains onboard power and status lead that blinks when the sensor detects alcohol fumes.
The sensor provides both digital and analog output. The difference between the two is simple. In the digital output, high or low (i.e. either 1 or 0) is transmitted to the microcontroller but a wide range of values from 0 to 1023 in the analog signal is transmitted to the microcontroller which corresponds to the intensity of alcohol in a nearby environment. They build the sensor out of LM393 IC, which has an inbuilt amplifier that amplifies the voltage signal in the detectable range. Also, it has voltage comparators for efficient amplification. We can adjust the amount of amplification with the help of potentiometers given in the sensor.
Note: – Sensor values depend on the source of the sensors and may vary in distance.
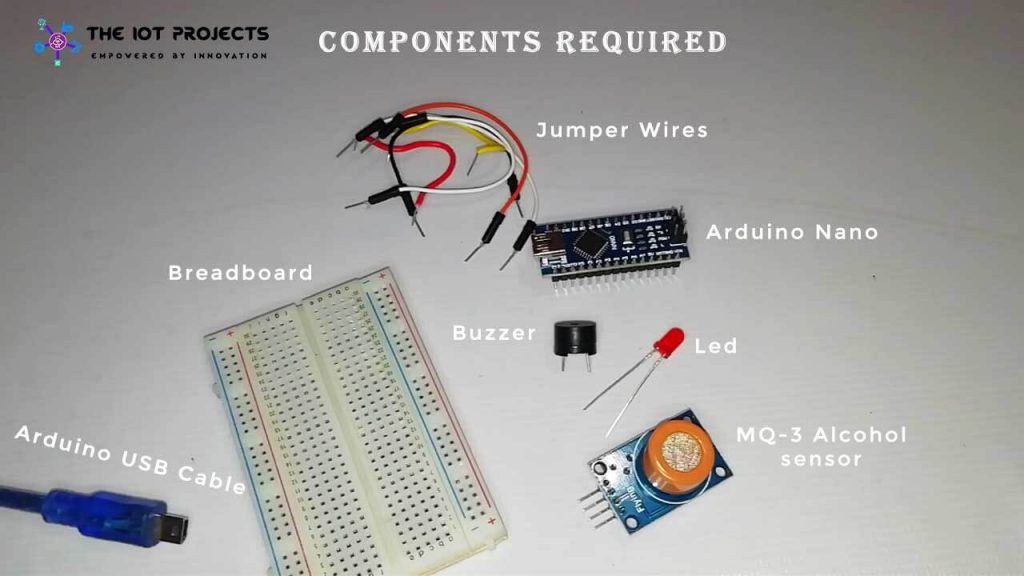
Components Required
The following is the list of all the components required for Alcohol Detector using Arduino project. You can buy them easily from the Amazon link provided below:
| S.N | Components Name | Description | Quantity | |
|---|---|---|---|---|
| 1 | Arduino Nano | Arduino Nano R3 | 1 | https://amzn.to/3swvBuO |
| 2 | MQ-3 Sensor | MQ-3 Alcohol Sensor | 1 | https://amzn.to/30GsaGc |
| 3 | Buzzer | Small 2 pin Buzzer | 1 | https://amzn.to/2OKdkvv |
| 4 | LED | 5Mm RED LED | 1 | https://amzn.to/3cwvtoG |
| 5 | Jumper Wires | Jumper Cables breadboard friendly | 5 | https://amzn.to/2JWSR44 |
| 6 | Breadboard | Mini Breadboard | 1 | https://amzn.to/2NP2UKL |
Why MQ3 sensor for Alcohol detection
- The sensitivity of Alcohol, Ethanol is good
- Easy to use and fix
- Adjustable value
- Low price
- Can be used in various alcohol detection projects
Here are some more useful specifications that we need to know before using this low cost MQ3 sensor.
| Operating voltage | 5V |
| Load resistance | 200 KΩ |
| Heater resistance | 33Ω ± 5% |
| Heating consumption | <800mw |
| Sensing Resistance | 1 MΩ – 8 MΩ |
| Concentration Scope | 25 – 500 ppm |
| Preheat Time | Over 24 hour |
The Arduino based alcohol detector using the MQ3 sensor is specified above.
MQ3 Alcohol Sensor Module Pinout
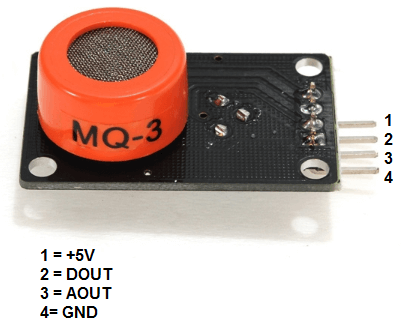
Now let’s have a look at the pinout.
| VCC | Supplies power for the module. You can connect it to 5V output from your Arduino |
| GND | It is the Ground Pin and needs to be connected to GND pin on the Arduino |
| D0 | Provides a digital representation of the presence of alcohol |
| A0 | Provides analog output voltage in proportional to the concentration of alcohol |
Circuit Diagram of Alcohol Detector using Arduino
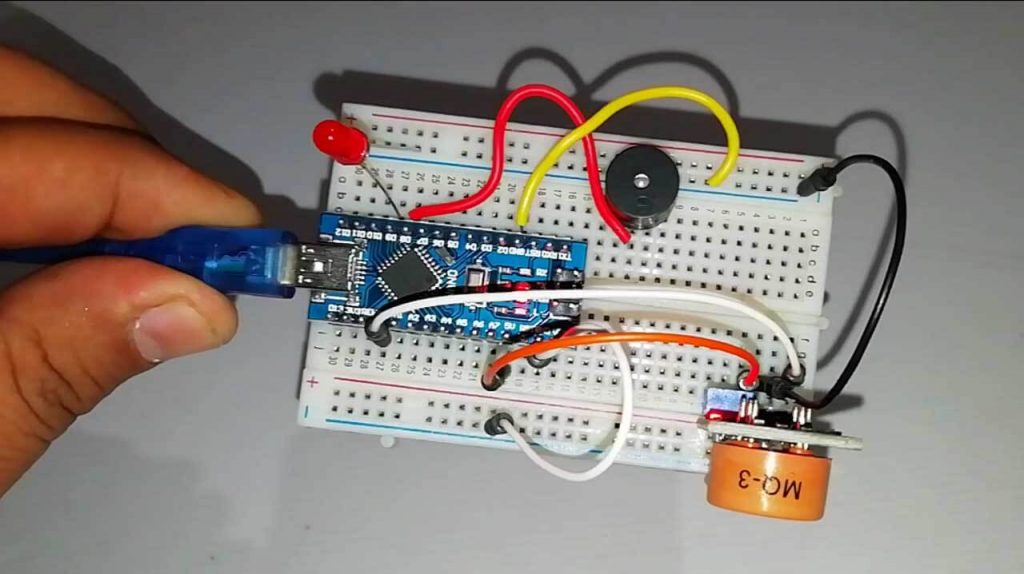
Now lets wire MQ-3 Alcohol sensor, Buzzer and LED with Arduino Nano. The Connection is fairly simple. Connect the components as shown in the schematics below.

| S.N | MQ-3 Sensor | Arduino |
| 1 | VCC | 5V |
| 2 | GND | GND |
| 3 | A0 | Pin A0 |
| S.N | Buzzer | Arduino |
| 1 | VCC | D8 |
| 2 | GND | GND |
| S.N | LED | Arduino |
| 1 | Anode (+) | D9 |
| 2 | Cathode (-) | GND |
I have assembled the circuit on a breadboard. If you don’t want to assemble the circuit on a breadboard and want Custom PCB for the project, then here is the PCB for you. The PCB Board for the portable Arduino Radar is designed for you. You can simply download the Gerber file from the link below and order the PCB online from PCBWay

PCBWay offers Only $5 for 10 PCBs and a total of $30 dollars for 20 PCBs Assembly. Apart from this PCBWay offers $5 as a signup bonus. So, what are you waiting for? get your first prototype order for free.
Explore More:
- Portable Radar Using Arduino
- Arduino Wireless Communication using NRF24L01 Transceiver Module
- IoT based Fire Detector & Automatic Extinguisher using NodeMCU
- Interface DHT11 Sensor with Arduino and LCD
- IoT based Fall Detection using NodeMCU and MPU6050 Sensor
Programming Arduino for Alcohol Detector Project
To program the Arduino, MQ-3 Alcohol Sensor, LED & Buzzer with Arduino IDE, we need to define all the Input/Output pins.
 #define MQ3 A0
 #define Buzzer 8
 #define LED 9
Here we have defined the threshold value of MQ3 reading above which it should trigger an action.
#define Thres_Val 460Global integer to store the analog reading from MQ-3 sensor. It ranges from 0 to 1023.
int value;In void setup first we are declaring all the input and output pins.
   pinMode(MQ3, INPUT);
   pinMode(Buzzer, OUTPUT);
   pinMode(LED, OUTPUT);
Then we started the Serial Output for debugging the program.
Serial.begin(9600);In a loop part first we reads the analog value from MQ3 and then sends the value to UART for debugging
value = analogRead(MQ3);
Serial.println(value);
Finally, If value from MQ-3 Alcohol sensor detect alcohol it turns on the LED and Buzzer. Otherwise the LED and Buzzer are off.
if ( value > Thres_Val )
   {
     digitalWrite ( LED , HIGH );    //digitalWrite(Buzzer,HIGH);
tone(Buzzer, 1000);
 }
 else {
     digitalWrite(LED, LOW);
 //digitalWrite(Buzzer,LOW);
noTone(Buzzer);
 }
Final Program Code for MQ-3 Alcohol Detector
So, this is the final program code for Alcohol detector using Arduino and MQ3 sensor. Copy the code provided below and upload it to your Arduino Board. Make sure you have selected correct board and COM port.
//Alcohol Detector based on MQ3
 /* Here are the list of I/O pins*/
 #define MQ3 A0
 #define Buzzer 8
 #define LED 9
 /***/
 /Threshold value of MQ3 reading above which it should trigger/
 #define Thres_Val 460
 //
 // global int to store the analog reading from MQ3 (0 to 1023)
 int value;
 void setup() {
   // declaring the input and output pins
   pinMode(MQ3, INPUT);
   pinMode(Buzzer, OUTPUT);
   pinMode(LED, OUTPUT);
 // Serial Output for debugging
   Serial.begin(9600);
 }
 void loop() {
   // reads the analog value from MQ3
   value = analogRead(MQ3);
 // sends the value to UART for debugging
   Serial.println(value);
 if ( value > Thres_Val )   //if alcohol is detected
   {
     digitalWrite ( LED , HIGH );    // turns the LED on
 //digitalWrite(Buzzer,HIGH);    // turns on (uncomment if buzzer is used)
tone(Buzzer, 1000);             //Generate a 1000Hz tone only if you use speaker (comment out if buzzer is used)
 }
 else {
     digitalWrite(LED, LOW);       //  turns the LED off
 //digitalWrite(Buzzer,LOW);   //  turns off (uncomment if buzzer is used)
noTone(Buzzer);               //  Removes the tone from speaker (comment out if buzzer is used)
 }
 delay (500);            //  a 500ms delay before reading is taken again
 }
Video Demonstration
The video demonstration of Alcohol Detector Using Arduino & MQ3 Sensor is embedded below. If you like the video don’t forget to hit that like and subscribe button.
Wrapping Up
So, that’s all for Alcohol Detector Using Arduino & MQ3 Sensor that can be can be used in a variety of locations.. I wish you all the best for the project. if you stuck anywhere you can ask me in the comment section below.


