RFID Master Card Door Lock System using Arduino
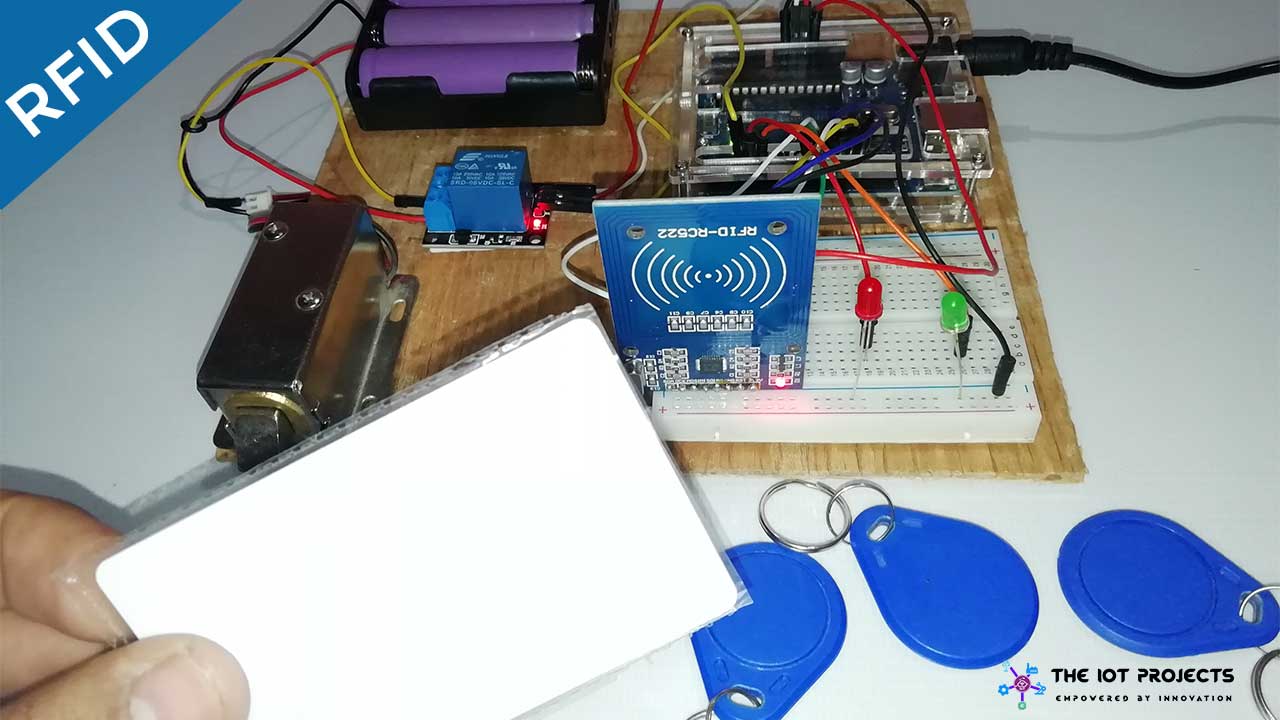
Hello, everybody in this tutorial I will show you a tutorial to make RFID Master Card Door Lock System using Arduino. with which you can register multiple RFID Tags and control your door lock system.
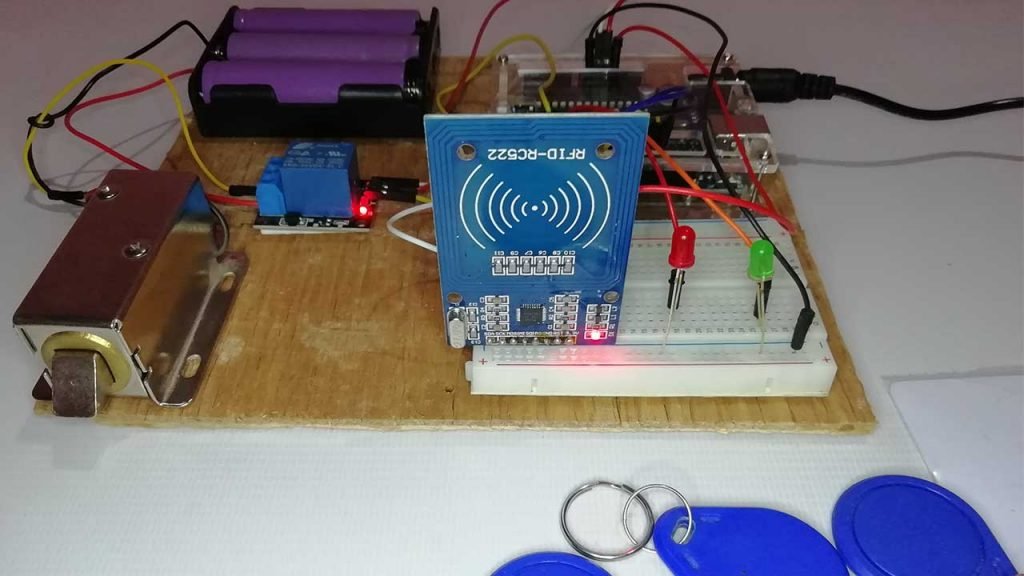
How does this RFID master card door lock system work?
Basically, you will have one RFID card Registered as a master card in a system. Now, you can use that RFID Master card to register other RFID cards/tags to this system to control your solenoid door lock.
To add an RFID Card/tag into our system, first, you should scan the Master RFID Card. Now, when the Green LED is ON, you should scan the second RFID card/tag that you want to register to the system. After that, your card is added to the RFID master door lock system. Now, you can scan the newly added card/tag to access the door lock.
Similarly, we can remove access to RFID card/tag as well. For that, you have to scan the master card then scan the RFID card/tag that you want to remove. Now, that card won’t have any access to the RFID door lock system.
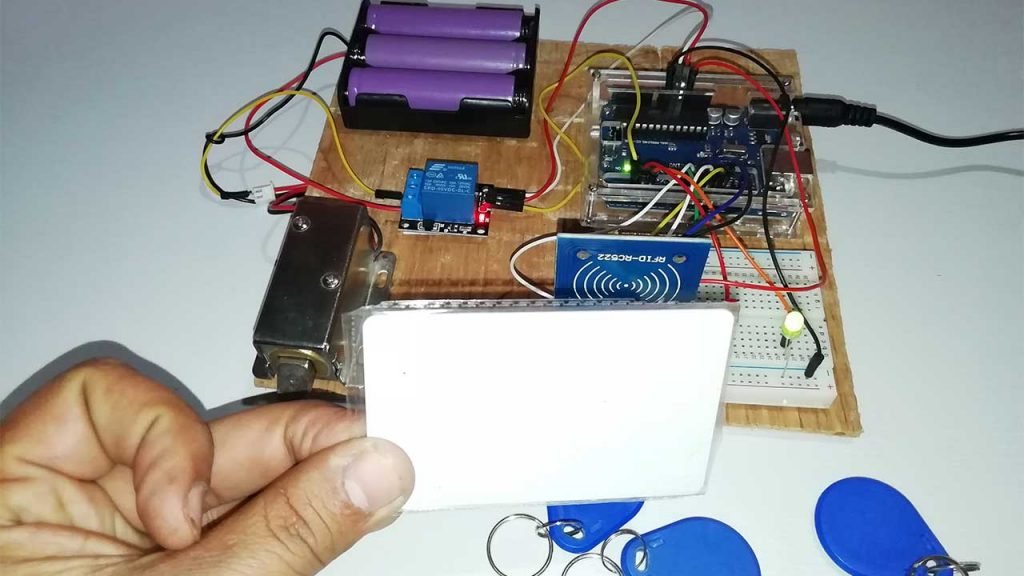
Note: In a similar way you can add multiple cards/tags and remove them as well.
Components Required
The following are the list of the required components for making RFID Master Card Door Lock System using Arduino.
- Arduino UNO
- RFID MF-RC522 Module
- RFID Cards/Tags
- Relay Module
- Solenoid Door Lock
- A Green and A Red LED
- 12V DC power supply
- Jumper wires.
Circuit Diagram of Arduino RFID Master Card Door Lock System
Now, follow the circuit diagram provided below and do your connections.
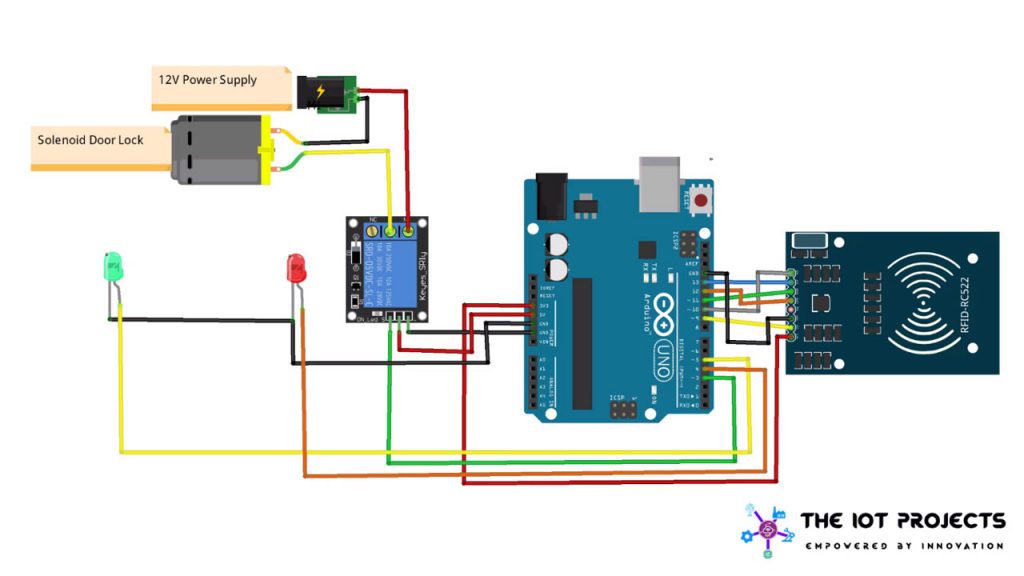
Connections between Arduino and RFID are given in the table below. The solenoid lock is connected to Arduino through the relay module.
| RFID Pin | Arduino Uno Pin |
| SDA | Digital 10 |
| SCK | Digital 13 |
| MOSI | Digital 11 |
| MISO | Digital 12 |
| IRQ | Unconnected |
| GND | GND |
| RST | Digital 9 |
| 3.3V | 3.3V |
| Relay Pin | Arduino Uno Pin |
| Vcc | Vcc |
| GND | GND |
| Sinal | 3 |
Green LED Positive pin is connected to the digital pin 5 of Arduino and Negative pin to the GND. Similarly, the RED LED Positive pin is interfaced with digital pin 4 and Negative pin to the GND.
Program Code
Let’s start coding by including all the required libraries. Here, this program only requires two libraries, one for SPI communication between Arduino and RFID, and the second for the RFID module. Both the libraries can be downloaded from the links provided below:
These are the pins for RFID Module, LEDs, Relays and different states of program for RFID.
#define RST_PIN 9
#define SS_PIN  10

#define STATE_STARTUP       0
#define STATE_STARTING      1
#define STATE_WAITING       2
#define STATE_SCAN_INVALID  3
#define STATE_SCAN_VALID    4
#define STATE_SCAN_MASTER   5
#define STATE_ADDED_CARD    6
#define STATE_REMOVED_CARD  7

#define REDPIN 4
#define GREENPIN 5
#define Relay 3
Here, you need to change the UID of your Master Card.
byte masterCard[cardSize] = {129,163,220,121}; //Change Master Card ID
Note: To know your master card UID. First, upload the program to your Arduino by selecting the correct board and COM Port. After successful upload open the serial monitor at the baudrate of 9600. Now, scan your card to get the UID. Just copy that ID and paste it on the program code. Now, again upload the code.
Final Program code for RFID Master Card Door Lock
//RFID Based Solenoid Door lock using Arduino
//The IoT Projects https://www.youtube.com/c/TheIoTProjects
//website:https://iotprojectsideas.com/
//RFID RC522 Master Card, Add and Remove multiple Cards

#include <SPI.h>
#include <Wire.h>
#include <MFRC522.h>

#define RST_PIN 9
#define SS_PIN  10

#define STATE_STARTUP       0
#define STATE_STARTING      1
#define STATE_WAITING       2
#define STATE_SCAN_INVALID  3
#define STATE_SCAN_VALID    4
#define STATE_SCAN_MASTER   5
#define STATE_ADDED_CARD    6
#define STATE_REMOVED_CARD  7

#define REDPIN 4
#define GREENPIN 5
#define Relay 3

const int cardArrSize = 10;
const int cardSize    = 4;
byte cardArr[cardArrSize][cardSize];
byte masterCard[cardSize] = {129,163,220,121};   //Change Master Card ID
byte readCard[cardSize];
byte cardsStored = 0;

// Create MFRC522 instance
MFRC522 mfrc522(SS_PIN, RST_PIN);
// Set the LCD I2C address

byte currentState = STATE_STARTUP;
unsigned long LastStateChangeTime;
unsigned long StateWaitTime;

//------------------------------------------------------------------------------------
int readCardState()
{
  int index;

  Serial.print("Card Data - ");
  for(index = 0; index < 4; index++)
  {
    readCard[index] = mfrc522.uid.uidByte[index];


    Serial.print(readCard[index]);
    if (index < 3)
    {
      Serial.print(",");
    }
  }
  Serial.println(" ");

  //Check Master Card
  if ((memcmp(readCard, masterCard, 4)) == 0)
  {
    return STATE_SCAN_MASTER;
  }

  if (cardsStored == 0)
  {
    return STATE_SCAN_INVALID;
  }

  for(index = 0; index < cardsStored; index++)
  {
    if ((memcmp(readCard, cardArr[index], 4)) == 0)
    {
      return STATE_SCAN_VALID;
    }
  }

 return STATE_SCAN_INVALID;
}

//------------------------------------------------------------------------------------
void addReadCard()
{
  int cardIndex;
  int index;

  if (cardsStored <= 20)
  {
    cardsStored++;
    cardIndex = cardsStored;
    cardIndex--;
  }

  for(index = 0; index < 4; index++)
  {
    cardArr[cardIndex][index] = readCard[index];
  }
}

//------------------------------------------------------------------------------------
void removeReadCard()
{
  int cardIndex;
  int index;
  boolean found = false;

  for(cardIndex = 0; cardIndex < cardsStored; cardIndex++)
  {
    if (found == true)
    {
      for(index = 0; index < 4; index++)
      {
        cardArr[cardIndex-1][index] = cardArr[cardIndex][index];
        cardArr[cardIndex][index] = 0;
      }
    }

    if ((memcmp(readCard, cardArr[cardIndex], 4)) == 0)
    {
      found = true;
    }
  }

  if (found == true)
  {
    cardsStored--;
  }
}

//------------------------------------------------------------------------------------
void updateState(byte aState)
{
  if (aState == currentState)
  {
    return;
  }

  // do state change
  switch (aState)
  {
    case STATE_STARTING:
      StateWaitTime = 1000;
      digitalWrite(REDPIN, HIGH);
      digitalWrite(GREENPIN, LOW);
      break;
    case STATE_WAITING:
      StateWaitTime = 0;
      digitalWrite(REDPIN, LOW);
      digitalWrite(GREENPIN, LOW);
      break;
    case STATE_SCAN_INVALID:
      if (currentState == STATE_SCAN_MASTER)
      {
        addReadCard();
        aState = STATE_ADDED_CARD;
        StateWaitTime = 2000;
        digitalWrite(REDPIN, LOW);
        digitalWrite(GREENPIN, HIGH);
      }
      else if (currentState == STATE_REMOVED_CARD)
      {
        return;
      }
      else
      {
        StateWaitTime = 2000;
        digitalWrite(REDPIN, HIGH);
        digitalWrite(GREENPIN, LOW);
      }
      break;
    case STATE_SCAN_VALID:
      if (currentState == STATE_SCAN_MASTER)
      {
        removeReadCard();
        aState = STATE_REMOVED_CARD;
        StateWaitTime = 2000;
        digitalWrite(REDPIN, LOW);
        digitalWrite(GREENPIN, HIGH);
      }
      else if (currentState == STATE_ADDED_CARD)
      {
        return;
      }
      else
      {
        StateWaitTime = 2000;
        digitalWrite(REDPIN, LOW);
        digitalWrite(GREENPIN, HIGH);
        digitalWrite(Relay,LOW);
        delay(3000);
        digitalWrite(Relay,HIGH);
      }
      break;
    case STATE_SCAN_MASTER:
      StateWaitTime = 5000;
      digitalWrite(REDPIN, LOW);
      digitalWrite(GREENPIN, HIGH);
      break;
  }

  currentState = aState;
  LastStateChangeTime = millis();
}

void setup()
{
  SPI.begin();         // Init SPI Bus
  mfrc522.PCD_Init();  // Init MFRC522

  LastStateChangeTime = millis();
  updateState(STATE_STARTING);

  pinMode(REDPIN, OUTPUT);
  pinMode(GREENPIN, OUTPUT);
  pinMode(Relay, OUTPUT);
  digitalWrite(Relay,HIGH);

  Serial.begin(9600);
}

void loop()
{
  byte cardState;

  if ((currentState != STATE_WAITING) &&
      (StateWaitTime > 0) &&
      (LastStateChangeTime + StateWaitTime < millis()))
  {
    updateState(STATE_WAITING);
  }

  // Look for new cards
  if ( ! mfrc522.PICC_IsNewCardPresent())
  {
    return;
  }

  // Select one of the cards
  if ( ! mfrc522.PICC_ReadCardSerial())
  {
    return;
  }

  cardState = readCardState();
  updateState(cardState);
}
Video Demonstration of RFID Door Lock
Now, your RFID Master Card Door Lock System using Arduino is ready to test. Here, is a full video demonstration. If you like it then please share it with your friends.
Conclusion
So, that’s pretty much for this session. I hope you enjoyed making this RFID Master Card Door Lock System using Arduino. If you did, don’t forget to share this article with your friends. If you have any doubts regarding this weather station project then do let me know them in the comment section below.
Recommended Readings:
- RFID Based Solenoid Door lock using Arduino
- Interface DHT11 Sensor with Arduino and LCD
- Temperature Controlled Home Automation using Arduino
- IoT Based RFID Attendance System using ESP32
- Password Security Lock System Using Arduino & Keypad
- Contactless Smart Doorbell Using ESP8266 & Blynk
- Insert Data into MySQL Database with ESP8266 Development Board
- Fire Security System using Arduino & Flame Sensor
- IoT based Silent Intruder Alarm using Arduino
- IoT Based RFID Smart Door Lock System Using NodeMCU ESp8266

Hi, Allen ,thank you. Your tutorials are very informative and neat.
Greetings from Sri lanka.
– Shankar
Thanks for appreciation ?
Hai, thanks you.
My question, how to do so when blank out power, don’t need to register again?
Thanks.
Master card UID is saved in EEPROM. But for other cards you need to re register them.
Thanks you very much..
Hi can I get ur number, i need ur help for one RFID CARD PROJECT. THANKS NAVEEN
I have DA in my uid and it’s giving me an error
RFID Master Card Door Lock System using Arduino
Hello, I have run the MasterCard program, but it has a major problem, that is, when the power goes out, everything is deleted. Please guide me, thank you.
Hi, did you ever figure out how to solve this problem? I have the same issue that i would like to combat.
Hello, please send the answer to my email address, thank you