The relay allows you to attach operating devices in relatively high current or voltage modes. We cannot link the Arudino board directly to powerful pumps, motors, even a simple deep bulb, etc. Because the board isn’t equipped for such loads and doesn’t operate. So for this reason we should add relays to the circuit that you simply can find in any Arduino and Relay based projects. In this article, we point out what relays are, how you’ll be able to connect them to your Arduino project. Overall this is a complete Guide for Interfacing Relay with Arduino.
Introduction to Relay
A relay is a gateway that enables you to attach electrical circuits with different parameters. In Arduino, the relay opens or closes external devices, closes in a certain way, or disconnects a separate electrical network connected to them. With the help of Arduino and Relay, we control the method of turning the house lights on or off. In the same way, we can turn on or off the lights just through OPEN or CLOSE Commands.
Features of a relay
Basically, a relay module has two features.
- Channels – Channels are based on how many devices are connected.
- Power – based on microcontrollers.
Pinouts of the relay
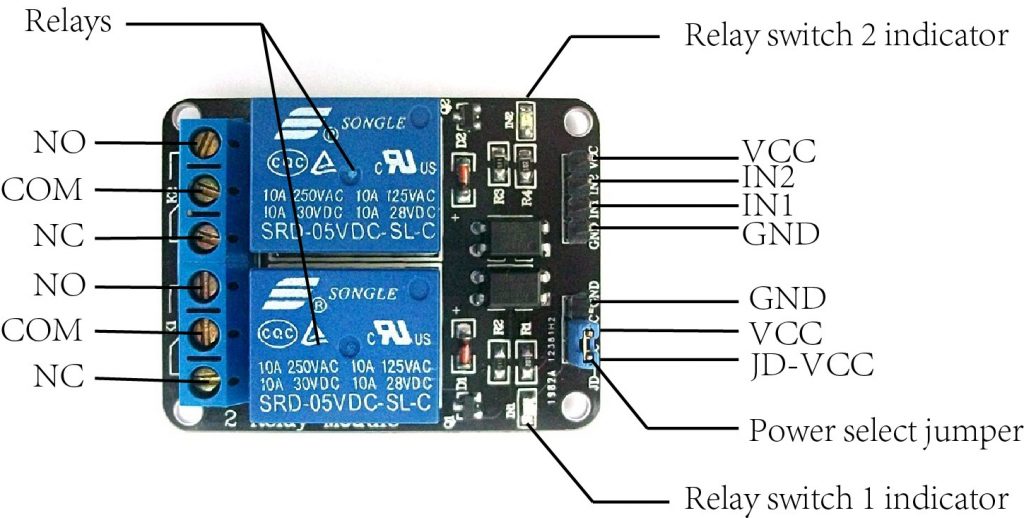
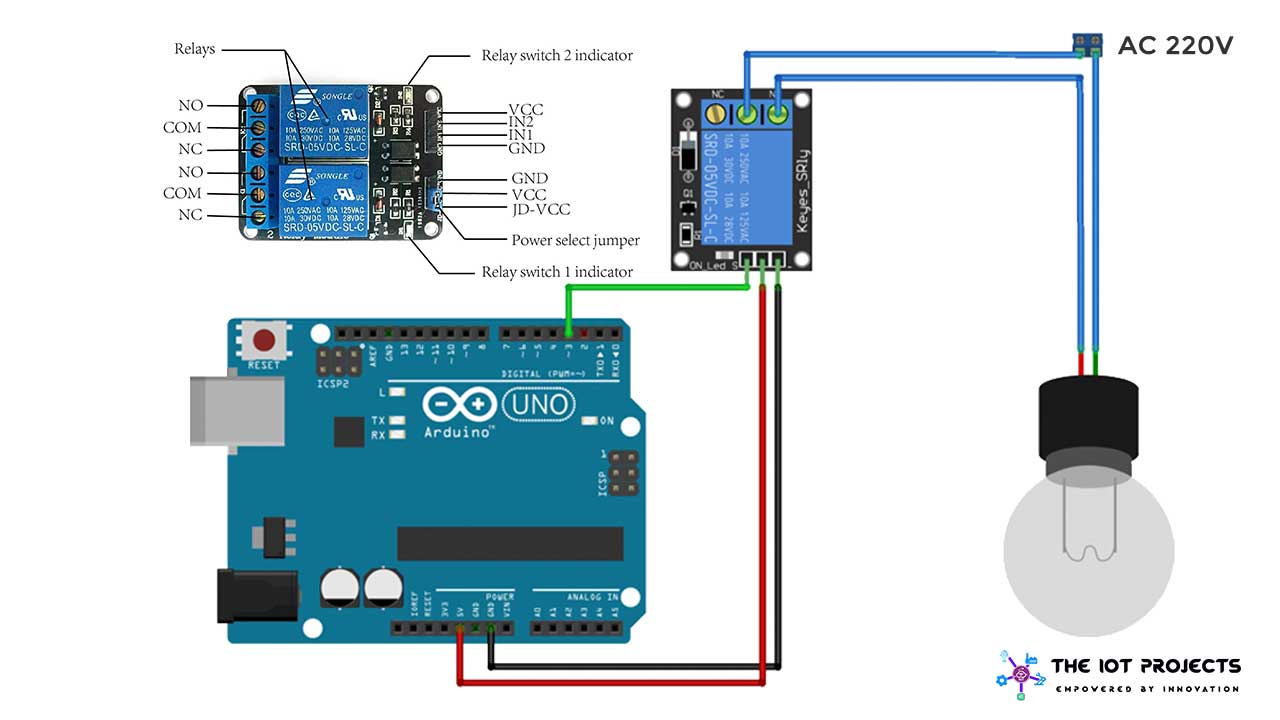
This is a two-channel relay where it has two relays. The connection on the right side indicates the connections to be done with Arduino. Similarly, left side connection is to be done with devices like bulbs, motors, fan, fridge, AC, etc
Interface Relay with Arduino
- VCC – to attach Arduino’s supply
- GND – to attach to Arduino Ground supply
- IN1 – to regulate the primary relay, must be connected to Arduino’s digital pin.
- IN2 – to regulate the second relay, must be connected to Arduino’s digital pin
- Other sets of pins consist of JD-VCC relays which is used to power the electromagnet of the relays.
Interface devices with Relay
- NO – Opened normally, if connected to NO the load will remain disconnected before the trigger
- NC – Normally closed, the opposite side of the load is connected to either NO or NC. If connected to NC, the load is added before triggering
- COM – Common, it’s connected to at least one end of the load for control.
Relay example Code
const int relPin = 3;
void setup() {
pinMode(relPin, OUTPUT);
}
void loop() {
digitalWrite(relPin, HIGH);
delay(1000);
digitalWrite(relPin, LOW);
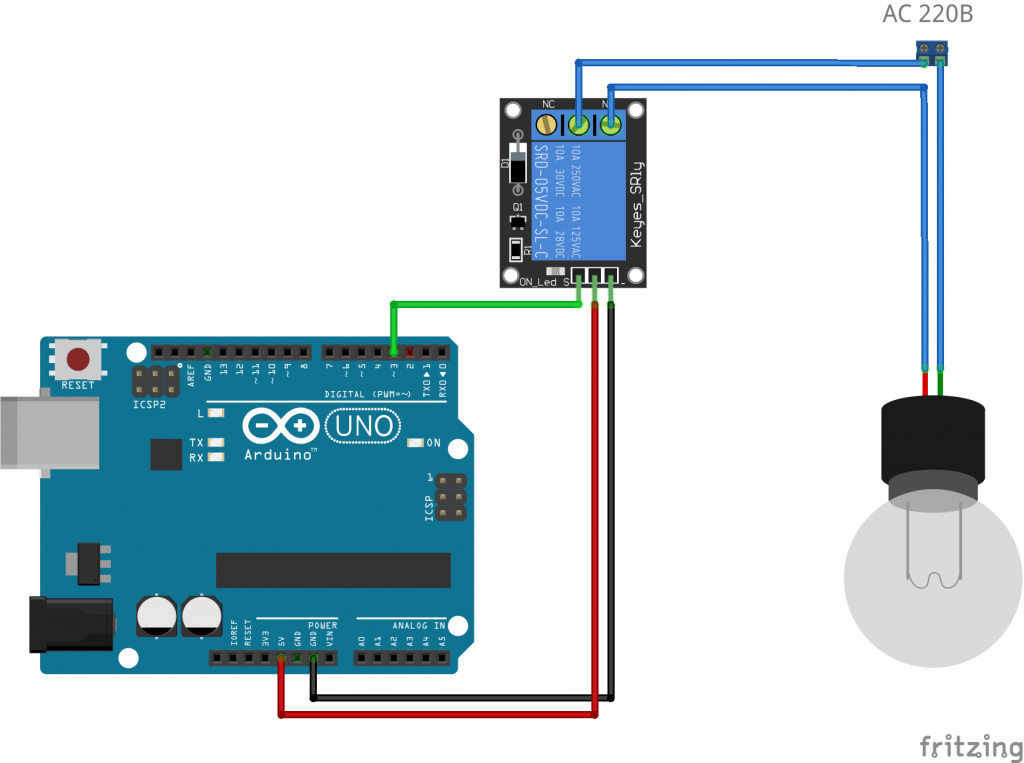
delay(3000); }Now, upload the above program by selecting your correct Arduino board from the tools menu. Then also select the correct corresponding COM port. After a successful upload, the bulb starts to flash every 1 second.
Conclusion
So, this is the complete Guide for Interfacing Relay with Arduino. The above program code and connection flash the bulb every 1 second, like a glowing LED, but with the bulb.
Recommended Readings:


