ESP32 based MAX30100 Pulse Oximeter Webserver
Overview: ESP32 MAX30100 WebServer
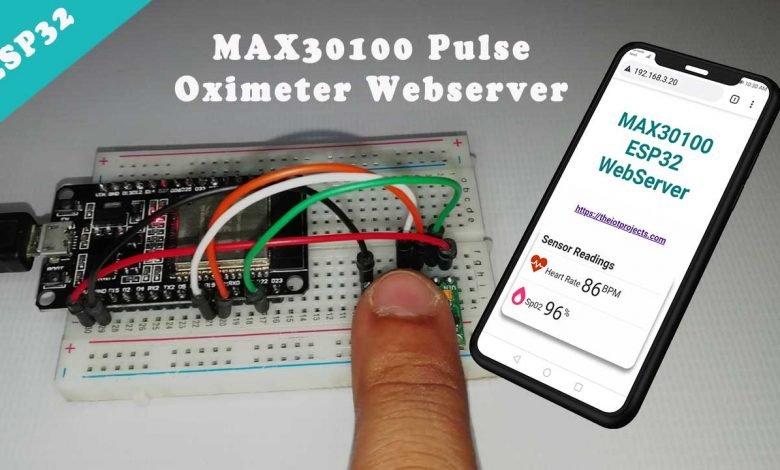
In this project, you will learn to make ESP32 based MAX30100 Pulse Oximeter Webserver. Our previous project was based on ESP8266 NodeMCU where we monitor the BPM and Sp02 parameters of the oximeter sensors in the webserver. But in today’s project, we will monitor Heart Rate and oxygen saturation (Sp02) values on the ESP32 Webserver. You can monitor those values from any smartphone or PC which has wifi support and browsing capabilities.
In today’s tutorial, you will learn to:
- Interface the MAX30100 Pulse Oximeter sensor with ESP32.
- Program ESP32 board using Arduino IDE.
- Create a beautiful ESP32 local webserver to display BPM and Sp02 parameters.
Components Required
To make an ESP32 based MAX30100 Pulse Oximeter Webserver, you will need the ESP32 Development board. A MAX30100 Pulse oximeter sensor, few jumper cables, and a breadboard. You can buy all these components from the Amazon link provided below.
| S.N | Components Name | Description | Quantity | |
|---|---|---|---|---|
| 1 | ESP32 | ESP32 Development Board | 1 | https://amzn.to/2Ry8EuF |
| 2 | MAX30100 Oximeter Sensor | MAX30100 Heart Rate Oximeter Sensor Arduino Module | 1 | https://amzn.to/3hdjkt2 |
| 3 | Jumper Wires | Jumper Cables breadboard friendly | 5 | https://amzn.to/3vw9ZAt |
| 4 | Breadboard | Mini Breadboard | 1 | https://amzn.to/2NP2UKL |
Interfacing MAX30100 with ESP8266 NodeMCU
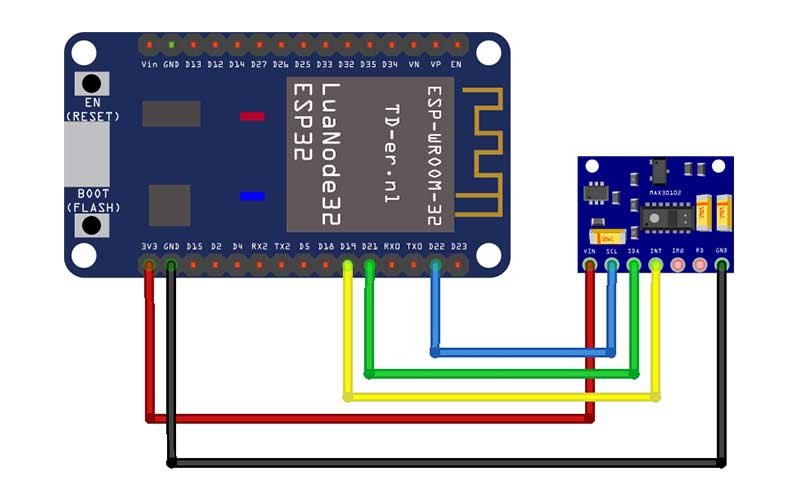
The Circuit assembly for MAX30100 Pulse Oximeter Webserver using ESP32 is very simple. The MAX30100 Oximeter Sensor works with the I2C bus. So, Interface the I2C pins (SCL &SDA) oximeter modules with GPIO 22 and GPIO 22 pins of ESP32. Connect the INT pin to the NodeMCU GPIO 19 pin. Similarly, provide 3.3V power to the VCC and Ground the GND pin. Basically, you can follow the circuit diagram to make your connections.
PCB Designing for MAX30100 Pulse Oximeter
The PCB for ESP32 based MAX30100 Pulse Oximeter Webserver has been designed in EasyEDA which looks like.
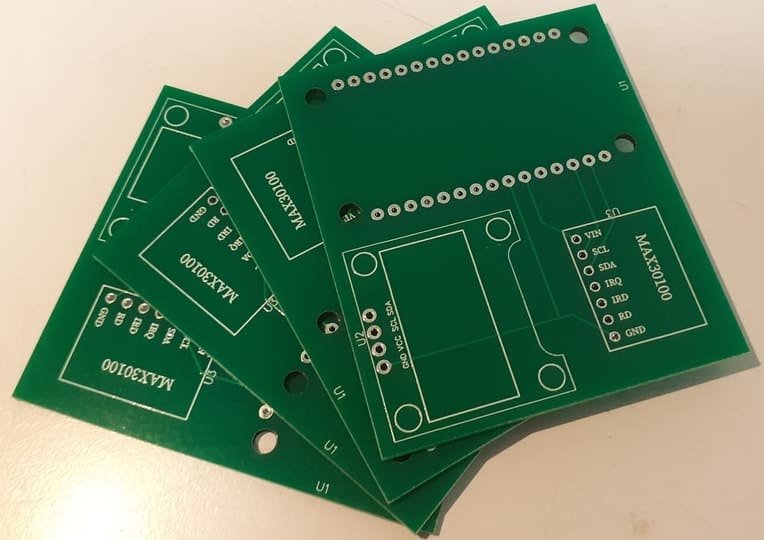
The Gerber file for the PCB is given below. You can download the Gerber file and order the PCB online from NextPCB.
PCB Ordering & Assembly

Now you can visit https://www.nextpcb.com/ and order the PCB. It is one of the biggest PCB manufacturer companies in China. They offer very good quality PCB at a reasonable price.
Preparing Arduino IDE For ESP32
Actually, We’ll program the ESP32 board using the Arduino IDE. So, make sure you have the ESP32 add-on installed.
Installing MAX30100_PulseOximeter & ESP32 Webserver Libraries
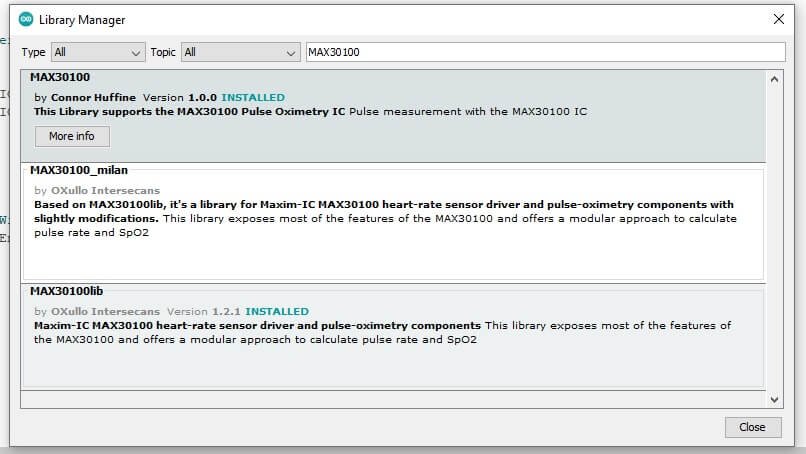
To install the library, First, download them and install them from the library manager. ELse, navigate to the Sketch > Include Library > Manage Libraries… Wait some time for Arduino IDE to update the list of installed libraries.
Now in the search field search for “MAX30100” and install the library as shown in the image below.
Similarly, search for “WebServer” and install that library as well.
Source Code/Program
This is the final source code for the ESP32 based MAX30100 Webserver project. You just need to replace the WiFi network credentials and upload it by selecting the correct board and its COM port.
/*Put your SSID & Password*/
const char* ssid = "xxxx-xxxx-xxxx";  // Enter SSID here
const char* password = "xxx-xxx-xxx";  //Enter Password here
//MAX30100 ESP32 WebServer
#include <WiFi.h>
#include <WebServer.h>
#include <Wire.h>
#include "MAX30100_PulseOximeter.h"

#define REPORTING_PERIOD_MS     1000

float BPM, SpO2;

/*Put your SSID & Password*/
const char* ssid = "xxxx-xxxx-xxxx";  // Enter SSID here
const char* password = "xxx-xxx-xxx";  //Enter Password here

PulseOximeter pox;
uint32_t tsLastReport = 0;

WebServer server(80);

void onBeatDetected()
{
  Serial.println("Beat Detected!");
}

void setup() {
  Serial.begin(115200);
  pinMode(19, OUTPUT);
  delay(100);
  Serial.println("Connecting to ");
  Serial.println(ssid);

  //connect to your local wi-fi network
  WiFi.begin(ssid, password);

  //check wi-fi is connected to wi-fi network
  while (WiFi.status() != WL_CONNECTED) {
    delay(1000);
    Serial.print(".");
  }
  Serial.println("");
  Serial.println("WiFi connected..!");
  Serial.print("Got IP: ");  Serial.println(WiFi.localIP());

  server.on("/", handle_OnConnect);
  server.onNotFound(handle_NotFound);

  server.begin();
  Serial.println("HTTP server started");

  Serial.print("Initializing pulse oximeter..");

  if (!pox.begin()) {
    Serial.println("FAILED");
    for (;;);
  } else {
    Serial.println("SUCCESS");

    pox.setOnBeatDetectedCallback(onBeatDetected);
  }

  pox.setIRLedCurrent(MAX30100_LED_CURR_7_6MA);

  // Register a callback for the beat detection

}
void loop() {
  server.handleClient();
  pox.update();
  BPM = pox.getHeartRate();
  SpO2 = pox.getSpO2();

  if (millis() - tsLastReport > REPORTING_PERIOD_MS)
  {

    Serial.print("BPM: ");
    Serial.println(BPM);

    Serial.print("SpO2: ");
    Serial.print(SpO2);
    Serial.println("%");

    Serial.println("*********************************");
    Serial.println();

    tsLastReport = millis();
  }

}

void handle_OnConnect() {

  server.send(200, "text/html", SendHTML(BPM, SpO2));
}

void handle_NotFound() {
  server.send(404, "text/plain", "Not found");
}

String SendHTML(float BPM, float SpO2) {
  String ptr = "<!DOCTYPE html>";
  ptr += "<html>";
  ptr += "<head>";
  ptr += "<title>Pulse Oximeter ESP32 WebServer</title>";
  ptr += "<meta name='viewport' content='width=device-width, initial-scale=1.0'>";
  ptr += "<link rel='stylesheet' href='https://cdnjs.cloudflare.com/ajax/libs/font-awesome/5.7.2/css/all.min.css'>";
  ptr += "<link rel='stylesheet' type='text/css' href='styles.css'>";
  ptr += "<style>";
  ptr += "body { background-color: #fff; font-family: sans-serif; color: #333333; font: 14px Helvetica, sans-serif box-sizing: border-box;}";
  ptr += "#page { margin: 20px; background-color: #fff;}";
  ptr += ".container { height: inherit; padding-bottom: 20px;}";
  ptr += ".header { padding: 20px;}";
  ptr += ".header h1 { padding-bottom: 0.3em; color: #008080; font-size: 45px; font-weight: bold; font-family: Garmond, 'sans-serif'; text-align: center;}";
  ptr += "h2 { padding-bottom: 0.2em; border-bottom: 1px solid #eee; margin: 2px; text-align: left;}";
  ptr += ".header h3 { font-weight: bold; font-family: Arial, 'sans-serif'; font-size: 17px; color: #b6b6b6; text-align: center;}";
  ptr += ".box-full { padding: 20px; border 1px solid #ddd; border-radius: 1em 1em 1em 1em; box-shadow: 1px 7px 7px 1px rgba(0,0,0,0.4); background: #fff; margin: 20px; width: 300px;}";
  ptr += "@media (max-width: 494px) { #page { width: inherit; margin: 5px auto; } #content { padding: 1px;} .box-full { margin: 8px 8px 12px 8px; padding: 10px; width: inherit;; float: none; } }";
  ptr += "@media (min-width: 494px) and (max-width: 980px) { #page { width: 465px; margin 0 auto; } .box-full { width: 380px; } }";
  ptr += "@media (min-width: 980px) { #page { width: 930px; margin: auto; } }";
  ptr += ".sensor { margin: 12px 0px; font-size: 2.5rem;}";
  ptr += ".sensor-labels { font-size: 1rem; vertical-align: middle; padding-bottom: 15px;}";
  ptr += ".units { font-size: 1.2rem;}";
  ptr += "hr { height: 1px; color: #eee; background-color: #eee; border: none;}";
  ptr += "</style>";

  //Ajax Code Start
  ptr += "<script>n";
  ptr += "setInterval(loadDoc,1000);n";
  ptr += "function loadDoc() {n";
  ptr += "var xhttp = new XMLHttpRequest();n";
  ptr += "xhttp.onreadystatechange = function() {n";
  ptr += "if (this.readyState == 4 && this.status == 200) {n";
  ptr += "document.body.innerHTML =this.responseText}n";
  ptr += "};n";
  ptr += "xhttp.open("GET", "/", true);n";
  ptr += "xhttp.send();n";
  ptr += "}n";
  ptr += "</script>n";
  //Ajax Code END

  ptr += "</head>";
  ptr += "<body>";
  ptr += "<div id='page'>";
  ptr += "<div class='header'>";
  ptr += "<h1>MAX30100 ESP32 WebServer</h1>";
  ptr += "<h3><a href='https://iotprojectsideas.com'>https://theiotprojects.com</a></h3>";
  ptr += "</div>";
  ptr += "<div id='content' align='center'>";
  ptr += "<div class='box-full' align='left'>";
  ptr += "<h2>Sensor Readings</h2>";
  ptr += "<div class='sensors-container'>";


  //For Heart Rate
  ptr += "<p class='sensor'>";
  ptr += "<i class='fas fa-heartbeat' style='color:#cc3300'></i>";
  ptr += "<span class='sensor-labels'> Heart Rate </span>";
  ptr += (int)BPM;
  ptr += "<sup class='units'>BPM</sup>";
  ptr += "</p>";
  ptr += "<hr>";

  //For Sp02
  ptr += "<p class='sensor'>";
  ptr += "<i class='fas fa-burn' style='color:#f7347a'></i>";
  ptr += "<span class='sensor-labels'> Sp02 </span>";
  ptr += (int)SpO2;
  ptr += "<sup class='units'>%</sup>";
  ptr += "</p>";

  ptr += "</div>";
  ptr += "</div>";
  ptr += "</div>";
  ptr += "</div>";
  ptr += "</div>";
  ptr += "</body>";
  ptr += "</html>";
  return ptr;
}
Testing MAX30100 Pulse Oximeter Webserver
After successful upload of the ESP32 based MAX30100 Pulse Oximeter Webserver program code. So now it’s time to test the project. Just open the Serial Monitor and press the EN button on the ESP32 board. Now, ESP32 will be connected to your Wi-Fi network and then your IP address will be printed on the serial monitor.
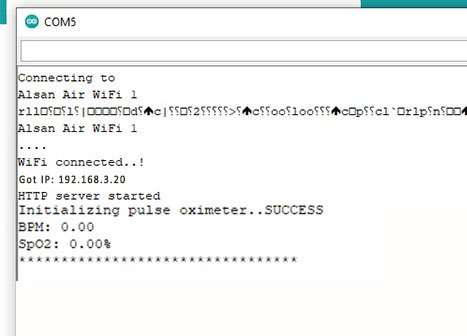
Similarly, the HTTP server will start responding. We have integrated Asynchronous Javascript And XML (AJAX) Code. So that we can request data from the server asynchronously (in the background) without refreshing the page. You just place your finger on the sensor and it will display the values of your pulse rate and the oxygen level in your body.
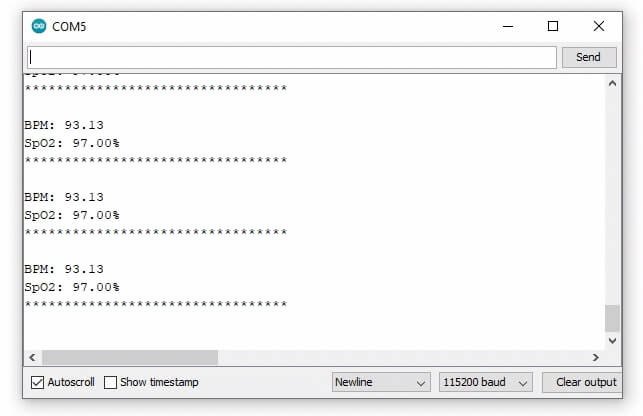
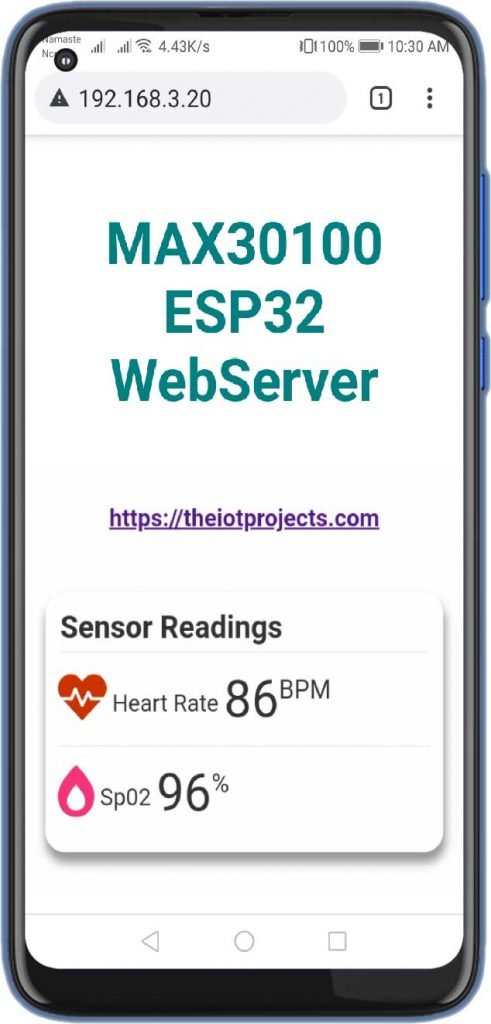
Basically, you can view these parameters on a smartphone using any of the existing web browsers. Enter the IP address shown in the serial monitor. In my case, it’s 192.168.3.20 you may have different. Now you can monitor BPM and Sp02 values from any smartphone or PC connected to the same Wi-Fi. These parameters are updated every second by performing the silent GET request on the server and update the parameters on the page with AJAX.
Video Demonstration
Wrapping Up
This is all about building ESP32 based MAX30100 Pulse Oximeter Webserver. I hope you like this short tutorial. It’s always free to comment, so comment your queries.

sir
i did the same connections but the pulse oximeter light is not glowing
If you use the green oximeter, you need to modify it
sir
i did the same connections but the pulse oximeter light is not glowing
After installing the max30100 sensor library also it is showing error that @Compilation error: MAX30100_PulseOximeter.h: No such file or directory . What to do . Else thank you @iotprojectsideas for such a great project all would be fantastic if i get a setup video also.(👍 ͡❛ ͜ʖ ͡❛)👍
Give this error to chatgpt…chatgpt will give u zip file of this directory form github