In today’s DIY IoT Project, we will make IoT Web Controlled Smart Notice Board using NodeMCU ESP8266 & 16×2 LCD Display. Here We have created a local web server for demonstration, and for displaying the notice we have used a 16×2 LCD.
Overview of Smart Notice Board
Notice Board is the commonest and primary apparatus in any institution, organization, or public-service corporation places like as bus terminals, railway stations, and parks. But sticking to various notices day by day could be a difficult process. This project deals with a smart IoT-based wireless notice board. The main objective of the project is to develop a wireless notice board that displays messages sent from the web server. Whenever a user sends a message, it is received by a wifi Module through a Local Web Server.
DIY Mobile Phone using GSM Module & Arduino with Nextion Display
An LCD display connected to a server system should continuously listen for the incoming notices from the user, and process and display them on the LCD screen. The message displayed should be updated each time the user sends new information. However, the only authenticated person should update the information to be displayed on the LCD.
Components Required
The following are the components that are required for making IoT Based Web Controlled Smart Notice Board. All the components mentioned here are easily available. The Name of the components are listed below:
- Nodemcu ESP8266 12E Board
- 16X2 LCD Display
- 10K Potentiometer
- Connecting Jumper Wires
- Breadboard
Also Read: Dual Axis Solar Tracker Arduino Project Using LDR & Servo Motors
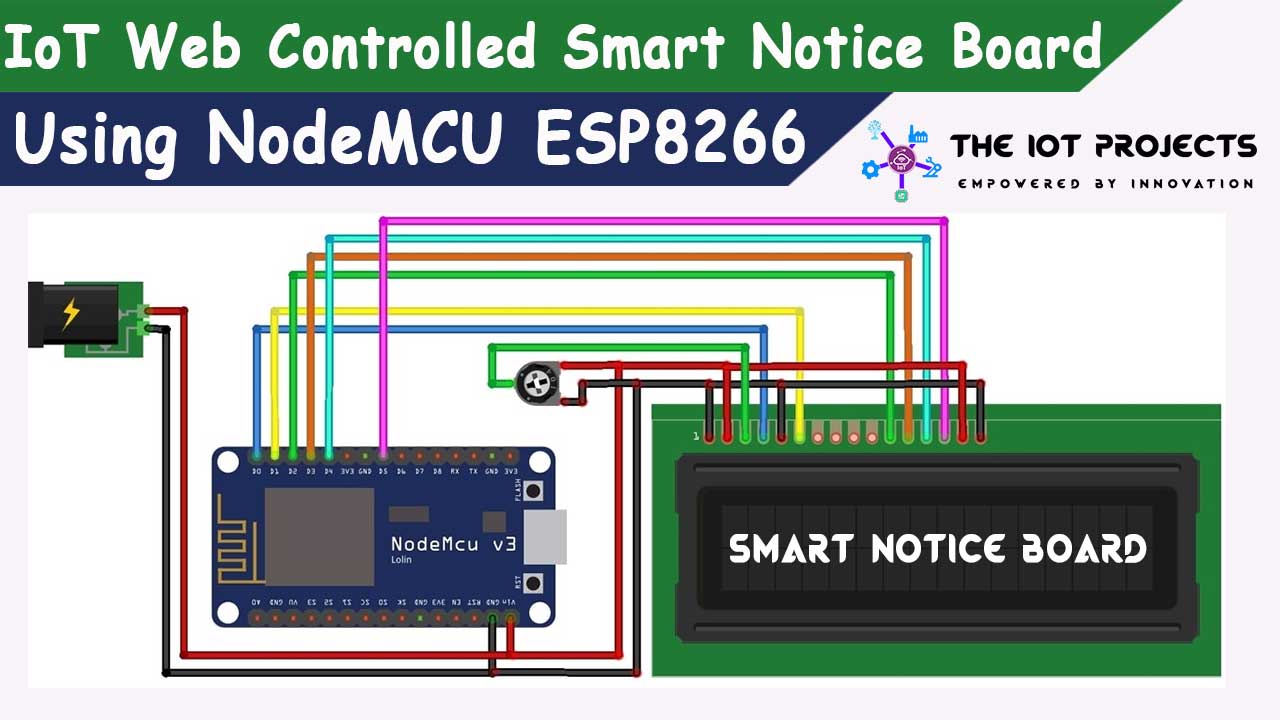
Circuit Diagram for Web Controlled Notice Board with ESP8266
To make this project, we need to connect a 16X2 LCD Display with Nodemcu ESP8266 Board. Hence, the circuit diagram with a detailed connection is provided below.
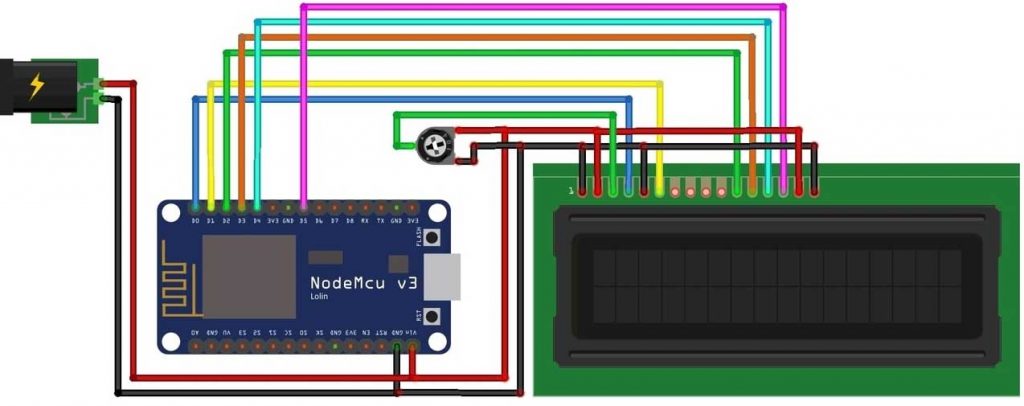
These are the connections between NodeMCU & LCD Display.
- RS pin of LCD — D0 pin of NodeMCU
- EN pin of LCD — D1 pin of NodeMCU
- D4 pin of LCD — D2 pin of NodeMCU
- D5 pin of LCD — D3 pin of NodeMCU
- D6 pin of LCD — D4 pin of NodeMCU
- D7 pin of LCD — D5 pin of NodeMCU
Similarly connect pin numbers 1, 5, and 16 of LCD to GND & Pin numbers 2, and 15 to 5V VCC. A 10K Potentiometer should be used at pin number 3 of the LCD to adjust the contrast. 5V DC is enough to operate this device.
Source Code/Program
As always, Copy the code given below and upload it to the Nodemcu board. But before that, you need to install two important libraries to make the local webserver. Download these libraries from the provided links:
Code Explanation
First of all, we need to include all the libraries. ESP8266Wifi library is used for TCP/IP Communication. ESPAsyncTCP and ESPAsycnWebServer libraries are used for establishing a local webserver. LiquidCrystal library is used for interfacing LCD Display with NodeMCU.
#include <ESP8266WiFi.h>

#include <ESPAsyncTCP.h>

#include <ESPAsyncWebServer.h>

#include <LiquidCrystal.h>
Usually, we declare all the connection pins for LCD and make an instance to use in the program. SSID & Password are used for connecting to a wifi network.
LiquidCrystal lcd(D0, D1, D2, D3, D4, D5);

const char* ssid = "*********";

const char* password = "************";
These lines are used to make a simple HTML page. Here you can enter your notice and hit the send button to send the message on LCD. The send message is stored in the memory of NodeMCU.
const char index_html[] PROGMEM = R"rawliteral(

<!DOCTYPE HTML><html><head>

<title>Smart Notice Board</title>

.......................................................................................

.....................................................................................

<input type="submit" value="Send">

</form><br>

</center></body></html>)rawliteral";
It will send a GET request & and print the received message on the LCD Screen.
server.on("/", HTTP_GET, [](AsyncWebServerRequest *request){

	request->send_P(200, "text/html", html_page);

  });

It sends the webpage with input fields to the client computer.


<ESP_IP>/get?input1=<Message>

server.on("/get", HTTP_GET, [] (AsyncWebServerRequest *request) {

..

	if (request->hasParam(input1)) {

  	message = request->getParam(input1)->value();

  	inputParam = input1;

  	lcd.print(message);
Under the loop function, we print the scrolling value of the text without a break.
server.on("/", HTTP_GET, [](AsyncWebServerRequest *request){

	request->send_P(200, "text/html", html_page);

  });

It sends the webpage with input fields to the client computer.


<ESP_IP>/get?input1=<Message>

server.on("/get", HTTP_GET, [] (AsyncWebServerRequest *request) {

..

	if (request->hasParam(input1)) {

  	message = request->getParam(input1)->value();

  	inputParam = input1;

  	lcd.print(message);

It will send a GET request & and print the received message on the LCD Screen.


void loop() {

	for (int positionCounter = 0; positionCounter < 29; positionCounter++) {

	lcd.scrollDisplayLeft();

	delay(500);

  }
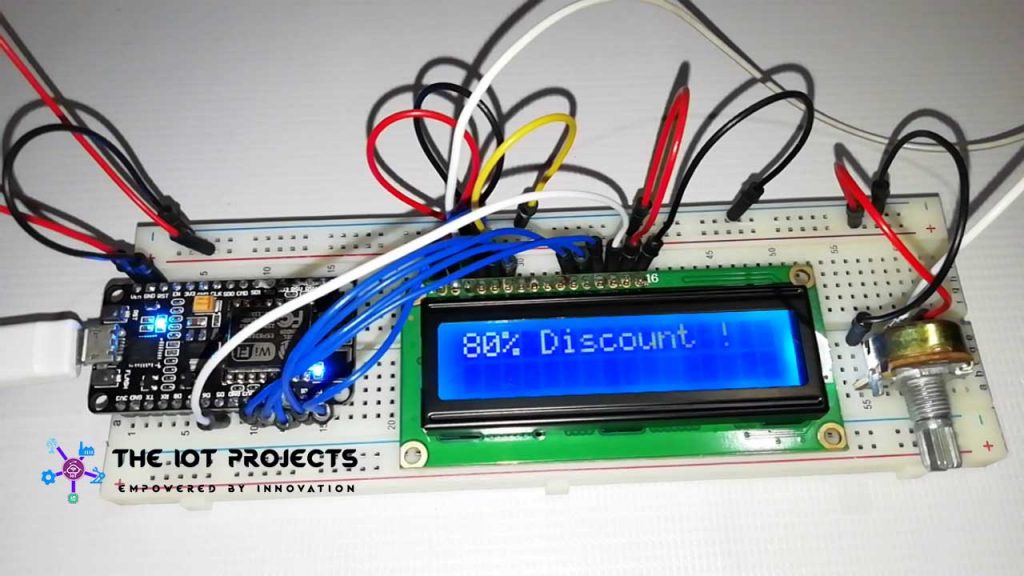
IoT Web Controlled Smart Notice Board with ESP8266 Demonstration
Once the code is uploaded to the NodeMCU ESP8266 board, you can open the Serial Monitor. The serial monitor will display the local IP address after getting connected to your WiFi Network.
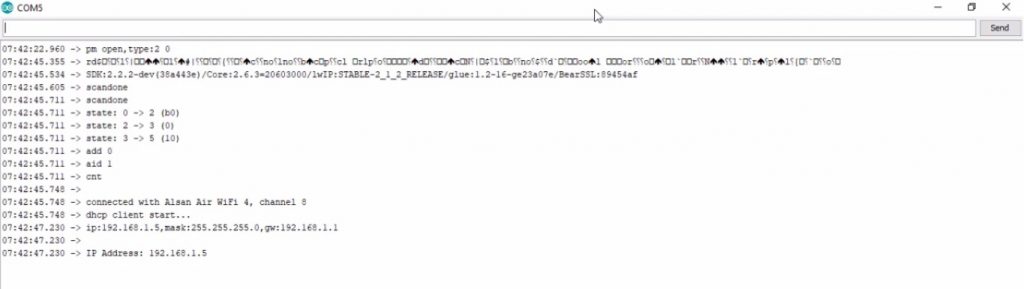
Copy the IP address and paste it into your favorite web browser and hit enter. It will display the webpage that we created earlier.
You may also like: Getting Started with Arduino UNO
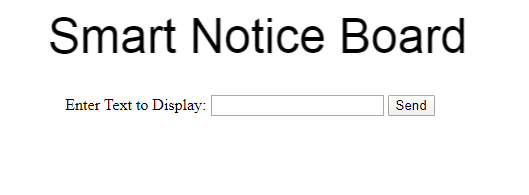
Now you can enter the message here and send it by clicking on the send button.
Once the message is sent, the serial monitor will display whatever is sent.
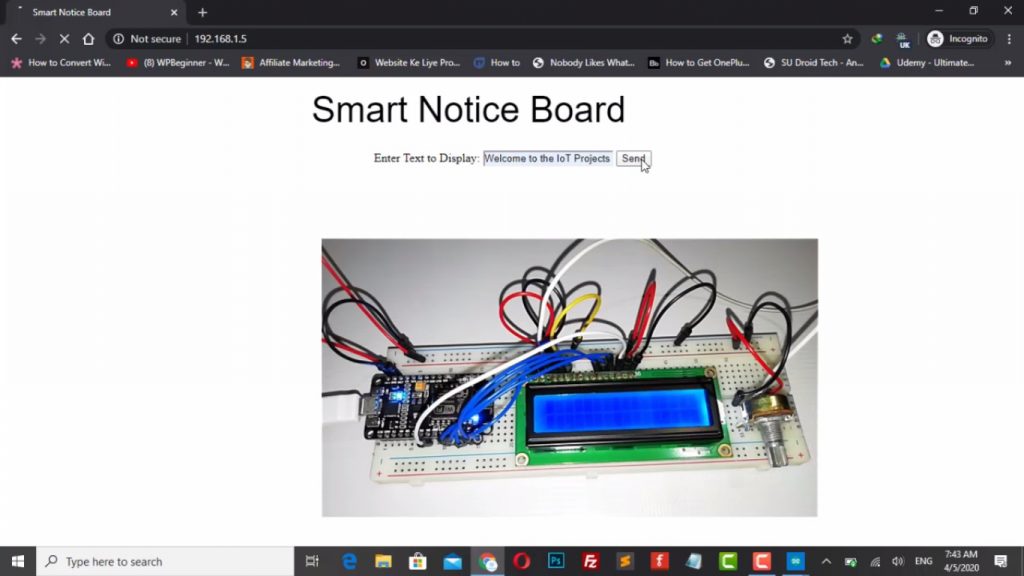
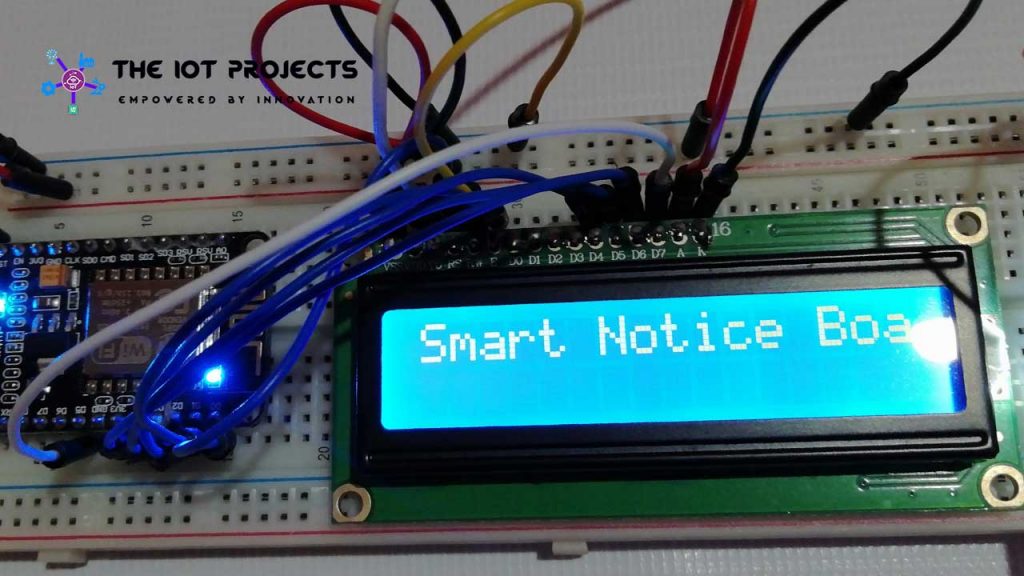
You can now see the same message on the LCD Screen.
Video Tutorial: IoT Web Controlled Smart Notice Board using NodeMCU ESP8266
Read more: Interface LDR Photo Resistor to Arduino and Control LEDs


Very nice project. Could you please create the same project using OLED ? I will be happy if can upload the code for OLED. Thanks.