Interface DHT11 Sensor with Arduino and LCD
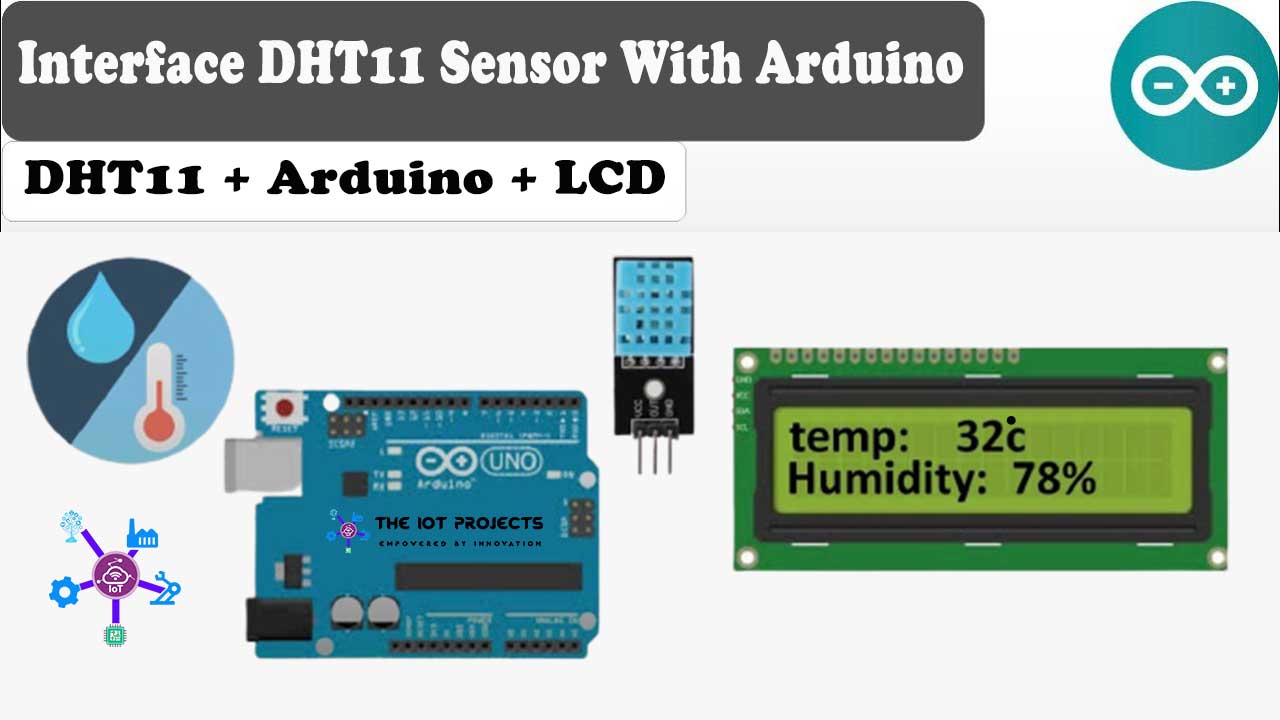
Today in this session we will learn to interface DHT11 Temperature and Humidity sensor with Arduino in a step-by-step manner. This simple project provides the ability to sense the environment around it with a cheap DHT11 sensor.
This sensor is pre-calibrated and no additional components are required so you can immediately start measuring relative humidity and temperature. Actually, the DHT11 sensor includes a resistive element like NTC. NTC is a temperature measuring sensor. Besides, DHT11 has good quality and durability. The best thing that we love about this sensor is, it is very cheap.
Components required
The following are the list of components that are required to interface DHT11 sensor with Arduino and 16×2 LCD Display.
- Arduino UNO
- DHT11 Temperature and Humidity Sensor
- 10K Potentiometer
- 16×2 LCD Screen
- Breadboard
- Jumper Wires
How DHT11 Measures Temperature and Humidity?
Inside the DHT11, there is a thermistor with a humidity sensor component.
The humidity sensor component consists of two electrodes containing a dehydrated substrate sandwich.
The ions are released into the substrate as water vapor absorbs it, which in turn increases the conductivity between the electrodes.
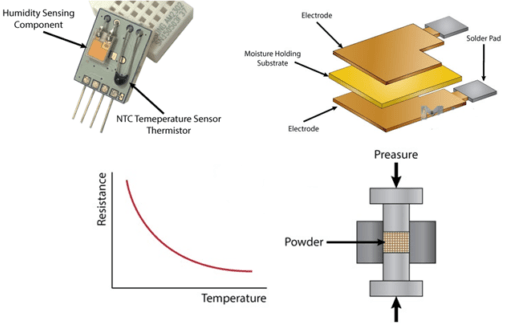
The resistance change between the two electrodes is proportional to the relative humidity. High relative humidity reduces the resistance between the electrodes, while low relative humidity increases the resistance between the electrodes.
DHT11 also includes an NTC / Thermistor to measure temperature. A thermistor is a thermal resistor whose resistance changes rapidly with temperature. The word “NTC” means “negative temperature coefficient“, which means that the resistance decreases with increasing temperature.
Hardware overview of DHT11 Sensor
The DHT11 is a digital humidity and temperature sensor. It measures humidity from 20% to 80% with an accuracy of 5%. Similarly, temperatures range from 0°C to 50°C with ±2.0°C accuracy. Generally, DHT11 requires a 10k-ohm external pull-up resistor between the VCC and the digital pin for a suitable interface. Anyway, the DHT11 module has built-in resistors. Therefore, an additional resistor is not required. It also has a decoupling capacitor to filter the noise in the power supply.
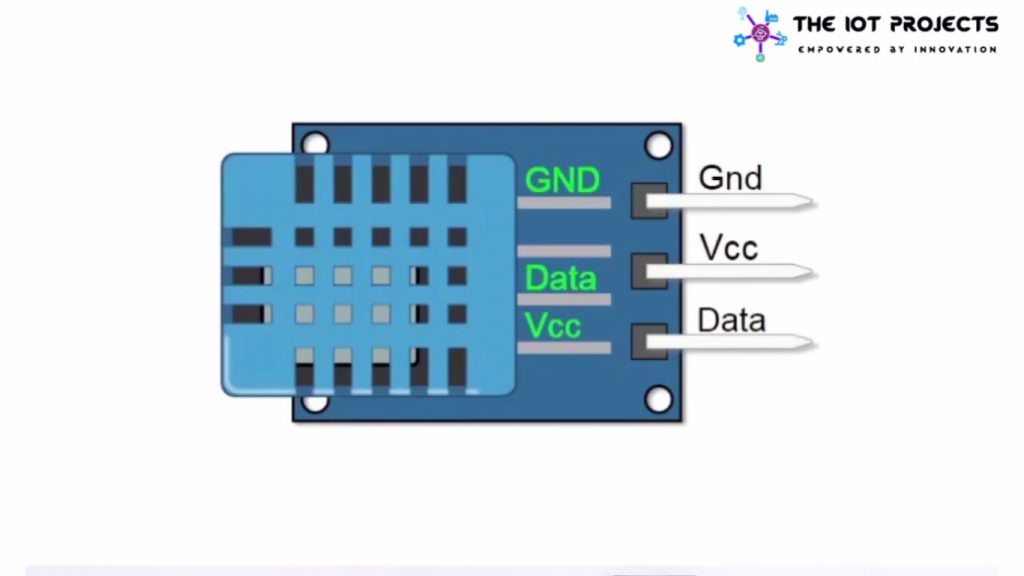
DHT11 Humidity and Temperature Sensor Pinouts
This sensor provides data to the Arduino using a data pin. Power Supply PIN (VCC) can be connected in the range of 3.5 to 5 volts.
Features of DHT11 Sensor
- Cheap in Price.
- 3 to 5V power and I/O
- 2.5mA max current use during conversion (while requesting data)
- Good for 20-80% humidity readings with 5% accuracy
- Good for 0-50°C temperature readings ±2°C accuracy
- No over 1Hz rate (once every second)
- Body size 15.5mm x 12mm x 5.5mm
- 3 pins with 0.1″ spacing
Interfacing DHT11 Sensor With Arduino and LCD
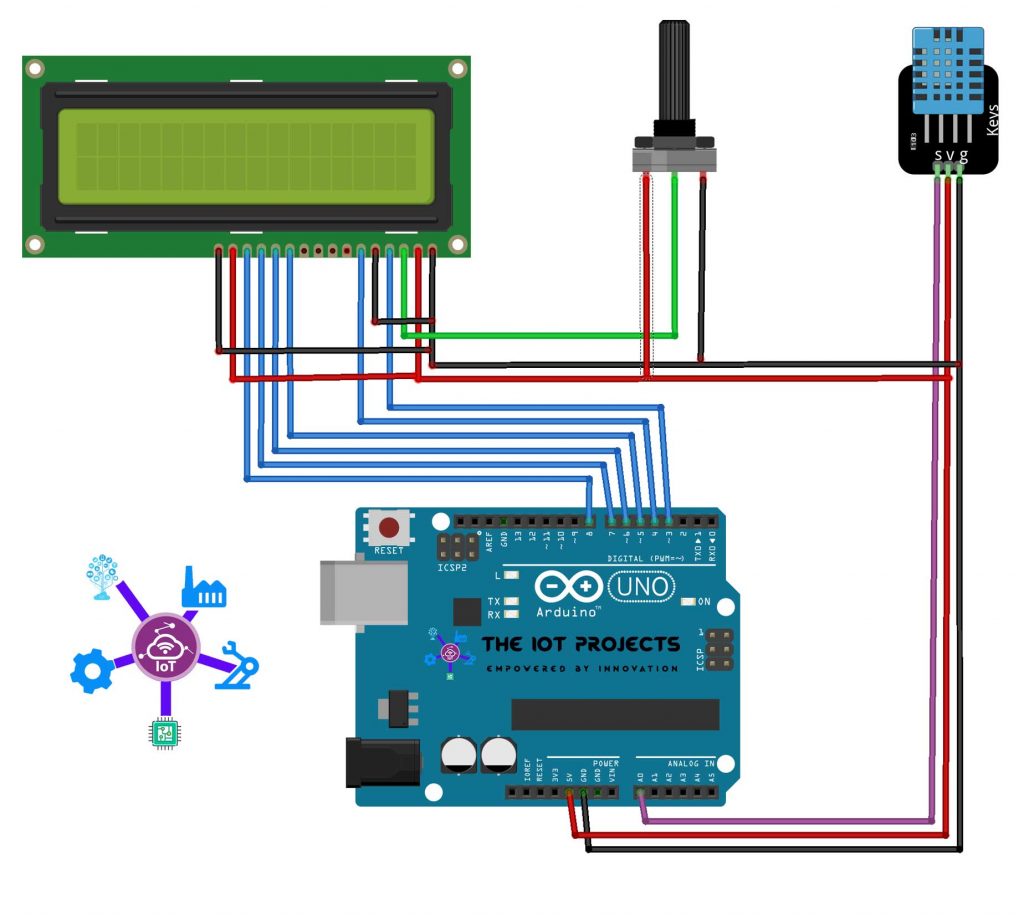
Now, it’s time to interface DHT11 Temperature and Humidity sensor with Arduino UNO and 16×2 LCD Display. without doing delay let’s assemble the components with the help of following circuit diagram and tables.
- Circuit Connections:-
- LCD display to Arduino
- Vss = Arduino GND
- VDD = Arduino 5V
- V0 = Potentiometer center pin
- RS = Digital pin 3
- RW = Arduino GND
- E = Digital pin 4
- D4 = Arduino digital pin 5
- D5 = Arduino digital pin 6
- D6 = Arduino digital pin 7
- D7 = Arduino digital pin 8
- A = Arduino 5V
- K = Arduino GND
- DH11 to Arduino
- VCC = Arduino 5V
- GND = Arduino GND
- Out = Arduino A0
- Potentiometer to Arduino
- Left = Arduino 5V
- Right = Arduino GND
- Center = LCD V0
- LCD display to Arduino
Program Code
Now, let’s program the Arduino UNO using this sketch. But, before uploading code to the Arduino. Download DHT Library file from below and copy it on Arduino Library Folder.
#include <dht.h>
#include <LiquidCrystal.h>
LiquidCrystal lcd(3, 4, 5, 6, 7, 8);
#define dhtpin A0// the output pin of DH11
dht DHT;
void setup() {
  Serial.begin(9600);
 lcd.begin(16,2);
}

void loop() {
  int val= DHT.read11(7);
 int cel= DHT.temperature;
 int humi=DHT.humidity;

  lcd.print("Temperature: ");
  lcd.print(cel);// display the temperature
  lcd.print((char)223);
  lcd.setCursor(0, 1);
  lcd.print("humidity:  ");
  lcd.print(humi); // display the humidity
  delay(1000);
  lcd.clear();
}
Copy the above code in your Arduino IDE and then go to the tools menu, select your correct board, and COM Port. Now, compile the program and upload it to your board.
Video Demonstration: Interface DHT11 Sensor with Arduino
This is a complete video tutorial on Interfacing DHT11 Temperature and Humidity Sensor with Arduino and 16×2 LCD Display. If this video tutorial is helpful for you then please, don’t forget to subscribe.
Wrapping up
Finally, we have learned to Interface DHT11 with Arduino & LCD. Now, you can see the Humidity and Temperature from the LCD Screen. I hope you found this project useful! Drop a comment below if you have any doubts or queries. I’ll do my best to answer your questions.
Recommended Projects:
- Internet Clock Using NodeMCU ESP8266 and 16×2 LCD without RTC Module
- Interfacing Temperature and Humidity Sensor with Arduino
- Interfacing DHT11 Humidity and Temperature Sensor with Arduino & LCD
- NodeMCU ESP8266 Monitoring DHT11/DHT22 Temperature and Humidity with Local Web Server
- Water Level Sensor Arduino Tutorial
- Temperature Controlled Home Automation using Arduino
- Dual Axis Solar Tracker Arduino Project Using LDR & Servo Motors
- IoT Based Patient Health Monitoring System Using ESP8266/ESP32 Web Server
- Connect RFID to PHP & MySQL Database with NodeMcu ESP8266
- IoT Based Voice Controlled Home Automation Using NodeMCU & Android
- BME280 Based Mini Weather Station using ESP8266/ESP32
- IoT based Fire Detector & Automatic Extinguisher using NodeMCU

