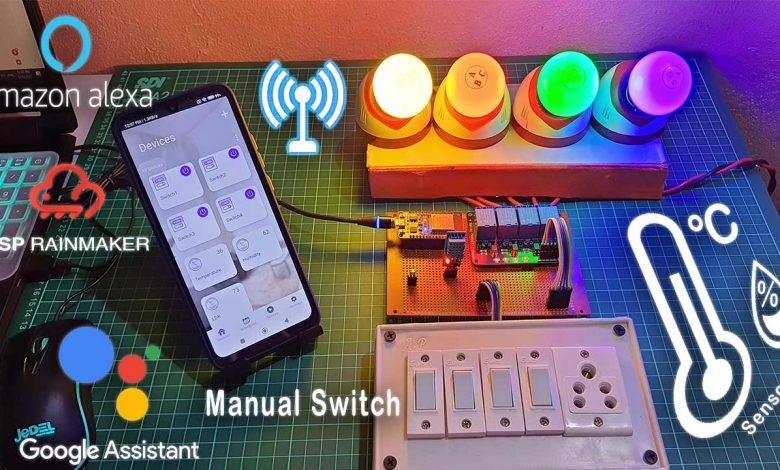
In this tutorial, we will make another ESP32 Home Automation using ESP RainMaker IoT Project to control 4 appliances with Google Assistant, Alexa, and manual switches. You can monitor the real-time feedback and the sensor readings on your smartphone from anywhere in the world. You can still control the appliances with manual switches when there is no internet.
During the tutorial, We will also add some automation to turn ON and OFF the devices automatically according to the predefined time schedule.
Also Read:
- Amazon Alexa Based Home Automation using Arduino IoT Cloud & ESP8266
- Home Automation with Arduino IoT Cloud using ESP8266
- IoT Based LED Control using Google Firebase & ESP8266
- ESP8266 Manual Wifi Configuration with EEPROM without Hard-Code
Overview: ESP32 Smart Home Automation
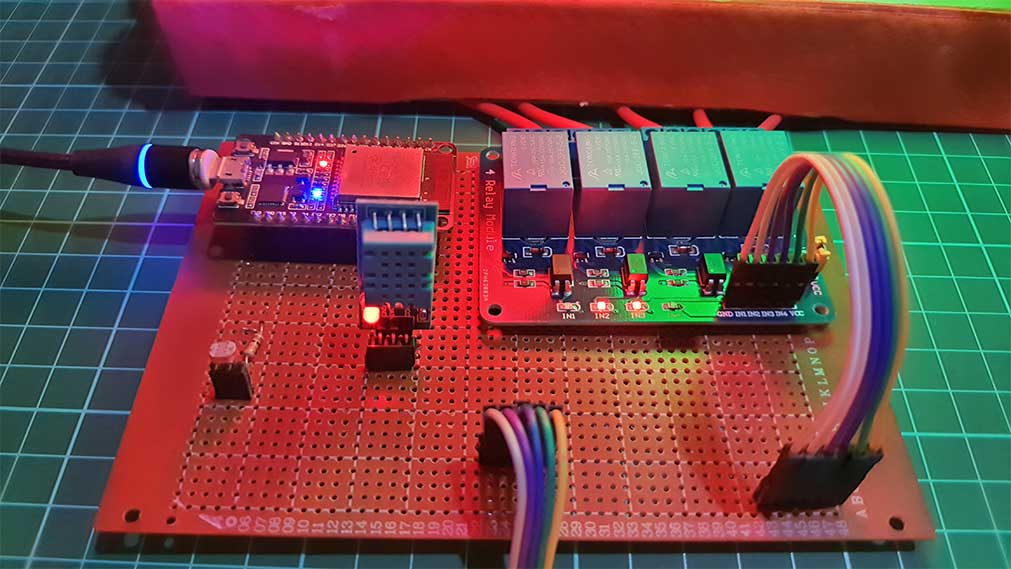
Now before going to the details, let me show you how the project works. If you see the blue LED glowing on ESP32 then it indicates that ESP32 is connected to your WiFi Network.
Control Appliances with Google Assistant
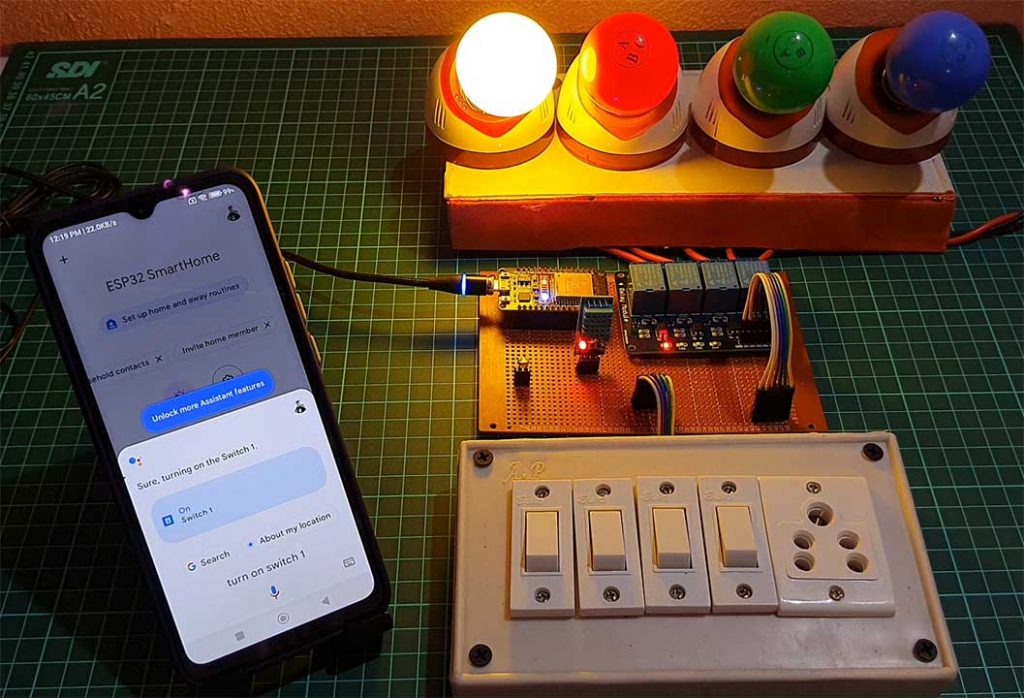
So I can control it with Google Assistant and Alexa. “Hey Google, turn on switch-1“. you can see the light turned on. “OK Google, turn on switch-3” Now let me give multiple commands at once to google assistant. “Hey Google, turn off switch-1 and switch-3”. As you can see the led bulbs connected to switch-1 & Switch-3 are off.
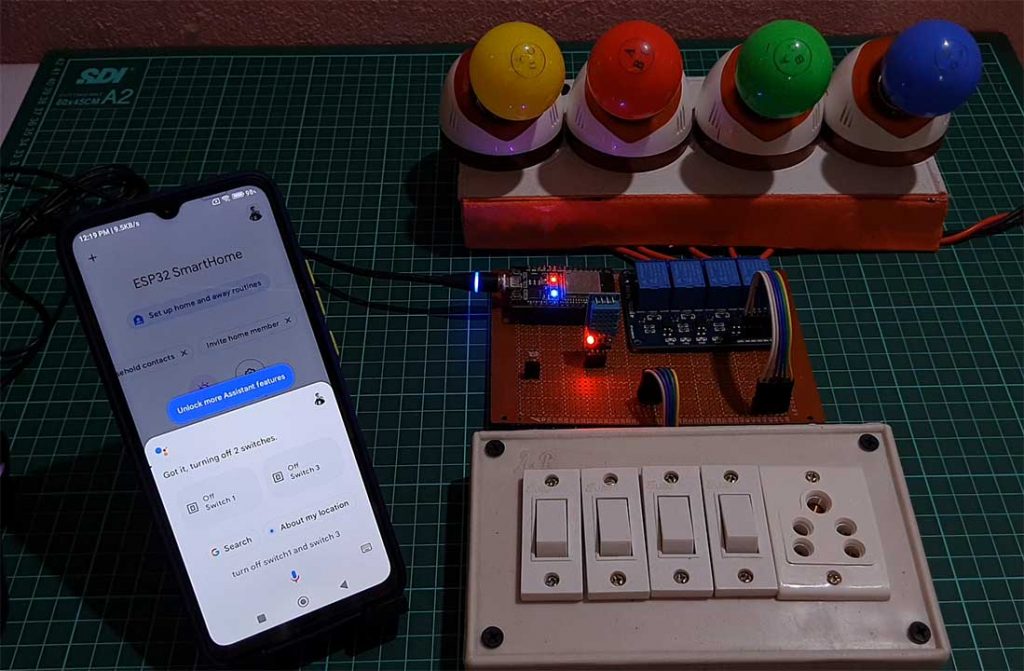
Control Appliances with Amazon Alexa
Now let me turn it on with Alexa. “Alexa turn on switch 2 and Switch 4“. you can see the light turn on. and I can also easily turn on and off all the lights with a single command. “Hey, Google turn on all switches”. “Hey Google, Turn off all the switches” As you can see all the lights turn on and off together.
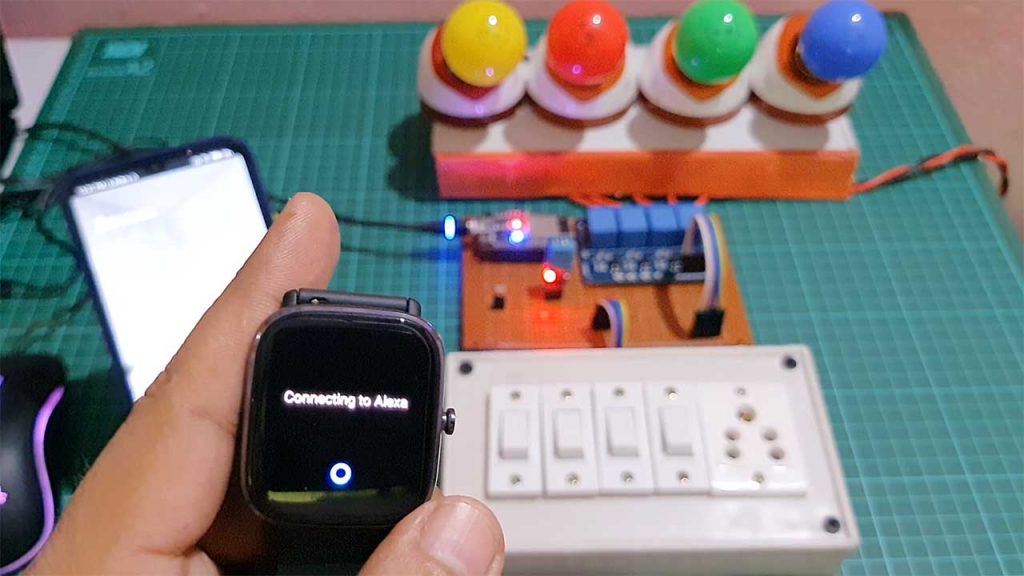
The best part of this project is if you have any Alexa or Google assistant supported device then you can control appliances from them directly. For demonstration, I have this smartwatch which has built-in Alexa support. So, I can directly control the appliances from this smartwatch as well. “Turn On switch 1”. Isn’t it interesting and exciting features?
Control Appliances with Manual Switches
Now let me use manual switches to control these lights. you can see, that I can easily control all the lights with the manual switches. now let me turn off the Wi-Fi and show you how it works without the internet. after turning off the Wi-Fi you can see the blue LED turn OFF. So I can only control these appliances using manual switches. let me turn on the Wi-Fi again. if the Wi-Fi is available, the ESP32 will automatically connect with Wi-Fi and the blue LED will turn on. now again I can control all these lights with Alexa and Google Assistant.
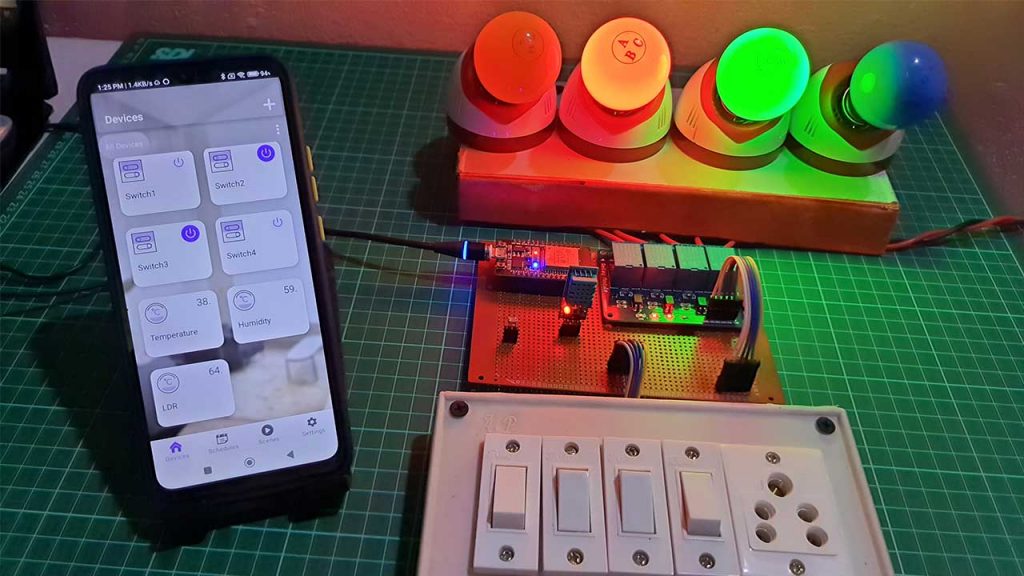
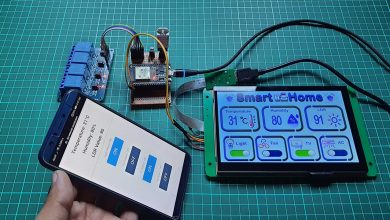
Now let me go to the Rainmaker app, to control switches and monitor the sensor readings. Now I can control switches using these buttons. here you can see, the sensor readings, temperature, humidity, and the LDR. First, let me cover the LDR sensor with my hand. and you can see the value decreased. If I remove my hand, you can see the value increasing. now let me increase the temperature with external heat. You can see the value is increasing.
Add Automation on ESP RainMaker
Now let me add some automation to control the relays with the predefined time schedule. For that, we need to create a schedule. Tap on schedule, and then tap on “add schedule“. Give a name, you can give any name. Then tap on ok. Now select a time. you can also repeat this automation. in the action I want the 2nd relay and 4th relay to turn on. now let me tap on done, now I will save it. Now it is 12:40 pm and as per the automation at 12:41 pm. the 2nd and 4th relay should turn on.
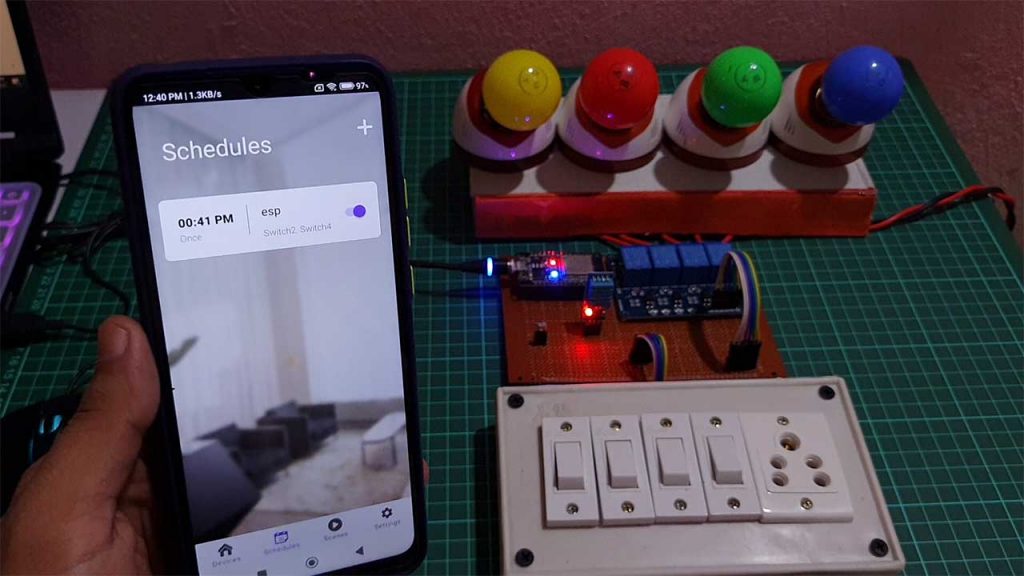
you can see the 2nd and 4th relay automatically turn on. so this is a very useful feature. you can add any automation according to your requirement with the ESP Rainmaker app.
Components Required
For this project, you don’t need any devices like google or amazon echo. We can easily control appliances using free applications. We have used all the free tools, so you don’t have to spend money on the software part. If you have ESP32, relay module, DHT11/ DHT22 Temperature & Humidity Sensor, LDR Sensor, a few switches, and jumper cables then you can easily make this project at your home. During this tutorial, I have shared the circuit Diagram, source code, and all other configuration details. So you can easily do this project after going through this complete guide.
| S.N | Components Name | Quantity | |
|---|---|---|---|
| 1 | ESP32 DEV KIT | 1 | https://amzn.to/3OnuHeB |
| 2 | DHT22 Sensor | 1 | https://amzn.to/3cbRQnp |
| 3 | DHT11 Sensor | 1 | https://amzn.to/3CkDziN |
| 4 | LDR Sensor | 1 | https://amzn.to/3pAg3aa |
| 5 | 4-Channel Relay Module | 1 | https://amzn.to/3RP6ZLv |
| 6 | 10K ohm resistor | 1 | https://amzn.to/3K7xMiq |
| 7 | Jumper Wires | 10 | https://amzn.to/2JWSR44 |
| 8 | Breadboard | 1 | https://amzn.to/3n33uRT |
Circuit Diagram
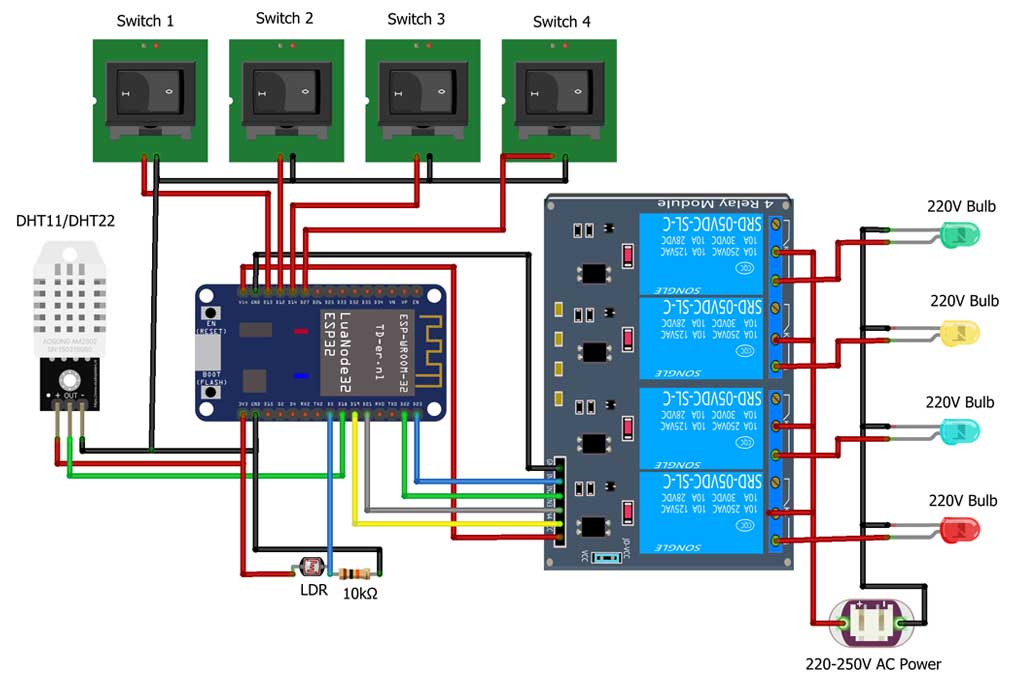
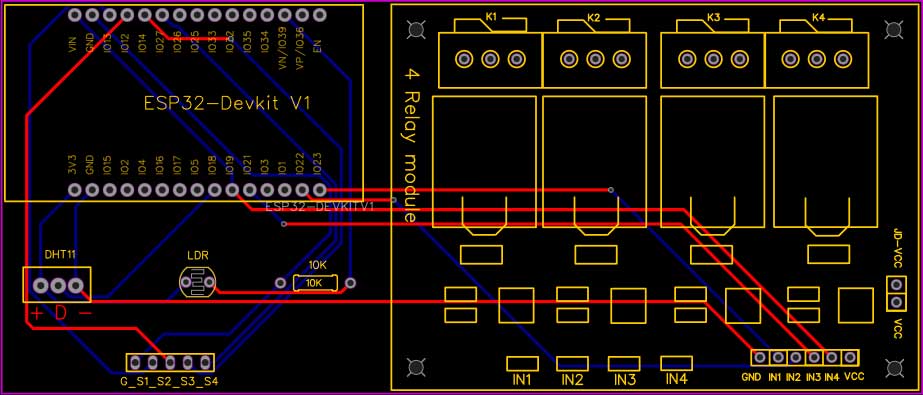
Now without any further delay let’s make this project. this is the circuit for this project. I have given the 5-volt supply to ESP32, the relay module, and the sensors. and the switches are connected across the GPIO pins and ground pins. Please take proper safety precautions while connecting these appliances with the relay module. as you can see the circuit is very simple, you can easily make it. but I will highly recommend you to use a PCB for this project.
PCB Designing & Ordering Online
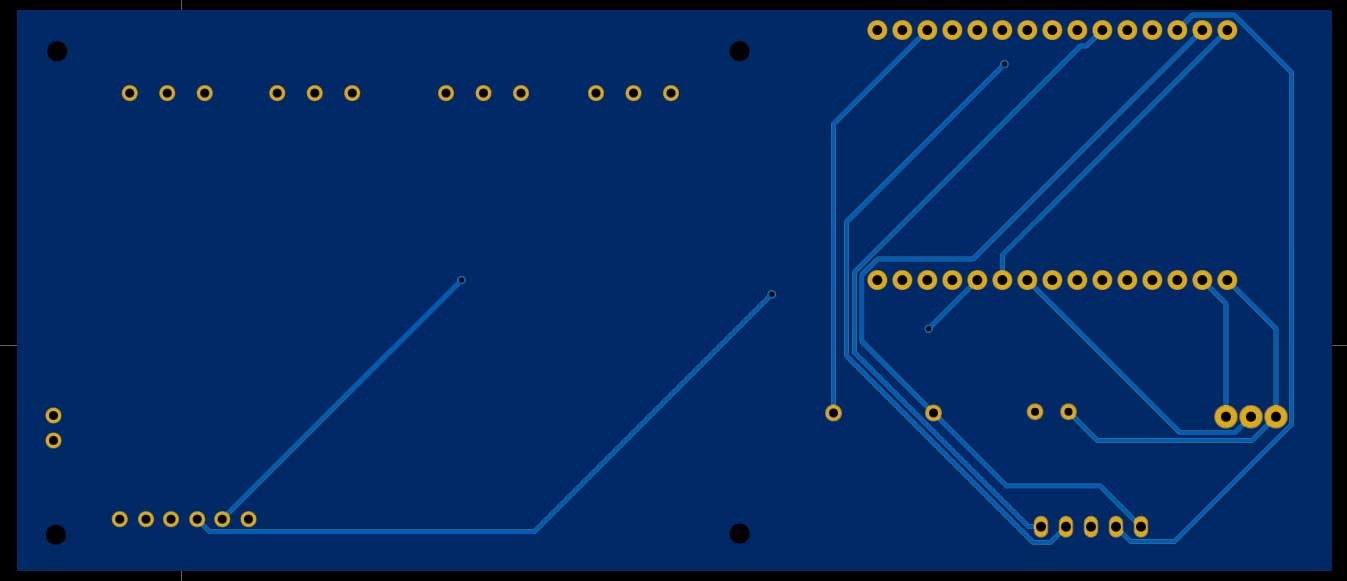
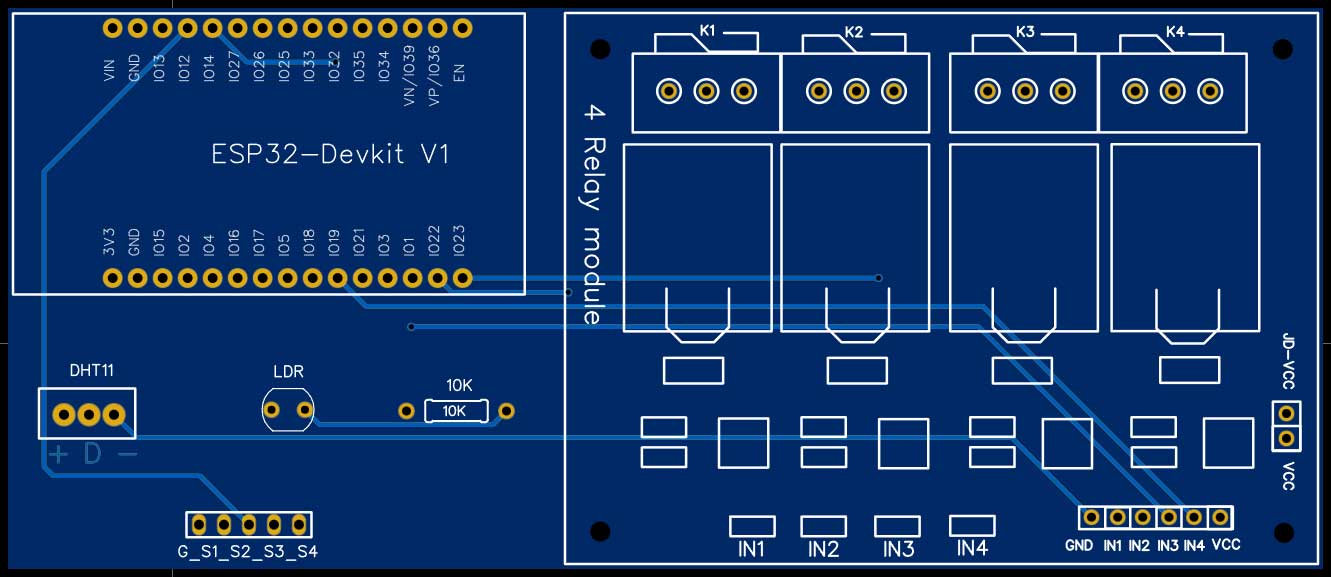
To test the project you can use breadboard assembly. But if you want to implement this project on your home electric board then I recommend you to use a zero PCB or use a custom PCB to avoid any loose connections and short circuits.
I have already designed a custom PCB for this project. You can go to the download links to download the project Gerber file and order directly from PCBWay.com.
Because pcbway is a one-stop solution for all your PCB needs like PCB prototyping, SMD stencils, PCB assembly, etc. currently, they have moved to a new factory and offering you up to 20% discount on 4-layer PCBs and 6-layer PCBs. PCBWay provides high-quality material TG150-160 but keeps the same price as TG 130-140.

So, get your first prototype PCB ready from pcbway.com
Program Code
This is the source code for ESP32 Home Automation using ESP RainMaker project.
/**********************************************************************************
  -----------------------
  Smart Home Automation using ESP32 Rain Maker with Real time feedback + no WiFi control
  -----------------------
  Website: https://iotprojectsideas.com/
  -----------------------
    Preferences--> Aditional boards Manager URLs :
    https://raw.githubusercontent.com/espressif/arduino-esp32/gh-pages/package_esp32_index.json
 **********************************************************************************/

#include "RMaker.h"
#include "WiFi.h"
#include "WiFiProv.h"
#include <DHT.h>
#include <SimpleTimer.h>

const char *service_name = "PROV_SmartHome";
const char *pop = "1234";

// define the Chip Id
uint32_t espChipId = 5;

// define the Node Name
char nodeName[] = "ESP32_Smarthome";

// define the Device Names
char deviceName_1[] = "Switch1";
char deviceName_2[] = "Switch2";
char deviceName_3[] = "Switch3";
char deviceName_4[] = "Switch4";

// define the GPIO connected with Relays and switches
static uint8_t RelayPin1 = 23;  //D23
static uint8_t RelayPin2 = 22;  //D22
static uint8_t RelayPin3 = 21;  //D21
static uint8_t RelayPin4 = 19;  //D19

static uint8_t SwitchPin1 = 13;  //D13
static uint8_t SwitchPin2 = 12;  //D12
static uint8_t SwitchPin3 = 14;  //D14
static uint8_t SwitchPin4 = 27;  //D27

static uint8_t wifiLed      = 2;   //D2
static uint8_t gpio_reset   = 0;
static uint8_t DHTPIN       = 18; // D18  pin connected with DHT
static uint8_t LDR_PIN      = 39; // VN  pin connected with LDR

/* Variable for reading pin status*/
// Relay State
bool toggleState_1 = LOW; //Define integer to remember the toggle state for relay 1
bool toggleState_2 = LOW; //Define integer to remember the toggle state for relay 2
bool toggleState_3 = LOW; //Define integer to remember the toggle state for relay 3
bool toggleState_4 = LOW; //Define integer to remember the toggle state for relay 4

// Switch State
bool SwitchState_1 = LOW;
bool SwitchState_2 = LOW;
bool SwitchState_3 = LOW;
bool SwitchState_4 = LOW;

float temperature1 = 0;
float humidity1   = 0;
float ldrVal  = 0;

DHT dht(DHTPIN, DHT11);  //For DHT 11
//DHT dht(DHTPIN, DHT22);  //For DHT 22

SimpleTimer Timer;

//The framework provides some standard device types like switch, lightbulb, fan, temperature sensor.
static Switch my_switch1(deviceName_1, &RelayPin1);
static Switch my_switch2(deviceName_2, &RelayPin2);
static Switch my_switch3(deviceName_3, &RelayPin3);
static Switch my_switch4(deviceName_4, &RelayPin4);
static TemperatureSensor temperature("Temperature");
static TemperatureSensor humidity("Humidity");
static TemperatureSensor ldr("LDR");

void sysProvEvent(arduino_event_t *sys_event)
{
  switch (sys_event->event_id) {
    case ARDUINO_EVENT_PROV_START:
#if CONFIG_IDF_TARGET_ESP32
      Serial.printf("nProvisioning Started with name "%s" and PoP "%s" on BLEn", service_name, pop);
      printQR(service_name, pop, "ble");
#else
      Serial.printf("nProvisioning Started with name "%s" and PoP "%s" on SoftAPn", service_name, pop);
      printQR(service_name, pop, "softap");
#endif
      break;
    case ARDUINO_EVENT_WIFI_STA_CONNECTED:
      Serial.printf("nConnected to Wi-Fi!n");
      digitalWrite(wifiLed, true);
      break;
  }
}

void write_callback(Device *device, Param *param, const param_val_t val, void *priv_data, write_ctx_t *ctx)
{
  const char *device_name = device->getDeviceName();
  const char *param_name = param->getParamName();

  if (strcmp(device_name, deviceName_1) == 0) {

    Serial.printf("Lightbulb = %sn", val.val.b ? "true" : "false");

    if (strcmp(param_name, "Power") == 0) {
      Serial.printf("Received value = %s for %s - %sn", val.val.b ? "true" : "false", device_name, param_name);
      toggleState_1 = val.val.b;
      (toggleState_1 == false) ? digitalWrite(RelayPin1, HIGH) : digitalWrite(RelayPin1, LOW);
      param->updateAndReport(val);
    }

  } else if (strcmp(device_name, deviceName_2) == 0) {

    Serial.printf("Switch value = %sn", val.val.b ? "true" : "false");

    if (strcmp(param_name, "Power") == 0) {
      Serial.printf("Received value = %s for %s - %sn", val.val.b ? "true" : "false", device_name, param_name);
      toggleState_2 = val.val.b;
      (toggleState_2 == false) ? digitalWrite(RelayPin2, HIGH) : digitalWrite(RelayPin2, LOW);
      param->updateAndReport(val);
    }

  } else if (strcmp(device_name, deviceName_3) == 0) {

    Serial.printf("Switch value = %sn", val.val.b ? "true" : "false");

    if (strcmp(param_name, "Power") == 0) {
      Serial.printf("Received value = %s for %s - %sn", val.val.b ? "true" : "false", device_name, param_name);
      toggleState_3 = val.val.b;
      (toggleState_3 == false) ? digitalWrite(RelayPin3, HIGH) : digitalWrite(RelayPin3, LOW);
      param->updateAndReport(val);
    }

  } else if (strcmp(device_name, deviceName_4) == 0) {

    Serial.printf("Switch value = %sn", val.val.b ? "true" : "false");

    if (strcmp(param_name, "Power") == 0) {
      Serial.printf("Received value = %s for %s - %sn", val.val.b ? "true" : "false", device_name, param_name);
      toggleState_4 = val.val.b;
      (toggleState_4 == false) ? digitalWrite(RelayPin4, HIGH) : digitalWrite(RelayPin4, LOW);
      param->updateAndReport(val);
    }

  }
}

void readSensor() {

  ldrVal = map(analogRead(LDR_PIN), 400, 4200, 0, 100);
  Serial.print("LDR - "); Serial.println(ldrVal);
  float h = dht.readHumidity();
  float t = dht.readTemperature(); // or dht.readTemperature(true) for Fahrenheit

  if (isnan(h) || isnan(t)) {
    Serial.println("Failed to read from DHT sensor!");
    return;
  }
  else {
    humidity1 = h;
    temperature1 = t;
    Serial.print("Temperature - "); Serial.println(t);
    Serial.print("Humidity - "); Serial.println(h);
  }
}

void sendSensor()
{
  readSensor();
  temperature.updateAndReportParam("Temperature", temperature1);
  humidity.updateAndReportParam("Temperature", humidity1);
  ldr.updateAndReportParam("Temperature", ldrVal);
}

void manual_control()
{
  if (digitalRead(SwitchPin1) == LOW && SwitchState_1 == LOW) {
    digitalWrite(RelayPin1, LOW);
    toggleState_1 = 1;
    SwitchState_1 = HIGH;
    my_switch1.updateAndReportParam(ESP_RMAKER_DEF_POWER_NAME, toggleState_1);
    Serial.println("Switch-1 on");
  }
  if (digitalRead(SwitchPin1) == HIGH && SwitchState_1 == HIGH) {
    digitalWrite(RelayPin1, HIGH);
    toggleState_1 = 0;
    SwitchState_1 = LOW;
    my_switch1.updateAndReportParam(ESP_RMAKER_DEF_POWER_NAME, toggleState_1);
    Serial.println("Switch-1 off");
  }
  if (digitalRead(SwitchPin2) == LOW && SwitchState_2 == LOW) {
    digitalWrite(RelayPin2, LOW);
    toggleState_2 = 1;
    SwitchState_2 = HIGH;
    my_switch2.updateAndReportParam(ESP_RMAKER_DEF_POWER_NAME, toggleState_2);
    Serial.println("Switch-2 on");
  }
  if (digitalRead(SwitchPin2) == HIGH && SwitchState_2 == HIGH) {
    digitalWrite(RelayPin2, HIGH);
    toggleState_2 = 0;
    SwitchState_2 = LOW;
    my_switch2.updateAndReportParam(ESP_RMAKER_DEF_POWER_NAME, toggleState_2);
    Serial.println("Switch-2 off");
  }
  if (digitalRead(SwitchPin3) == LOW && SwitchState_3 == LOW) {
    digitalWrite(RelayPin3, LOW);
    toggleState_3 = 1;
    SwitchState_3 = HIGH;
    my_switch3.updateAndReportParam(ESP_RMAKER_DEF_POWER_NAME, toggleState_3);
    Serial.println("Switch-3 on");
  }
  if (digitalRead(SwitchPin3) == HIGH && SwitchState_3 == HIGH) {
    digitalWrite(RelayPin3, HIGH);
    toggleState_3 = 0;
    SwitchState_3 = LOW;
    my_switch3.updateAndReportParam(ESP_RMAKER_DEF_POWER_NAME, toggleState_3);
    Serial.println("Switch-3 off");
  }
  if (digitalRead(SwitchPin4) == LOW && SwitchState_4 == LOW) {
    digitalWrite(RelayPin4, LOW);
    toggleState_4 = 1;
    SwitchState_4 = HIGH;
    my_switch4.updateAndReportParam(ESP_RMAKER_DEF_POWER_NAME, toggleState_4);
    Serial.println("Switch-4 on");
  }
  if (digitalRead(SwitchPin4) == HIGH && SwitchState_4 == HIGH) {
    digitalWrite(RelayPin4, HIGH);
    toggleState_4 = 0;
    SwitchState_4 = LOW;
    my_switch4.updateAndReportParam(ESP_RMAKER_DEF_POWER_NAME, toggleState_4);
    Serial.println("Switch-4 off");
  }
}


void setup()
{

  Serial.begin(115200);

  // Set the Relays GPIOs as output mode
  pinMode(RelayPin1, OUTPUT);
  pinMode(RelayPin2, OUTPUT);
  pinMode(RelayPin3, OUTPUT);
  pinMode(RelayPin4, OUTPUT);
  pinMode(wifiLed, OUTPUT);

  // Configure the input GPIOs
  pinMode(SwitchPin1, INPUT_PULLUP);
  pinMode(SwitchPin2, INPUT_PULLUP);
  pinMode(SwitchPin3, INPUT_PULLUP);
  pinMode(SwitchPin4, INPUT_PULLUP);
  pinMode(gpio_reset, INPUT);

  // Write to the GPIOs the default state on booting
  digitalWrite(RelayPin1, !toggleState_1);
  digitalWrite(RelayPin2, !toggleState_2);
  digitalWrite(RelayPin3, !toggleState_3);
  digitalWrite(RelayPin4, !toggleState_4);
  digitalWrite(wifiLed, LOW);
  dht.begin();    // Enabling DHT sensor

  Node my_node;
  my_node = RMaker.initNode(nodeName);

  //Standard switch device
  my_switch1.addCb(write_callback);
  my_switch2.addCb(write_callback);
  my_switch3.addCb(write_callback);
  my_switch4.addCb(write_callback);

  //Add switch device to the node
  my_node.addDevice(my_switch1);
  my_node.addDevice(my_switch2);
  my_node.addDevice(my_switch3);
  my_node.addDevice(my_switch4);
  my_node.addDevice(temperature);
  my_node.addDevice(humidity);
  my_node.addDevice(ldr);

  Timer.setInterval(2000);

  //This is optional
  RMaker.enableOTA(OTA_USING_PARAMS);
  //If you want to enable scheduling, set time zone for your region using setTimeZone().
  //The list of available values are provided here https://rainmaker.espressif.com/docs/time-service.html
  // RMaker.setTimeZone("Asia/Shanghai");
  // Alternatively, enable the Timezone service and let the phone apps set the appropriate timezone
  RMaker.enableTZService();
  RMaker.enableSchedule();

  //Service Name
  for (int i = 0; i < 17; i = i + 8) {
    espChipId |= ((ESP.getEfuseMac() >> (40 - i)) & 0xff) << i;
  }

  Serial.printf("nChip ID:  %d Service Name: %sn", espChipId, service_name);

  Serial.printf("nStarting ESP-RainMakern");
  RMaker.start();

  WiFi.onEvent(sysProvEvent);
#if CONFIG_IDF_TARGET_ESP32
  WiFiProv.beginProvision(WIFI_PROV_SCHEME_BLE, WIFI_PROV_SCHEME_HANDLER_FREE_BTDM, WIFI_PROV_SECURITY_1, pop, service_name);
#else
  WiFiProv.beginProvision(WIFI_PROV_SCHEME_SOFTAP, WIFI_PROV_SCHEME_HANDLER_NONE, WIFI_PROV_SECURITY_1, pop, service_name);
#endif

  my_switch1.updateAndReportParam(ESP_RMAKER_DEF_POWER_NAME, false);
  my_switch2.updateAndReportParam(ESP_RMAKER_DEF_POWER_NAME, false);
  my_switch3.updateAndReportParam(ESP_RMAKER_DEF_POWER_NAME, false);
  my_switch4.updateAndReportParam(ESP_RMAKER_DEF_POWER_NAME, false);
}

void loop()
{
  // Read GPIO0 (external button to reset device
  if (digitalRead(gpio_reset) == LOW) { //Push button pressed
    Serial.printf("Reset Button Pressed!n");
    // Key debounce handling
    delay(100);
    int startTime = millis();
    while (digitalRead(gpio_reset) == LOW) delay(50);
    int endTime = millis();

    if ((endTime - startTime) > 10000) {
      // If key pressed for more than 10secs, reset all
      Serial.printf("Reset to factory.n");
      RMakerFactoryReset(2);
    } else if ((endTime - startTime) > 3000) {
      Serial.printf("Reset Wi-Fi.n");
      // If key pressed for more than 3secs, but less than 10, reset Wi-Fi
      RMakerWiFiReset(2);
    }
  }
  delay(100);

  if (WiFi.status() != WL_CONNECTED)
  {
    //Serial.println("WiFi Not Connected");
    digitalWrite(wifiLed, false);
  }
  else
  {
    //Serial.println("WiFi Connected");
    digitalWrite(wifiLed, true);
    if (Timer.isReady()) {
      //Serial.println("Sending Sensor Data");
      sendSensor();
      Timer.reset();      // Reset a second timer
    }
  }
  manual_control();
}
First of all, you have to update the ESP32 board to the latest version 2.0.4. So for that first, you have to copy the Preference links. then go to File, and select Preference. and here you have to update the URLs. After that click on OK. Then go to tools, select boards, then boards manager. Then search for ESP32. here you have to install the latest version 2.0.4. I have already installed it. You also need to install the DHT library from the library manager.
You can change the service name and password from here.
const char *service_name = "PROV_SmartHome";
const char *pop = "1234";
This is the name of a node and under this node, you will find all these 4 devices. If you want, you can change these names.
// define the Node Name
char nodeName[] = "ESP32_Smarthome";
These are the device names, here I have given the names “Switch1“, “Switch2“, “Switch3“, and “Switch4” like that. but you can give any name as per your requirement, like Light, AC, TV, Fan, etc.
// define the Device Names
char deviceName_1[] = "Switch1";
char deviceName_2[] = "Switch2";
char deviceName_3[] = "Switch3";
char deviceName_4[] = "Switch4";
Alexa and Google will identify the device with these names. The source code is compatible with both DHT11/DHT22 sensors so, you can uncomment this DHT22 part and comment the DHT11 part to use the DHT22 sensor instead of DHT11. So, after doing the necessary changes, you can directly upload this code to ESP32.
For that, Go to tools and select the board as the ESP32 DEV module. then in the partition scheme and select the Rainmaker. and after that, Select the proper COM port. then hit the upload button. after uploading the code to ESP32.
Adding Device to ESP RainMaker
Open the serial monitor. here I have selected the baud rate 115200. Now you have to press and hold the boot button of the ESP32. Press and hold it for 4 seconds. Then release it. so you can see the QR code. I will just copy the link, just below the QR code. now you open a browser, and here I will paste it, and press enter.
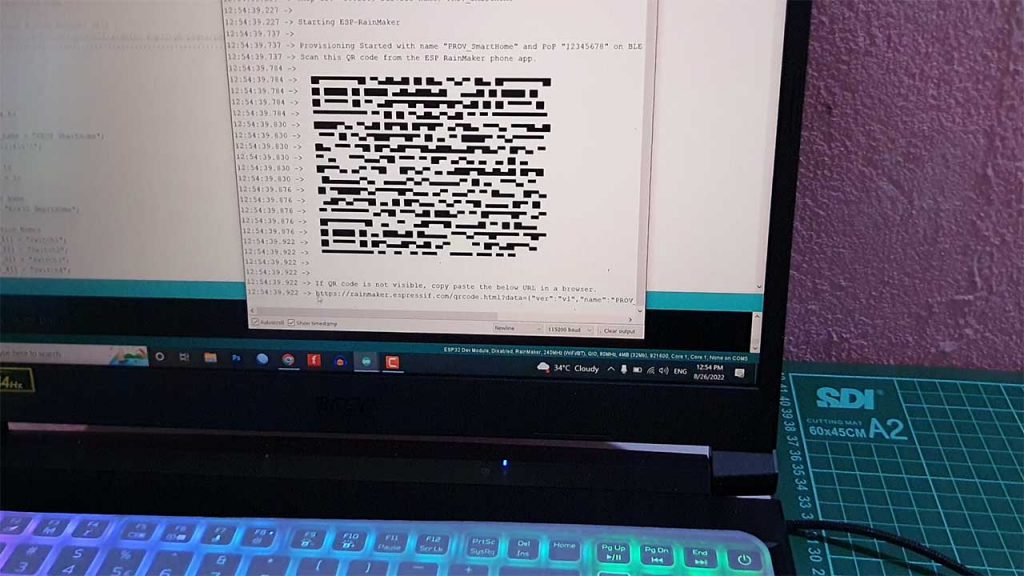
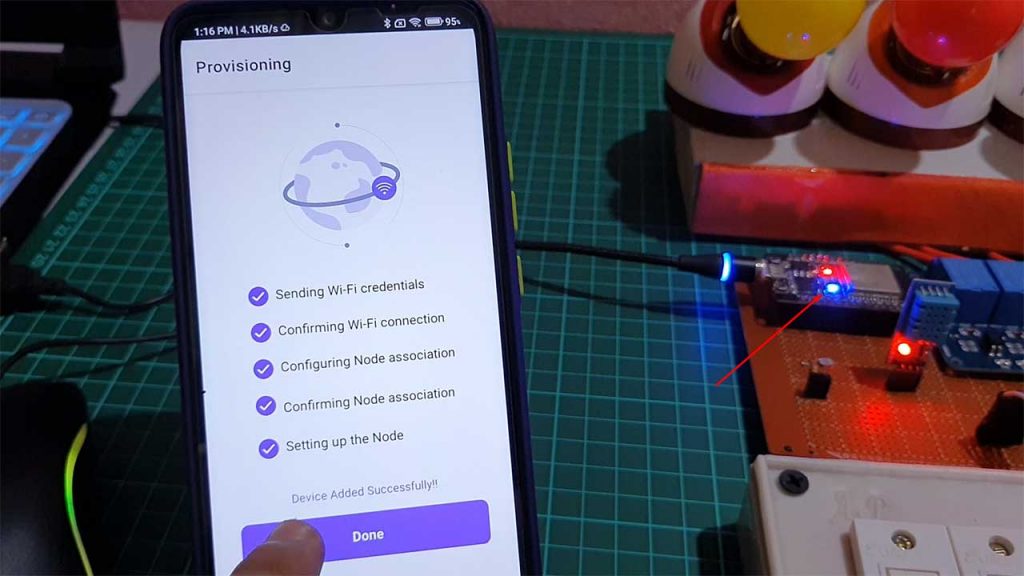
So now we have to scan the QR code with the ESP Rainmaker App. you can download it from the Google Play Store or App Store. let me open the app. now first before I scan the QR code, I have to turn on the Bluetooth and GPS. after that I will tap on “Add device“. now scan the QR code. then I have to enter the Wi-Fi details and tap on start. it may take some time. so now I will tap on done. so here you can see all the devices we have added.
Link ESP RainMaker with Amazon Alexa
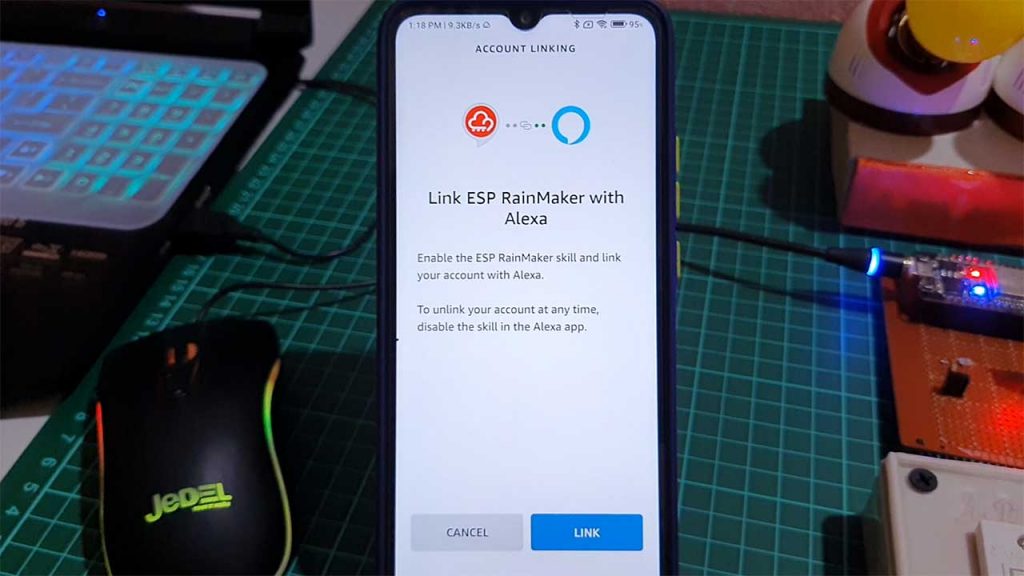
Now I will quickly connect to Amazon Alexa. so I will tap on the setting, then I will tap on voice service. first I will tap on Amazon Alexa. and here tap on “Link with Amazon Alexa“. now you can enter the ID and password. now it is showing already linked with Amazon Alexa. now open the Amazon Alexa app. if I go to the device, I can see all the devices already added to the Amazon Alexa app.
Link ESP RainMaker with Google Assistant
Here, again I will go to the Rainmaker app. now we will connect the Google Assistant. For that we have to open the Google Home app. let me open the Google home app. you can install this app from Google Play Store or App Store. now here tap on this “+” icon. first, I will create a Home. so I will tap on “create a new home“. and here let me give the name “ESP32 SmartHome”. you can give any name. now I will tap on continue. I will not enter any home address, so I will skip this step. and select continue without address. our home is created. now again I will tap on this “+” icon and select setup devices. and now tap on works with Google. here I have to search for ESP RainMaker.
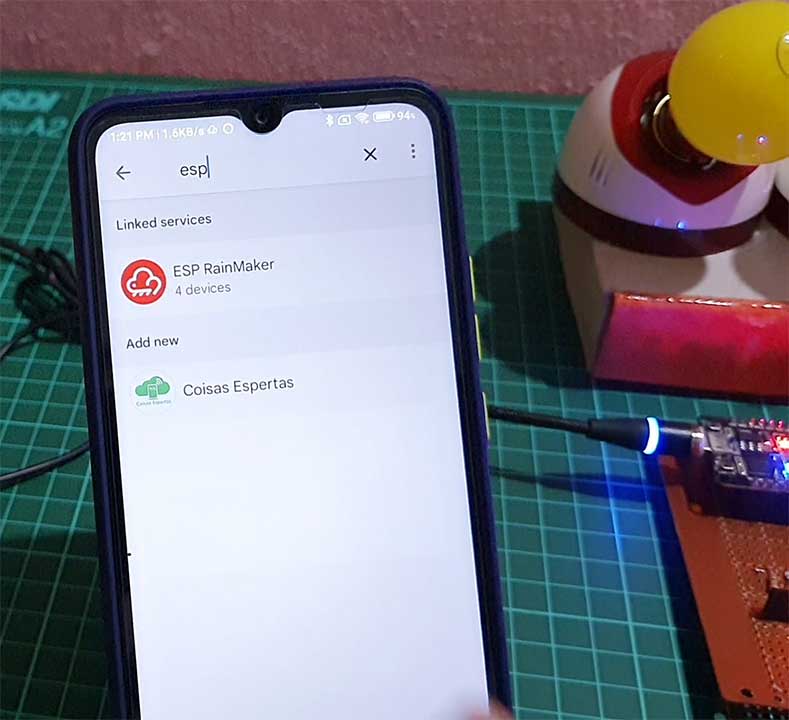
Let’s type the ESP. Now I have to tap on the ESP Rainmaker. Now tap on continue. Let me exit to the main dashboard. So here you can see, that all 4 devices were added successfully. and during this process, you can see the blue LED glowing which indicates now the ESP32 is connected to the Wi-Fi.

Conclusion
Therefore, this is a very useful ESP32 Home Automation using the ESP RainMaker IoT project, and you can easily make it at home. If you find this project helpful then please give a thumbs up and share it with your friends. Don’t forget to subscribe for more videos. Thank you for watching have a great day.

Hi,
Nice work!
Is it possible to ask for the temperature or humidity in Google Home?
like He google what is the temperature in the sleeping room.
I tried but it only shows the switches in Google Home.
Thanks in advance
Yes possible
Hi,
Below links are not working to upgrade esp32 board, is there any alternate link for this to update esp32 board.
http://arduino.esp8266.com/stable/package_esp8266com_index.json,https://raw.githubusercontent.com/espressif/arduino-esp32/gh-pages/package_esp32_index.json
use this link: https://dl.espressif.com/dl/package_esp32_index.json
Hi
Nice but we need to control 8deviced any code available
Hi,
Good Project.
Is it possible for temperature and humidity to add automation by setting the temperature or humidity set point then turn on/off some switches?
Thanks for your reply.
Yes possible
after recient updates to rainmaker and board firmware after uploading this code the esp32 boot loops