Design UI with Stone Designer Software & UART Communication for HMI Display
Creating Stunning User Interface with Stone Designer Software & Utilizing the Power of UART Communication
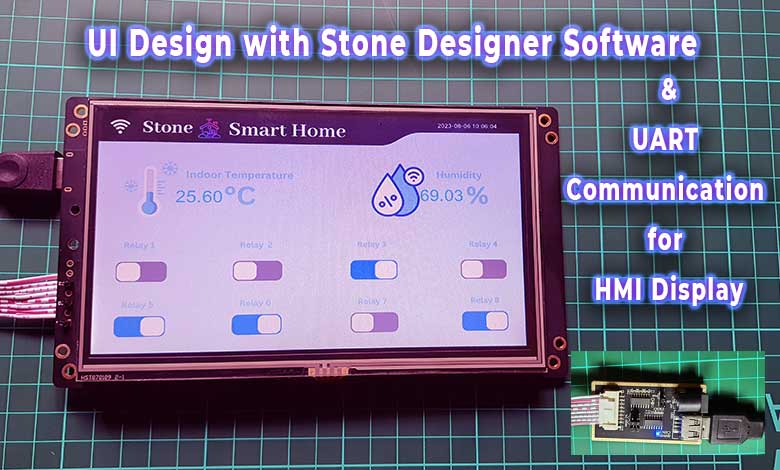
In this tutorial, we’ll explore how to Design UI with Stone Designer Software & UART Communication for HMI Display. With Stone Designer Software, you can easily design stunning interfaces, and by utilizing UART communication, you’ll be able to control and display data on HMI screens effectively. It’s a straightforward and practical approach to enhance your UI design skills and create engaging displays for various applications.
Overview: Stone HMI Display
Today, we will be continuing our series on Stone HMI Display. As said in a previous tutorial, today we will learn to design our UI, using Stone Designer Software. Then we will cover some basics about the data formatting of this HMI display using UART, which will help you to understand how to update data to the display and control some appliances.
In the upcoming series, we will learn to interface microcontrollers with this display, read the sensor data, and control some AC home Appliances.
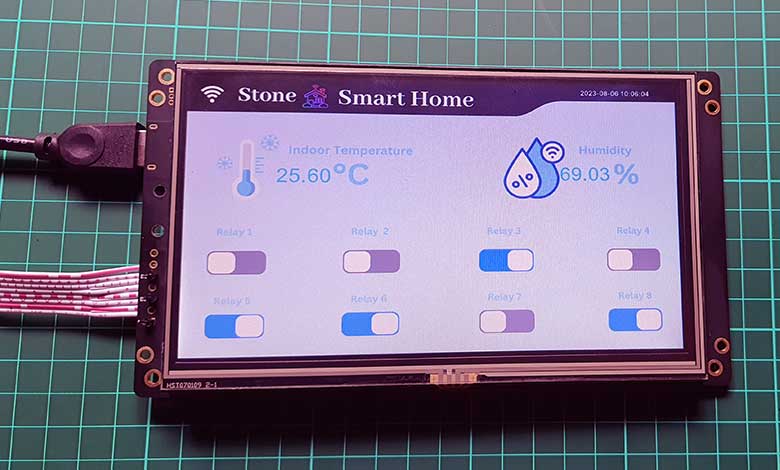
So, this tutorial is purely based on how to design our UI using stone designer software and how we can control the display using UART. Once you get a sense of it, we will start covering the microcontrollers one by one.
Components Required
To design a UI with Stone Designer Software and communicate with HMI displays via UART, you will need the following components:
| S.N | COMPONENTS NAME | QUANTITY | PURCHASE LINKS |
|---|---|---|---|
| 1 | Stone HMI Display (STWI070WT-01) | 1 | Amazon | AliExpress |
| 2 | WS2812 LED Strip | 1 | Amazon | AliExpress |
| 3 | Arduino Nano | 1 | Amazon | AliExpress |
| 4 | DHT11 Temperature & Humidity Sensor | 1 | Amazon | AliExpress |
| 5 | 8 Channel 5V relay Module | 1 | Amazon | AliExpress |
| 6 | MAX3232 RS232 to TTL | 1 | Amazon | AliExpress |
| 7 | Type A USB Cable | 5 | Amazon | AliExpress |
- Stone HMI Display: Choose a suitable HMI display that supports UART communication.
- Microcontroller: Select a compatible microcontroller, such as STM32, Arduino, or ESP32, to control the HMI display and handle UART communication.
- MAX3232 RS232 to TTL: This chip is essential for converting the signals between RS-232 and TTL formats, enabling seamless communication between the HMI display and microcontroller.
- USB Cable: Use a USB cable to connect the microcontroller to your computer for programming and debugging purposes.
- Stone Designer Software: Obtain the Stone Designer Software, a user-friendly tool to create UI designs for your HMI display.
- SSCOM32 UART Communication App: Install a Serial Monitor application on your computer to monitor the data frames transmitted between the HMI display and microcontroller during the testing phase.
- Breadboard and Jumper Wires: For prototyping and connecting the components during initial setup and testing.
- Power Supply: Provide the necessary power supply to the microcontroller and HMI display to ensure they function correctly.
With these components in your hand, you can start designing your UI using the Stone Designer Software and establish UART communication with your Stone HMI display for an interactive and user-friendly experience.
Stone Designer Software: A User-Friendly UI Design Tool
To design UI for your display. First You need to download the stone designer software. You can download Stone Designer’s Latest Software, UART Communication Software, and Project Instruction Set bundle from the link provided below:

Download Stone Designer Software and Tools
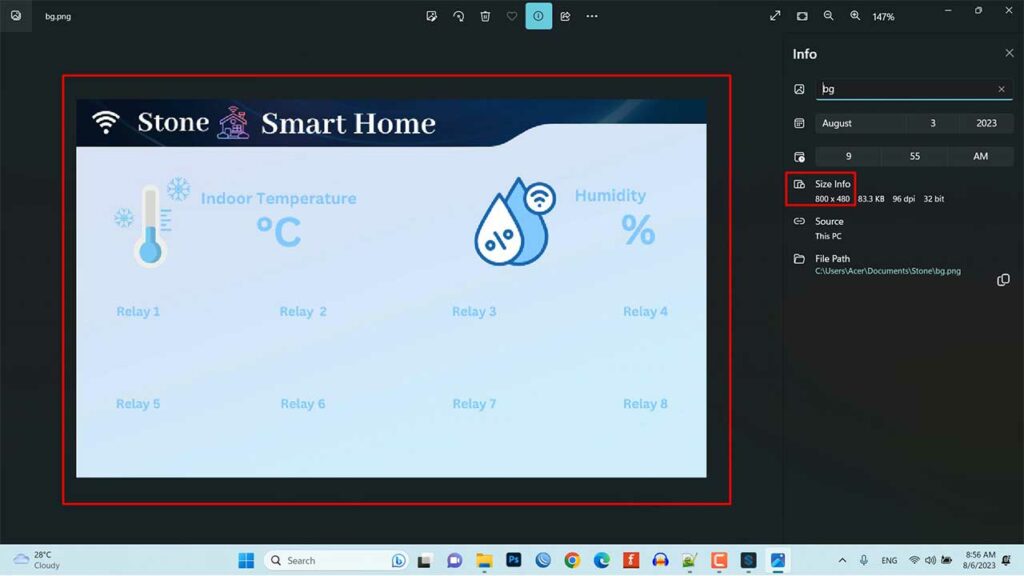
Once you downloaded the software installation file, Install it. Now you need to prepare one basic layout background image for your UI. Here I have already designed One using Photoshop. The size of the background image should be the same as the size of your display. For me, it’s 800 by 480 pixels for a 7-inch HMI Display.
Creating new project
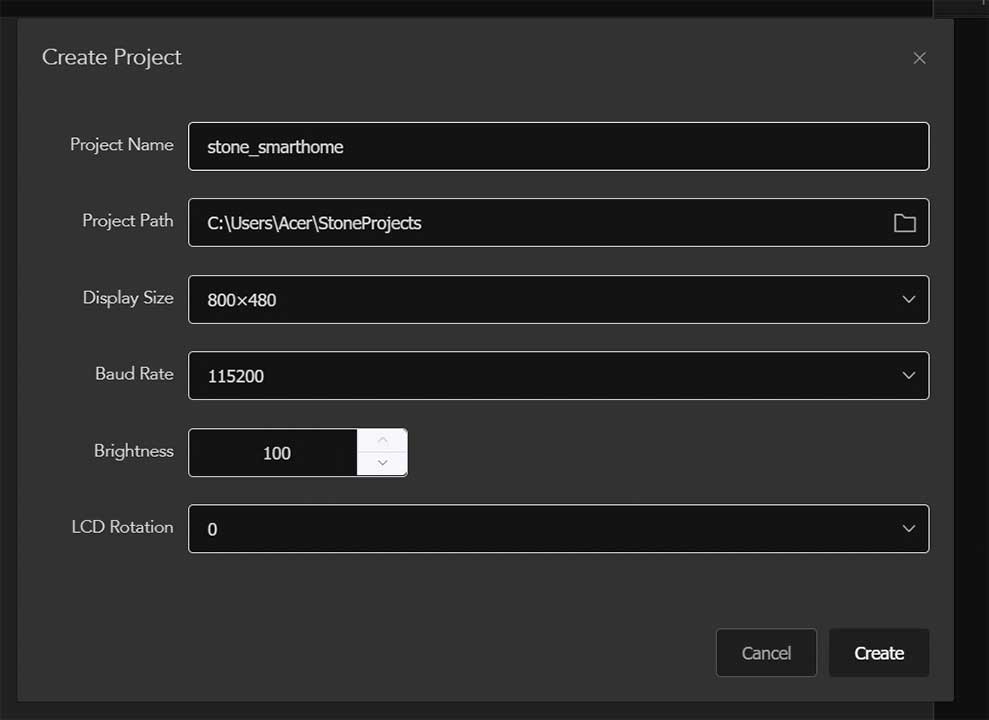
Now open the stone designer software and create a new project. Provide your project name, project path, display size, and baudrate. Then click on the Create button.
Adding Custom Background
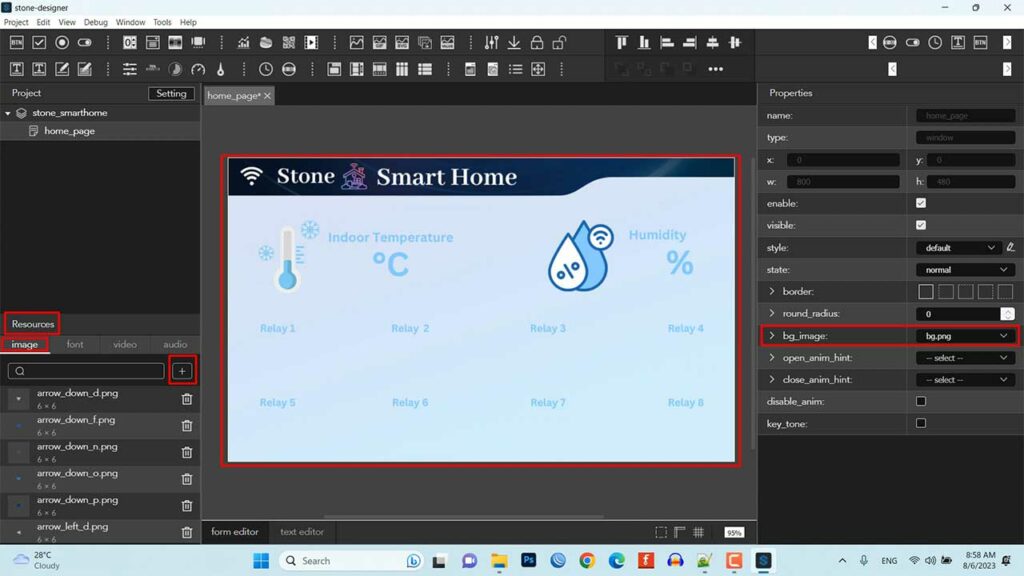
To add images to the project, click on the Image tab under Resources and add the background image you want to use. On the right side, under bg_image. Now, choose your background image.
Adding Label Widgets to the HMI Display
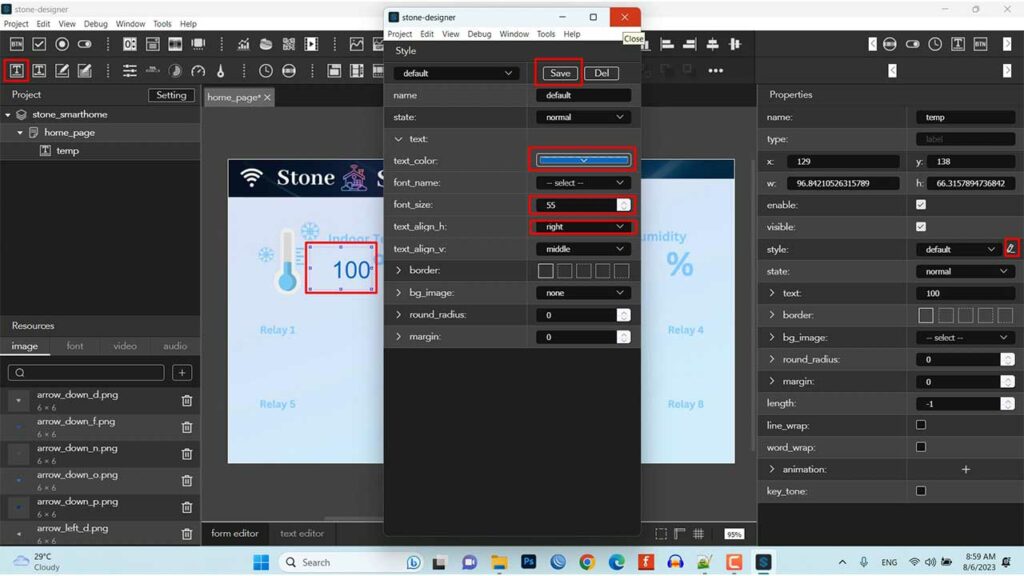
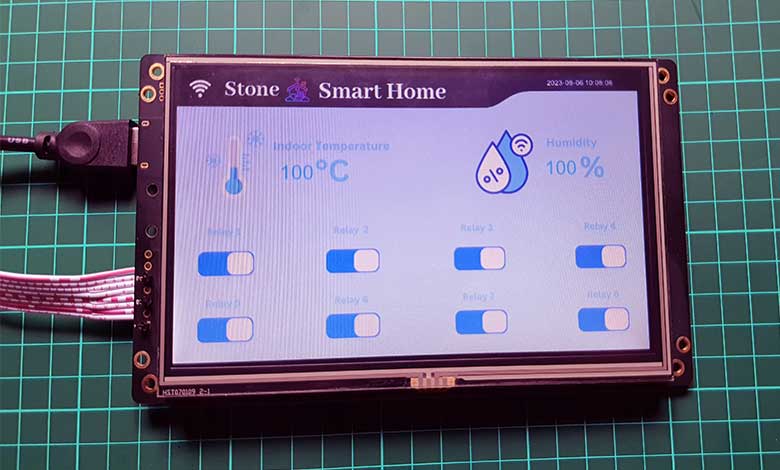
Now we will add 2 label widgets for Temperature and Humidity. For Indoor temperature keep the name of the label widget as “temp” We will require it to send/update data through UART Command. Now under style settings click on the little pen icon. Here under Text Setting configure the Text color, Font size, and text Alignment of your requirements. Then click on save. Under text value, I am providing 100 as the default value. This value will be displayed on your display.
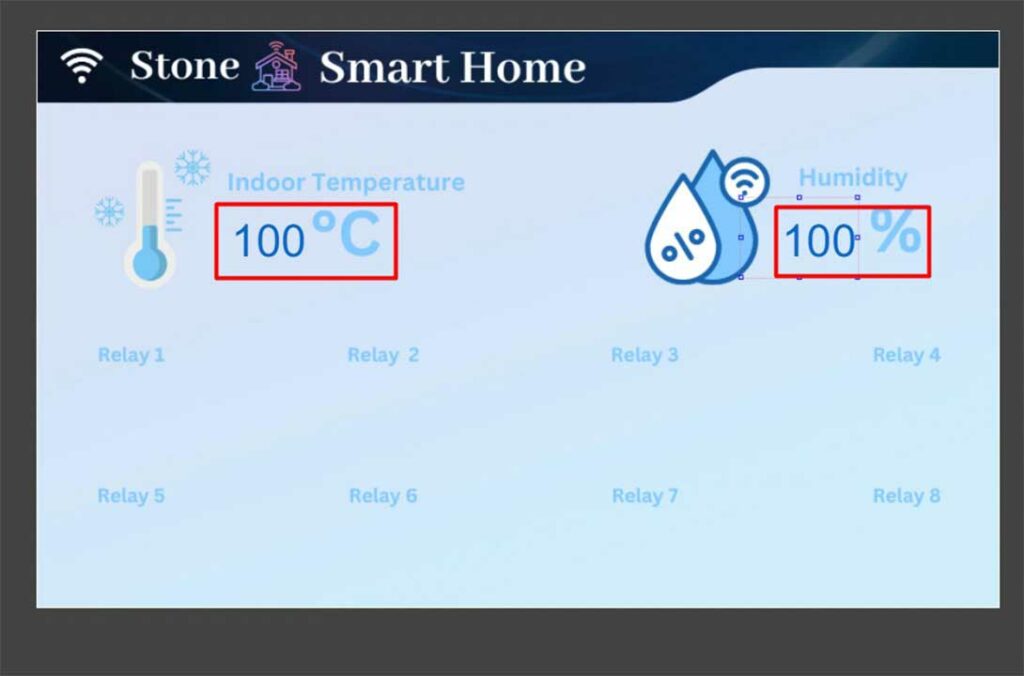
Similarly, the Humidity settings will be the same. So, I will just click CTRL+C and CTRL+V to copy and paste this label widget. Now drag it to the place where you want to place the widget. edit the widget name to “humi“.
Adding Switch & Digital Clock Widgets
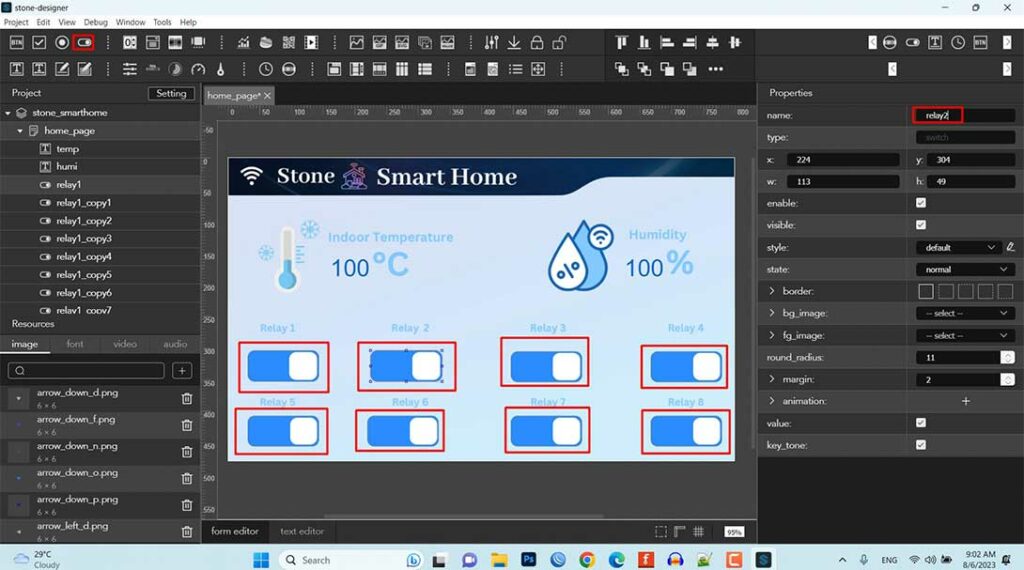
Now we will add 8 “Switch” Widgets just below each Relay. Make sure you name the widget differently like relay1, relay2, relay3, relay4, up to relay8.
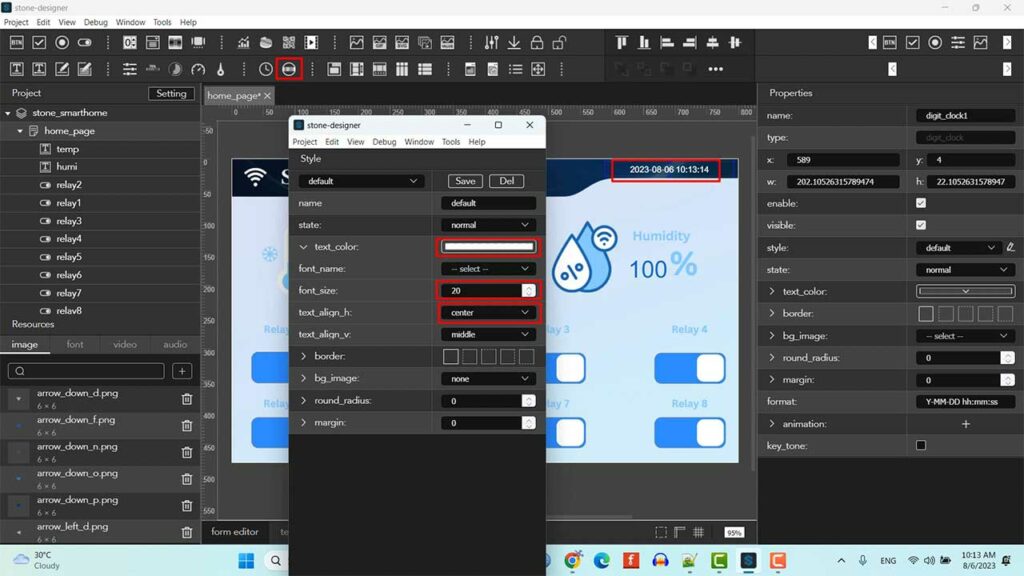
Finally, at last, let’s add a digital clock widget at the right corner of the screen. Then Change the text color to white.
Now you can save and simulate our newly created UI.
Download UI to the Stone HMI Display
Click on Download and choose your file location. The UI will compile and save in your default folder. Copy this default folder. Connect your display with USB UART Module and USB port on the Display to the computer.
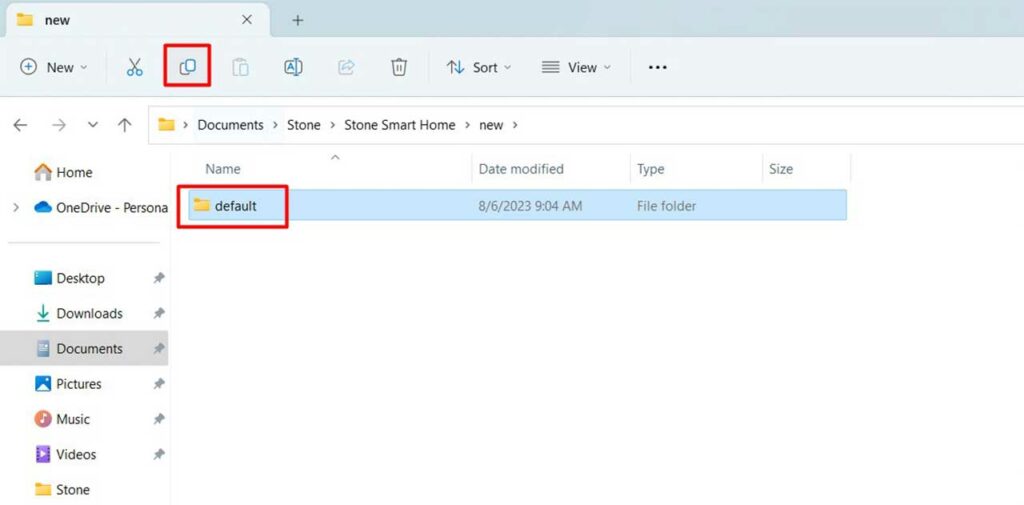
Go to the App drive E on your computer and delete that old default folder. After that paste the newly copied default folder.
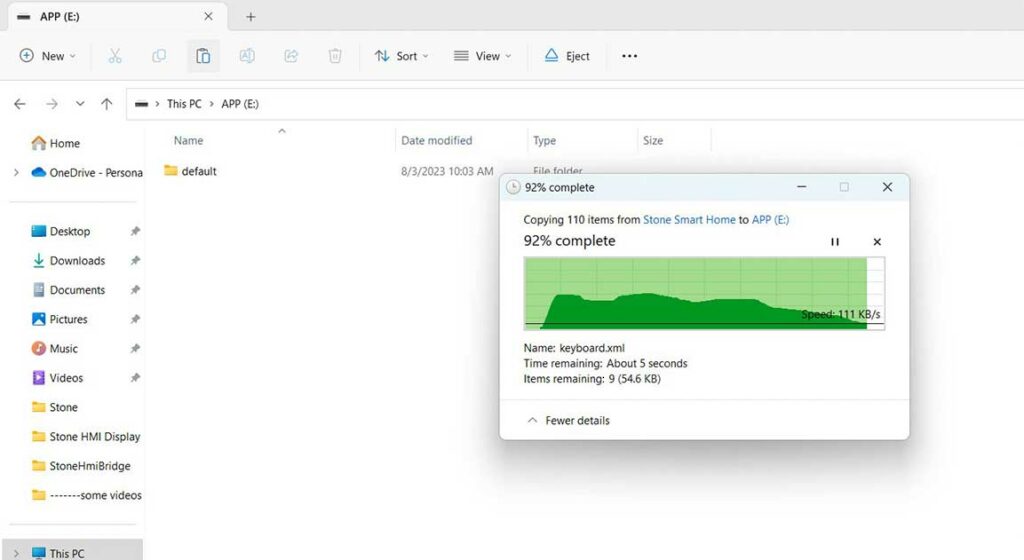
You can eject the drive and press the reset button on the back panel of your LCD. You will notice a blue LED Blinking. Congratulations. you have successfully downloaded a new UI into your HMI Display.
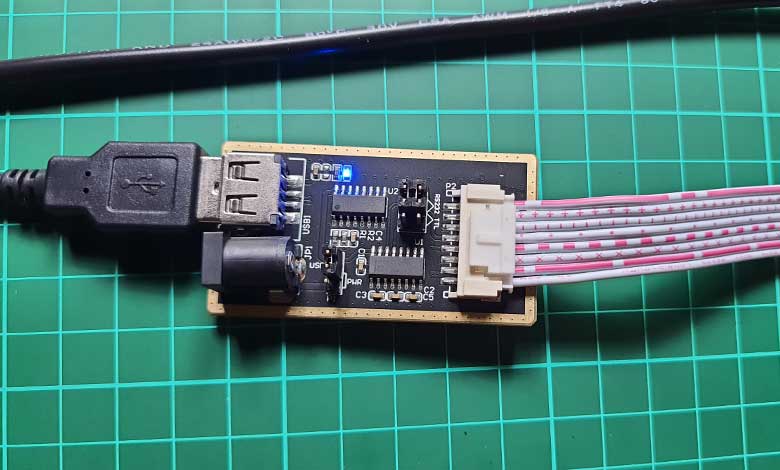
To send data to the display, we will use UART communication. So make sure to set your Jumper to the Correct direction for UART Communication as shown here.
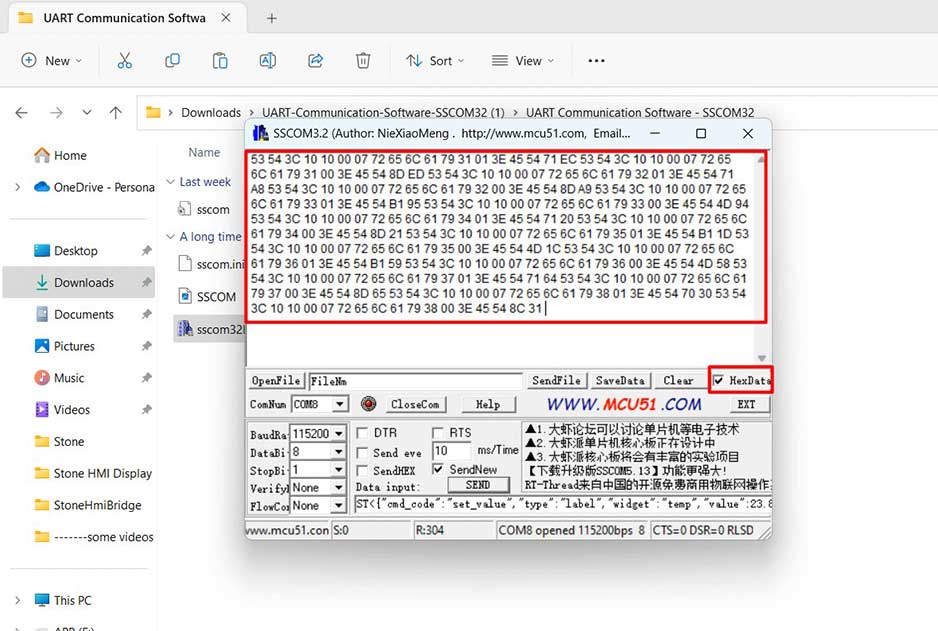
Now open UART Communication Software – SSCOM32. Here You can see my Display is connected to COM8 Port. You can check this from the device manager. After selecting the correct COM Port you can Press Buttons on Display. You will notice some characters and text on the serial. Now Turn ON HEXData to read data in Hex Format.
Sending & Receiving Data Frames with UART Communication
Now when you turn toggle switches you will see some data. Now let’s open the instruction set V2.5RC of stone HMI Display. This will help us in understanding how the data is transmitted between the MCU and the display.
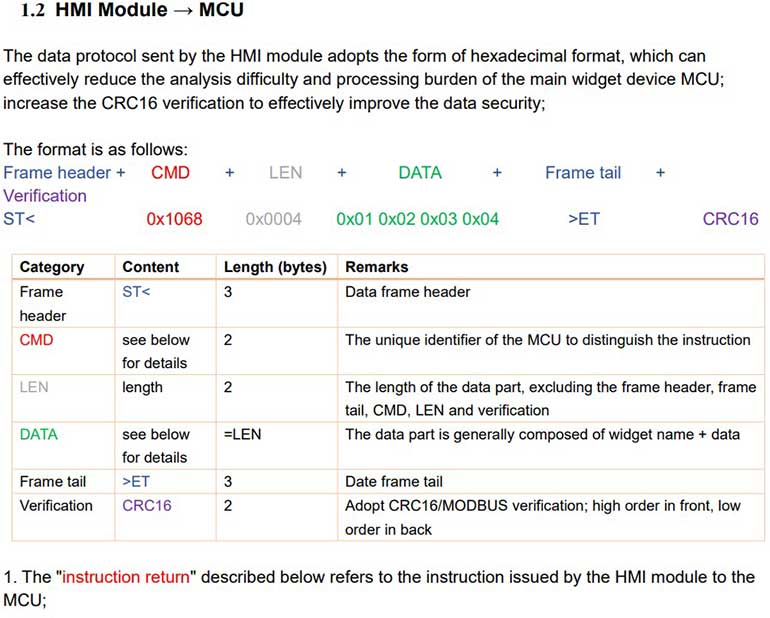
The data must consist of the frame header then the data itself and the frame tail in the end. Similarly, when the display sends the data to the MCU it sends the header then the command then the length of the data then the data itself followed by the frame tail and two bytes of CRC.
Let’s see this practically. As you can see the last Hex Value is different when we turn ON or OFF the Switch. Let’s quickly turn ON and OFF each Relay Switch and Note Down these HEX data on Note. we will need this data when we interface MCU with Display to send and receive data.

Now Move on to the label widget. Here we are going to monitor Temperature and Humidity from a sensor in an upcoming video. But Now we will try updating the value in the display using UART Command. Here I want to display the value of the float type. So I will select this command.
ST{"cmd_code":"set_value","type":"label","widget":"label1","value":1.123,"format":"%.3f"}>ETIf you need only integer value then you can choose this command.
ST{"cmd_code":"set_value","type":"label","widget":"label1","value":18"}>ETHere I am sending a 25.60 Value to the “temp” label widget.
ST{"cmd_code":"set_value","type":"label","widget":"temp","value":25.60,"format":"%.2f"}>ET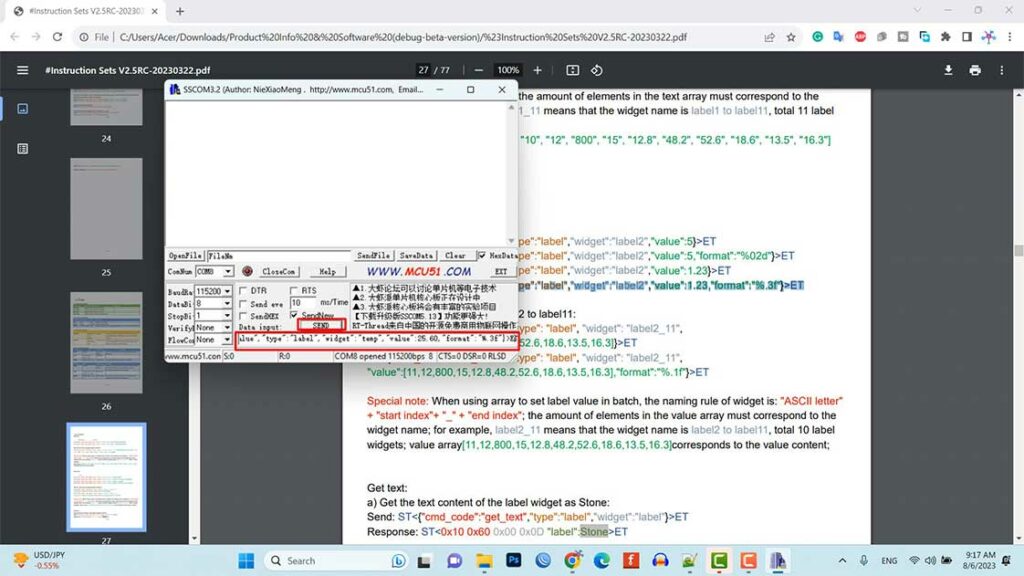
With this command, I am sending a 69.03 humidity value to the “humi” label widget.
ST;{"cmd_code":"set_value","type":"label","widget":"humi","value":69.03,"format":"%.2f"}>ETLastly, let’s try turning the ON and OFF Relay Switch using UART Command.
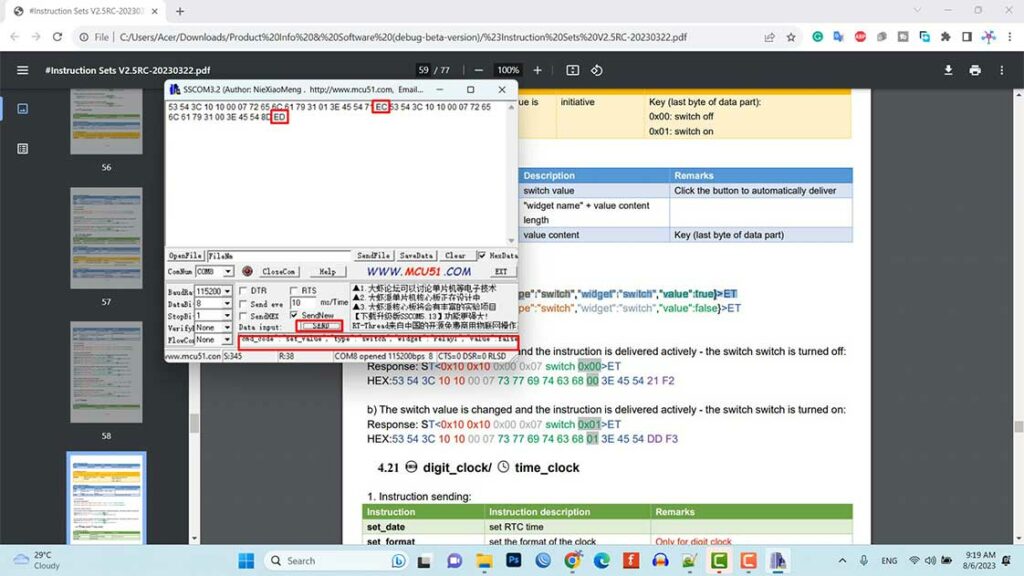
Type your widget name and value “True” to Turn “ON” and “False” to Turn “OFF“.
ST{"cmd_code":"set_value","type":"switch","widget":"relay1","value":true}>ETST{"cmd_code":"set_value","type":"switch","widget":"relay1","value":false}>ET
Conclusion
That’s all about today’s tutorial on Design UI with Stone Designer Software & UART Communication for HMI Display. In the tutorial, we demonstrated sending values to the display using the label element. Additionally, we showed how the display sends data frames when switches are ON and OFF.
In our next tutorial, we will focus on interfacing different microcontrollers like Arduino, ESP8266 NodeMCU, ESP32, Raspberry Pi pico, etc. with the display. Then we will learn to read and write values to the display to control different devices using different sensors. That’s all for today. If you have any questions or doubts, please leave your comments. Have a nice day.

