Fix MAX30100 Sensor & DIY Pulse Oximeter using Arduino
Troubleshooting MAX30100 Pulse Oximeter Sensor
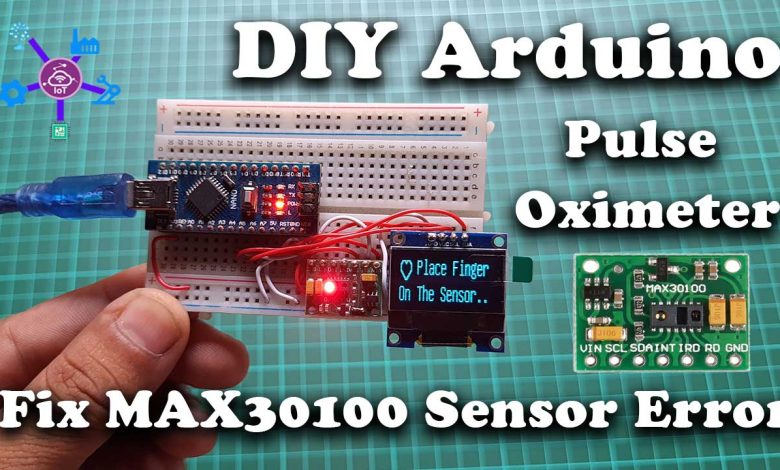
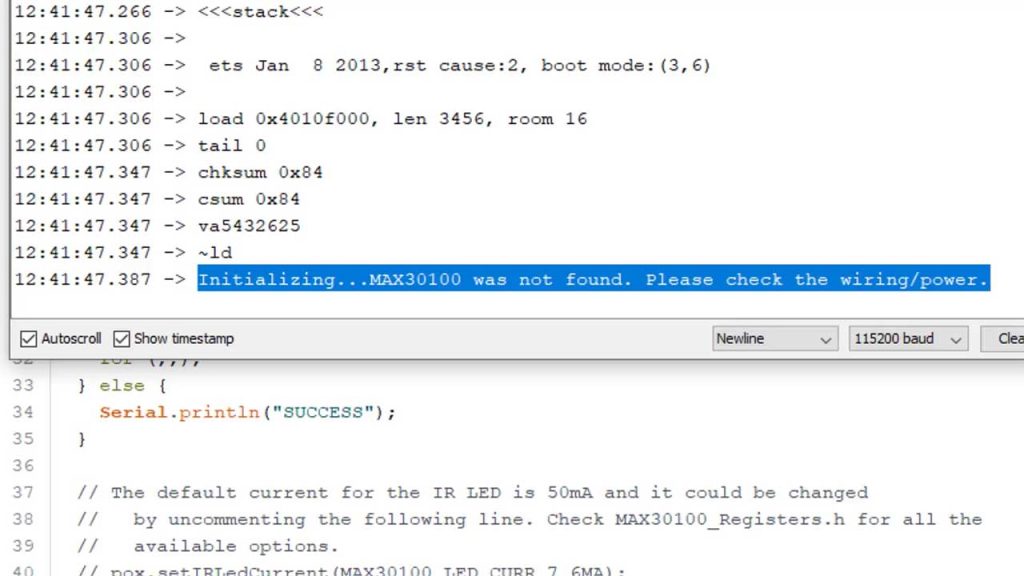
Today in this tutorial, we are going to fix the MAX30100 Sensor error and learn to DIY Pulse Oximeter using Arduino. You might have faced no red led light working even after following proper pin connection and program code. or you might have faced “Initializing pulse oximeter…FAILED” or “Initializing… MAX30100 was not found. Please check the wiring/power“. If you see these errors on the serial monitor and want to learn how to fix them, then you are at the right place. So, here we will fix MAX30100 sensor issues and DIY pulse oximeter using Arduino microcontroller.
Overview: DIY Pulse Oximeter using Arduino
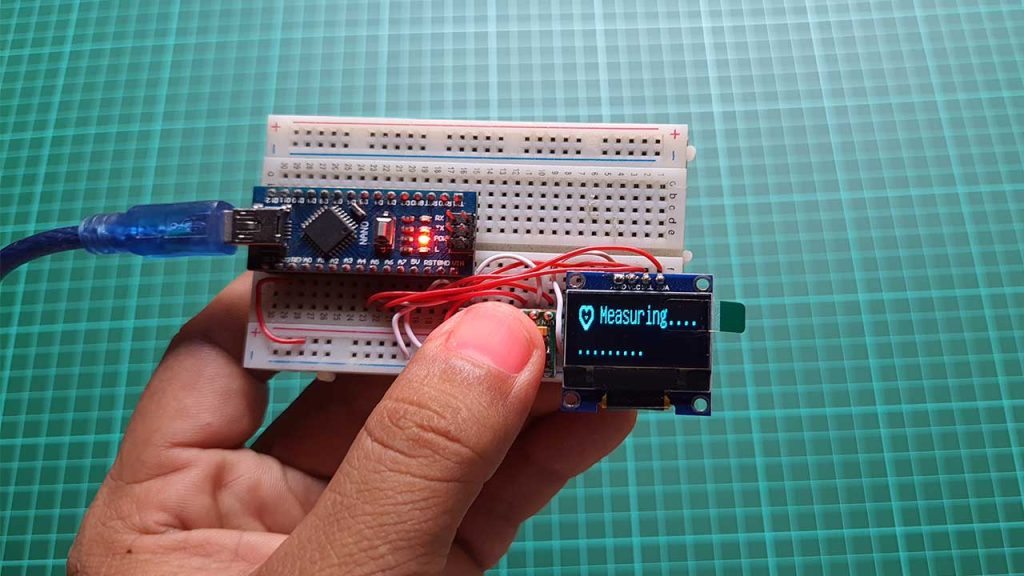
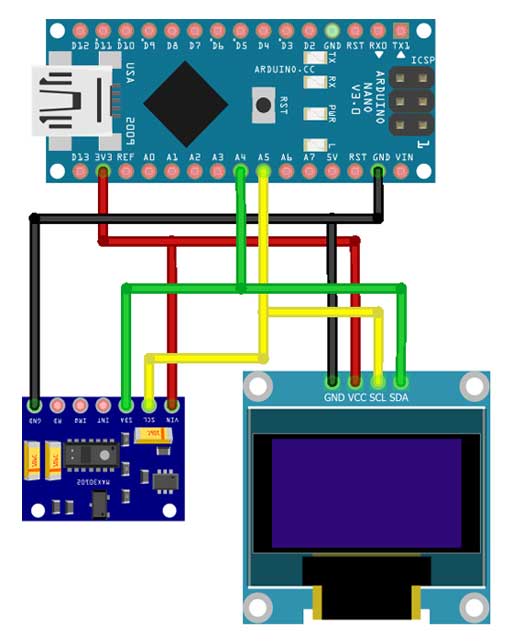
The pulse oximeter is used for measuring the heart rate and Sp02 level. So, today we will DIY Pulse Oximeter using Arduino, MAX30100 sensor, and 0.96″ SSD1306 OLED Display. To make this project compact, we are using the Arduino Nano microcontroller. But, before getting started with this project, let’s learn more about this MAX30100 pulse oximeter sensor, Its error, and ways to fix them.
Also read:
- ESP8266 based Pulse Oximeter Webserver
- Patient Health Monitoring System using Arduino IoT Cloud with ESP8266
- IoT Based Pulse Oximeter Using ESP8266 & Blynk
Components Required
The Components Required to DIY Pulse Oximeter using Arduino & MAX30100 are listed below. You can buy them directly from the Amazon link provided.
| S.N | Components Name | Description | Quantity | |
|---|---|---|---|---|
| 1 | Arduino Nano | Arduino Nano R3 | 1 | https://amzn.to/3vN4ZHu |
| 2 | MAX30100 Oximeter Sensor | MAX30100 Heart Rate Oximeter Sensor Arduino Module | 1 | https://amzn.to/3hdjkt2 |
| 3 | OLED Display | 0.96" I2C OLED Display | 1 | https://amzn.to/32WRubSv |
| 4 | 4.7K Ohm 1/4 Watt Resistor | 4.7K Ohm Resistor | 2 | https://amzn.to/3urSdhv |
| 5 | Jumper Wires | Jumper Cables breadboard friendly | 20 | https://amzn.to/3vw9ZAt |
| 6 | Breadboard | Mini Breadboard | 1 | https://amzn.to/2NP2UKL |
MAX30100 Oximeter Sensor
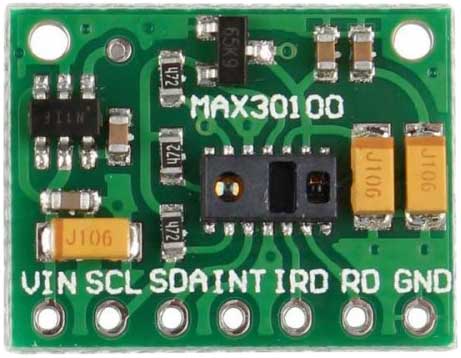
MAX30100 Pulse Oximeter sensor is the main component of this project. We can pull SpO2 and pulse information through I2C communication when connected to the microcontroller. In simple terms, this sensor is used for identifying oxygen saturation. Hence, this module is used for monitoring the pulse rate and oxygen saturation level of the blood.
Fix MAX30100 Sensor issues
There is no issue with the code and Arduino pin connections. I am sure you have already verified the MAX30100 pin connection with Arduino and they are in proper order. You also might have tried different example codes. So, there is a small build problem with MAX30100 sensor PCB.
If you closely see into the board you will see three pull-up resistors connected to a 1.8V pin of voltage regulator for a pull-up. But our microcontrollers are 5V or 3.3V based. So, these pull-up resistors are not making SDA and SCL data lines neither pull-up nor pull-down because of this connection the data which is sent from the sensor to the microcontroller is corrupted and we are getting error responses as like: “Initializing pulse oximeter…FAILED“, “Initializing… MAX30100 was not found. Please check the wiring/power“.
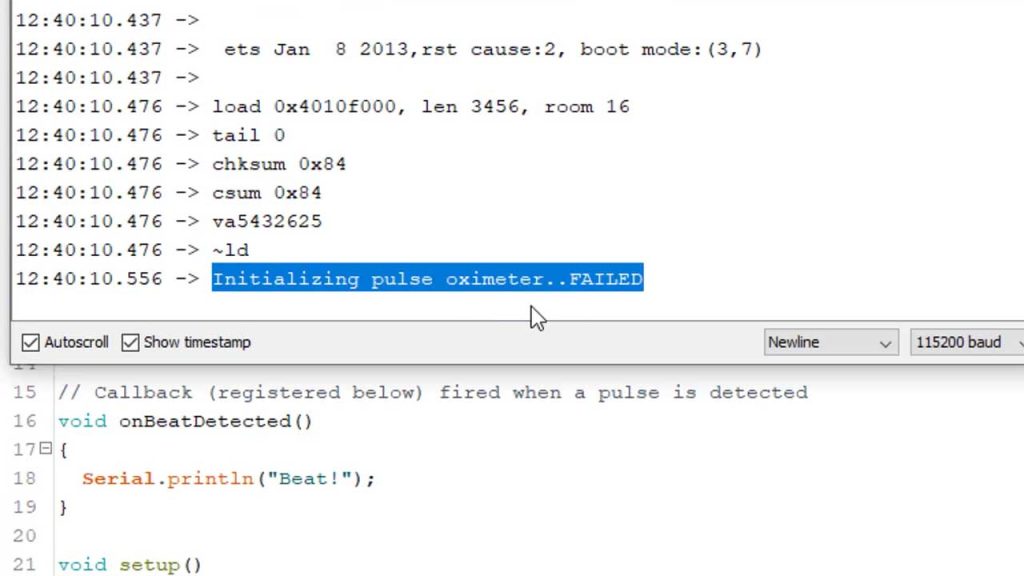
Since the sensor can’t communicate with the microcontroller, this will never receive a command to read the pulse and oxygen level, thus the red LED will never glow.
Now, we understood the real problem. So, what should be the solution for this??? well, the solution is very simple. we just need to connect these pull-up resistors to the 3.3v network. There are two methods to do this.
Method 1: Fix MAX30100 Sensor by adding jumper
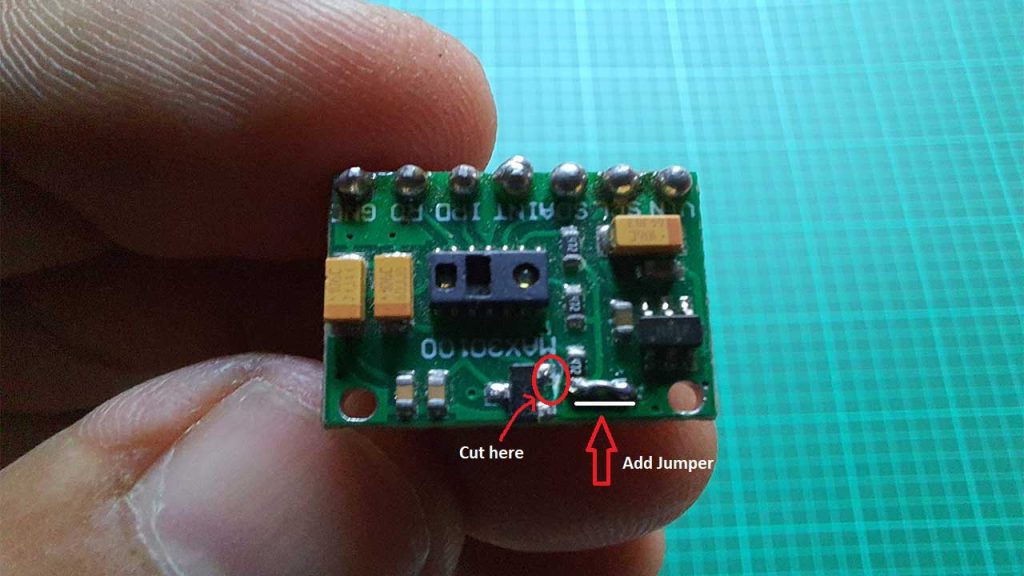
Cut the line where the pullup resistor is connected to a 1.8V voltage regulator pin and connect this pull-up resistor with the 3.3v pin of the second voltage regulator using a small jumper. you don’t have to connect all resistors. Because all three resistors are internally connected on the PCB as shown here.
Method 2: Fix MAX30100 Sensor by External Resistor
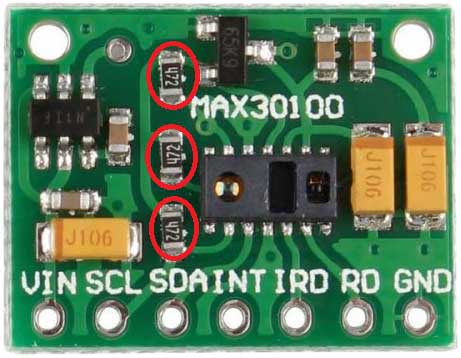
Simply remove these 3 resistors and connect an external 4.7kilo ohm resistors on the breadboard. You don’t have to cut the PCB line here.
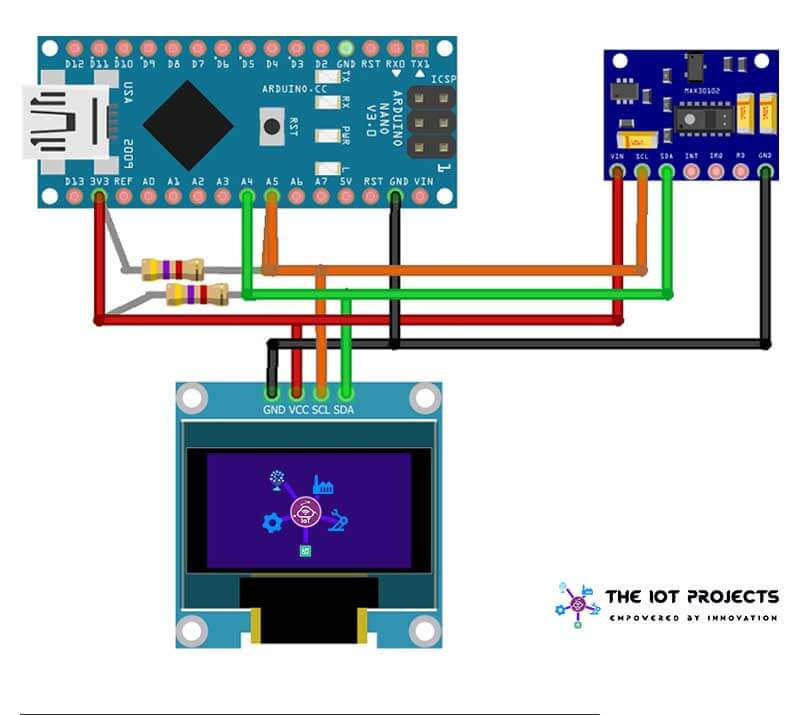
After successfully completing any of the ways, you can connect to any microcontroller and test it.
Circuit Assembly & PCB Ordering Online
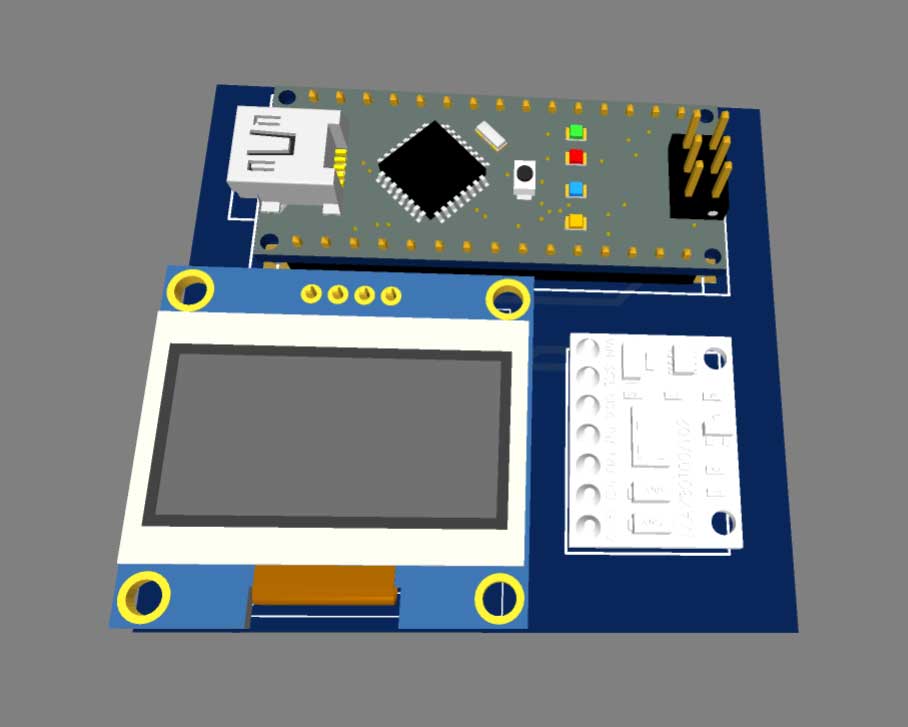
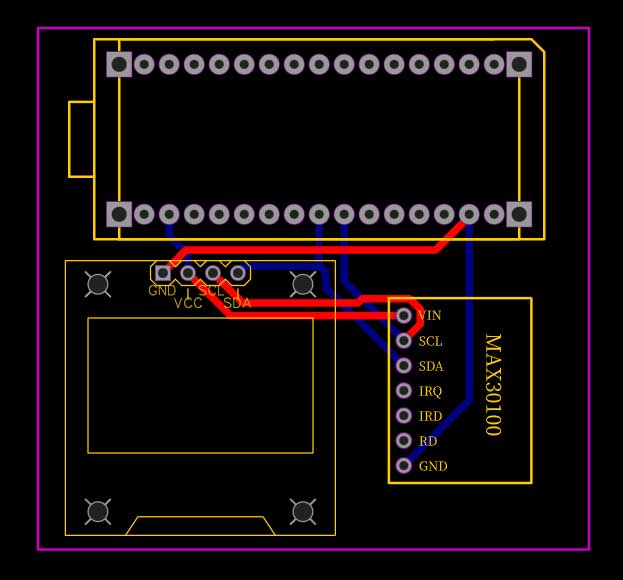
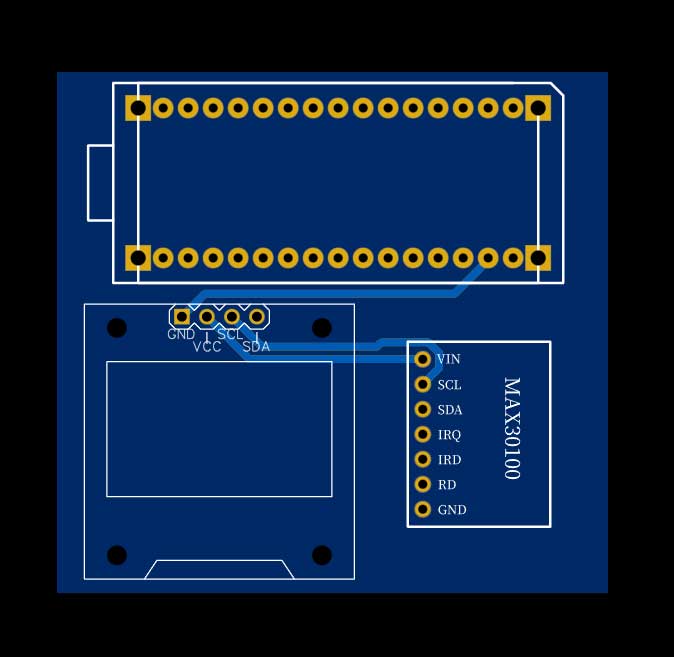
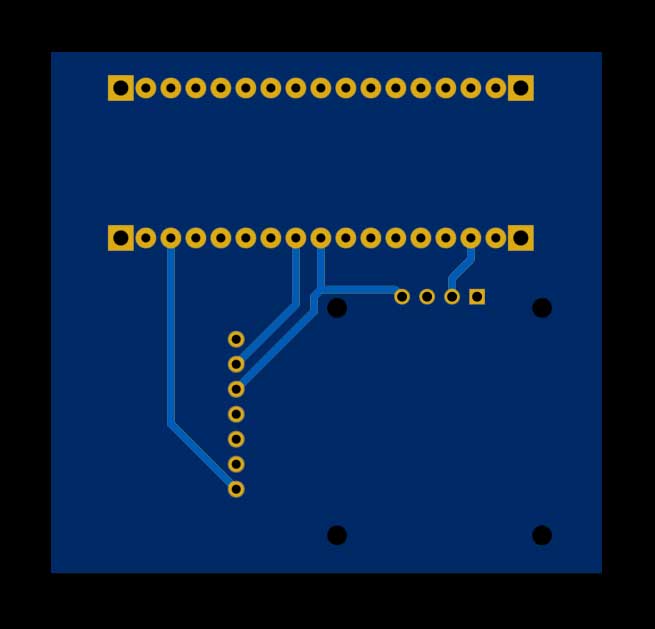
You can simply assemble the circuit on a breadboard. But To remove messy wiring and give a clean look, I designed a PCB prototype for this project. It is also helpful for troubleshooting without any errors. You can download the Gerber file of my PCB Design from the link attached below. The PCB looks like the image shown below.
I provided the Gerber File for Arduino-based Pulse Oximeter using MAX30100 sensor PCB below.
You can simply download the Gerber File and order your custom PCB from PCBWay

Visit the PCBWay official website by clicking here: https://www.PCBWay.com/. Simply upload your Gerber File to the Website and place an order. I prefer PCBWay for ordering custom PCBs. PCBWay is a place that brings manufacturers and customers together. They have more than a decade of experience in this field of fabrication, prototyping, and assembling PCBs. PCBWay have proved their focus to their customers’ needs in terms of cost-effectiveness, delivery, and quality. And this can be proved by their outstanding customer reviews.
Source/Program Code:
This is the program code for Pulse Oximeter using Arduino & MAX30100 Sensor. We have used some important libraries in the code. You need to install them in your Arduino IDE. The “MAX30100_PulseOximeter.h” is used to read the data from the sensor. “Wire.h” for I2C communication. Similarly, “U8G2lib.h” for showing animation on the display. Lastly, “Adafruit_SSD1306.h” is for the display driver. These all libraries are included at the beginning of the code.
// Sample implementation of the MAX30100 PulseOximeter

#include "MAX30100_PulseOximeter.h"
#include <Adafruit_SSD1306.h>
#include <U8g2lib.h>
#include <Wire.h>

#define REPORTING_PERIOD_MS     500
U8G2_SSD1306_128X32_UNIVISION_F_HW_I2C u8g2(U8G2_R0);

// PulseOximeter is the higher level interface to the sensor
// it offers:
//  * beat detection reporting
//  * heart rate calculation
//  * SpO2 (oxidation level) calculation

PulseOximeter pox;

const int numReadings=15;
float filterweight=0.5;
uint32_t tsLastReport = 0;
uint32_t last_beat=0;
int readIndex=0;
int average_beat=0;
int average_SpO2=0;
bool calculation_complete=false;
bool calculating=false;
bool initialized=false;
byte beat=0;

// Callback (registered below) fired when a pulse is detected
void onBeatDetected()
{
  show_beat();
  last_beat=millis();
}

void show_beat()
{
  u8g2.setFont(u8g2_font_cursor_tf);
  u8g2.setCursor(8,10);
  if (beat==0) {
    u8g2.print("_");
    beat=1;
  }
  else
  {
    u8g2.print("^");
    beat=0;
  }
  u8g2.sendBuffer();
}

void initial_display()
{
  if (not initialized)
  {
    u8g2.clearBuffer();
    show_beat();
    u8g2.setCursor(24,12);
    u8g2.setFont(u8g2_font_unifont_t_bengali);
    u8g2.print("Place Finger");
    u8g2.setCursor(0,30);
    u8g2.print("On The Sensor..");
    u8g2.sendBuffer();
    initialized=true;
  }
}

void display_calculating(int j)
{
  if (not calculating) {
    u8g2.clearBuffer();
    calculating=true;
    initialized=false;
  }
  show_beat();
  u8g2.setCursor(24,12);
  u8g2.setFont(u8g2_font_unifont_t_bengali);
  u8g2.print("Measuring....");
  u8g2.setCursor(0,30);
  for (int i=0;i<=j;i++) {
    u8g2.print(".");
  }
  u8g2.sendBuffer();
}
void display_values()
{
  u8g2.clearBuffer();
  u8g2.setFont(u8g2_font_unifont_t_bengali);

  u8g2.setCursor(65,12);
  u8g2.print(average_beat);
  u8g2.print(" Bpm");
  u8g2.setCursor(0,30);
  u8g2.print("SpO2 ");
  u8g2.setCursor(65,30);
  u8g2.print(average_SpO2);
  u8g2.print(" %");
  u8g2.sendBuffer();
}

void calculate_average(int beat, int SpO2)
{
  if (readIndex==numReadings) {
    calculation_complete=true;
    calculating=false;
    initialized=false;
    readIndex=0;
    display_values();
  }

  if (not calculation_complete and beat>30 and beat<220 and SpO2>50) {
    average_beat = filterweight * (beat) + (1 - filterweight ) * average_beat;
    average_SpO2 = filterweight * (SpO2) + (1 - filterweight ) * average_SpO2;
    readIndex++;
    display_calculating(readIndex);
  }
}

void setup()
{
    Serial.begin(115200);
    u8g2.begin();
    pox.begin();
    pox.setOnBeatDetectedCallback(onBeatDetected);
    initial_display();
}

void loop()
{
    // Make sure to call update as fast as possible
    pox.update();
    if ((millis() - tsLastReport > REPORTING_PERIOD_MS) and (not calculation_complete)) {
        calculate_average(pox.getHeartRate(),pox.getSpO2());
        tsLastReport = millis();
    }
    if ((millis()-last_beat>5000)) {
      calculation_complete=false;
      average_beat=0;
      average_SpO2=0;
      initial_display();
    }
}
Testing Arduino Based Pulse Oximeter using MAX30100
After, the successful upload of the program. It’s time to test our freshly build Pulse Oximeter using Arduino. the circuit is assembled on a small breadboard. It perfectly displays the data on the display. When you place finger on sensor it detects beats and start measuring Pulse and Sp02 level.
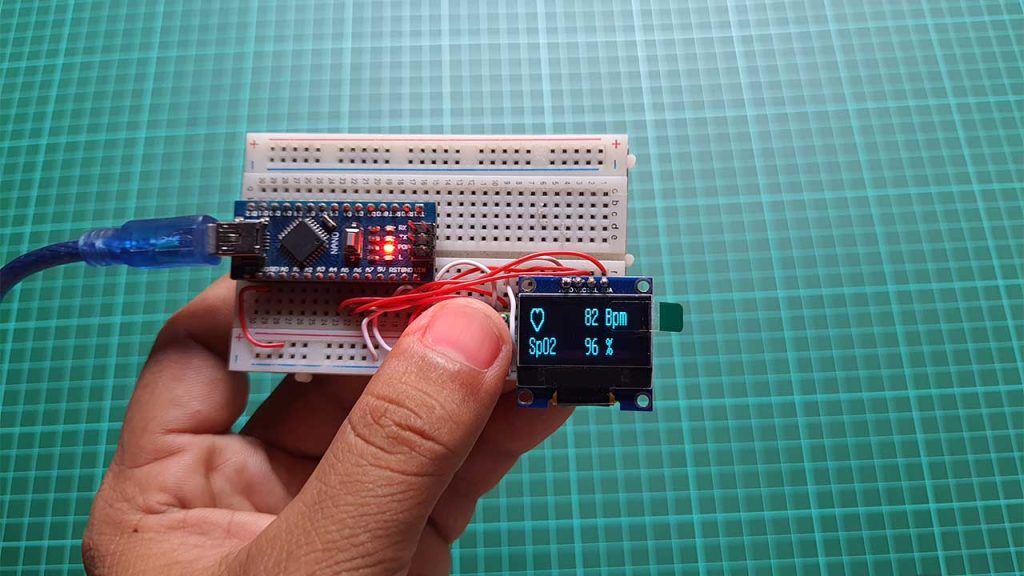
As we can see in the below image, The Heartbeat is 82 bits per minute and the SPO2 level shows 96%. The heart animation gets changes when the MAX30100 Pulse sensor detects heartbeats.
Conclusion
I have followed both ways with two different sensors to demonstrate to you, both sensors are working fine, they are giving accurate, Heartrate and SPO2 data seamlessly as shown here.
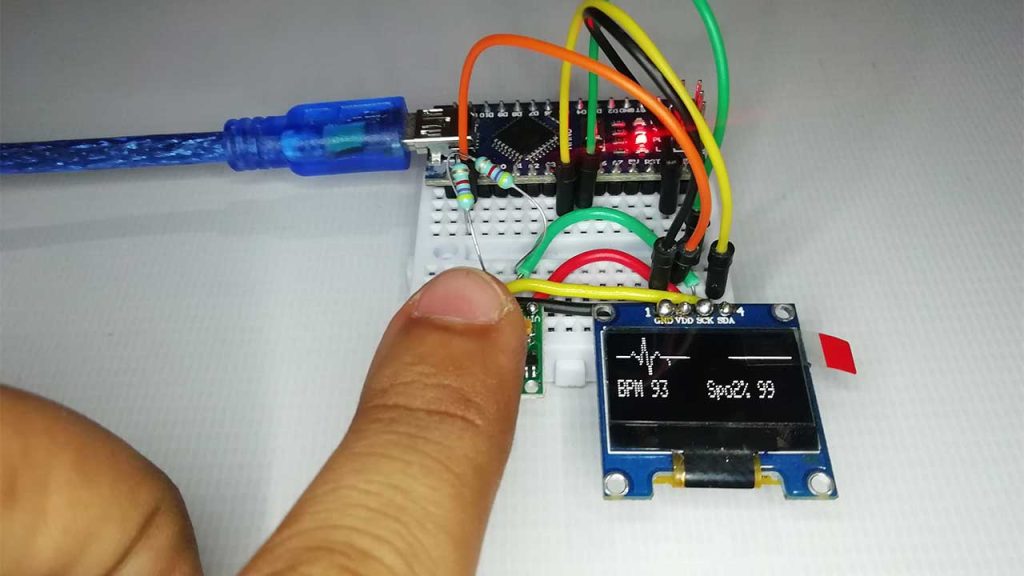
So, that’s all about MAX30100 troubleshooting for you. We have successfully Fix MAX30100 Sensor & DIY Pulse Oximeter using Arduino. I hope this tutorial helped you to solve the problem. If you are facing any other issues, just comment down below. See you in the next interesting tutorial.

Sir Inplace of OLED display, if it is possible to add 16/2 LCD. If LCD used, code is same or not