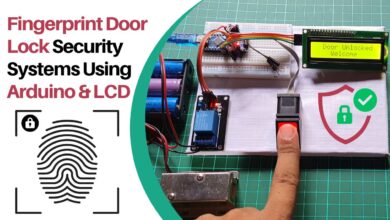
GSM based Fire Alert System Using Arduino and Flame Detector Sensor
Fire Detector and SMS Alert System using Arduino

Overview: GSM based Fire Detector & SMS Alert System using Arduino
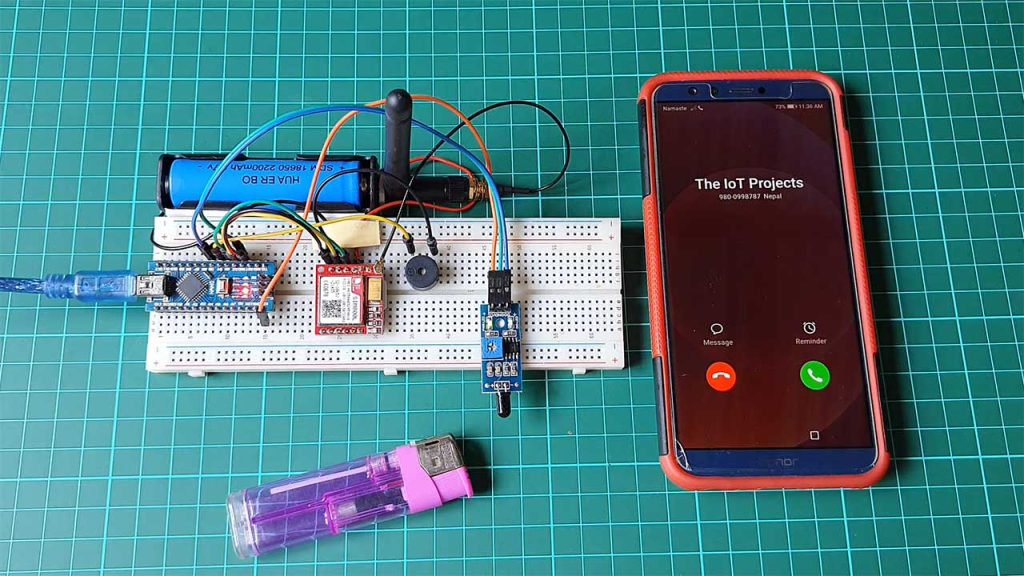
In this tutorial, you will learn to make a GSM based Fire Alert System Using Arduino and Flame Detector Sensor. Here, the SIM800L GSM module, a buzzer, and the flame sensor are used for detecting the fire. When the flame sensor detects the fire, the buzzer will be turned “ON” and SMS alerts, as well as phone call alerts, will be sent to the predefined phone numbers stored inside the Arduino sketch.
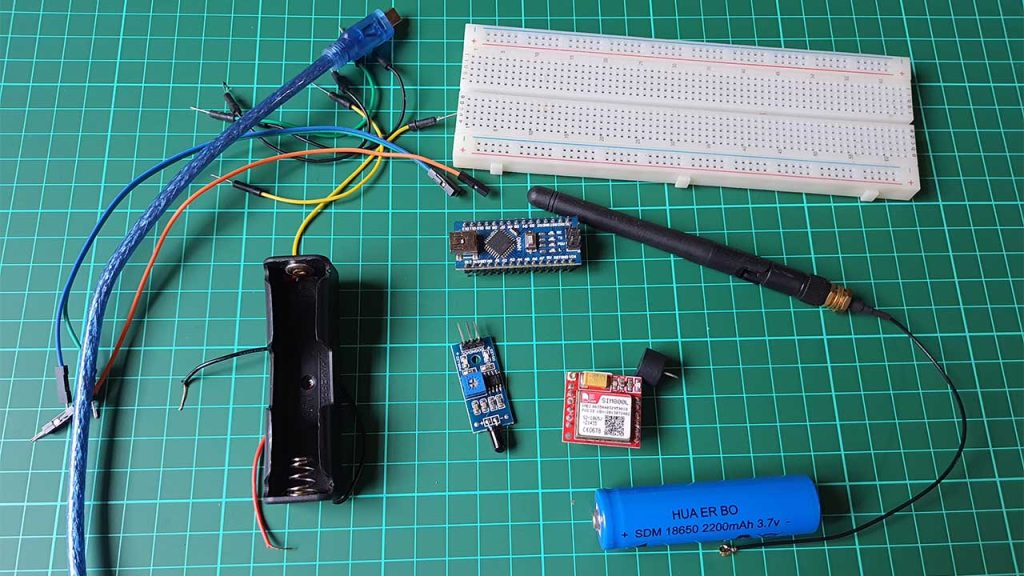
Components Required
The components required for a GSM-based Fire Alert System Using Arduino and Flame Detector Sensor are listed below. You can easily purchase them from the Amazon links provided below.
| S.N | Components Name | Quantity | |
|---|---|---|---|
| 1 | Arduino Nano | 1 | https://amzn.to/3oxkXoz |
| 2 | SIM800L GSM Module | 1 | https://amzn.to/3GqqcfP |
| 3 | Infrared Flame Sensor | 1 | https://amzn.to/3kjJeuT |
| 4 | Buzzer | 1 | https://amzn.to/3DARgHl |
| 5 | 18650 3.7V Battery | 1 | https://amzn.to/306MR1b |
| 6 | Few jumpers wires | 15 | https://amzn.to/3klh0A4 |
| 8 | Breadboard | 1 | https://amzn.to/3mt0O2c |
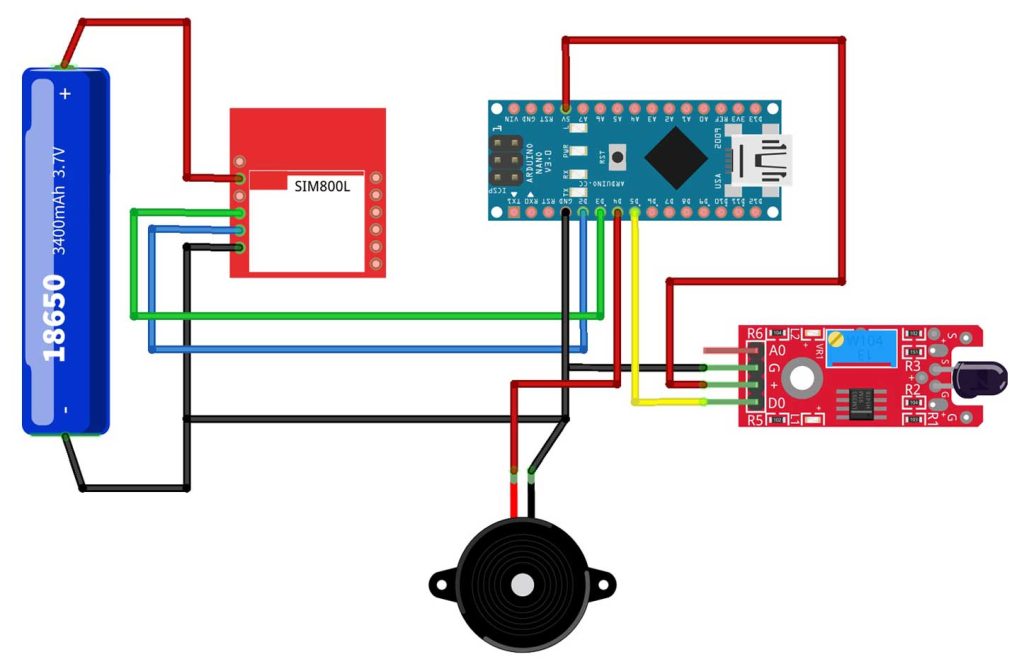
Circuit Connection: GSM Based Fire Alert System
Now let’s start assembling all the components for a GSM-based Fire Alert System Using Arduino and Flame Detector Sensor. Connect all the components according to the wiring diagram.
You can also use the Arduino UNO board instead of the Arduino Nano board. But, I prefer this NANO board for mini-projects.
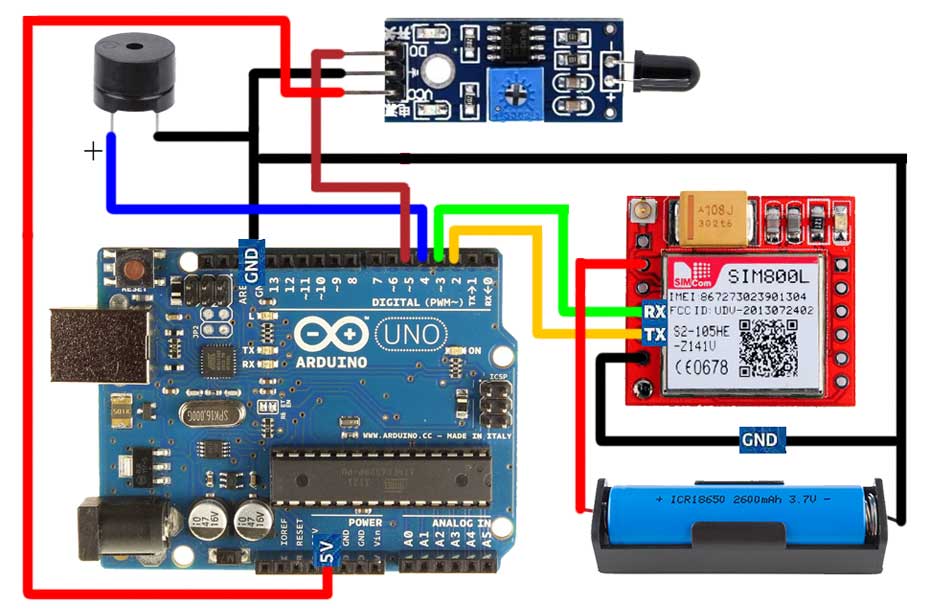
Follow this table for circuit connection:
| Arduino Nano | SIM800L GSM Module |
| 3.7V ( From 18650 battery) | VCC |
| GND | GND |
| D2 | Tx |
| D3 | Rx |
| Arduino Nano | Flame Sensor |
| 5V | VCC |
| GND | GND |
| D5 | Signal |
| Arduino Nano | Buzzer |
| D4 | Positive |
| GND | Negative |
Note: Before moving on to the programming part make sure your SIM800L Module LED light blinks once every three seconds.
PCB Designing & Ordering
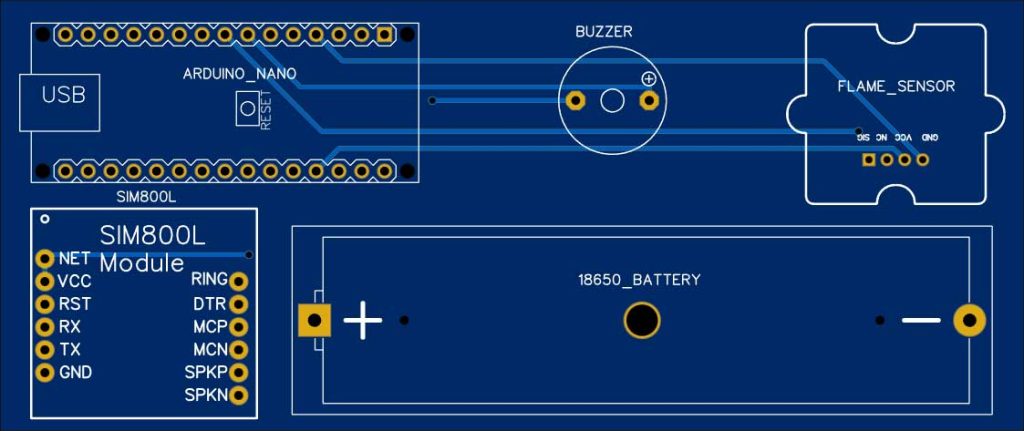
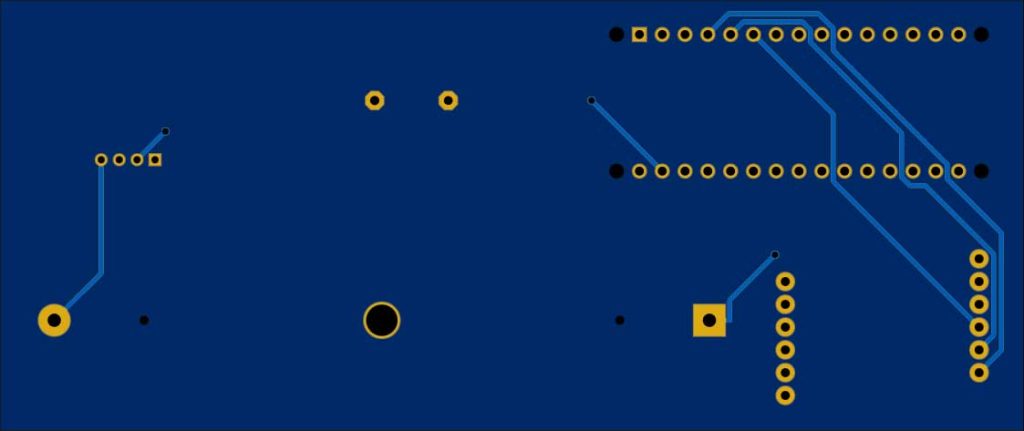
You can simply assemble the circuit on a breadboard. But if you don’t want to assemble the circuit on a breadboard, you can follow this schematic and build your own PCB. You can download the Gerber file of my PCB Design from the link attached below. The PCB looks like the image shown below.
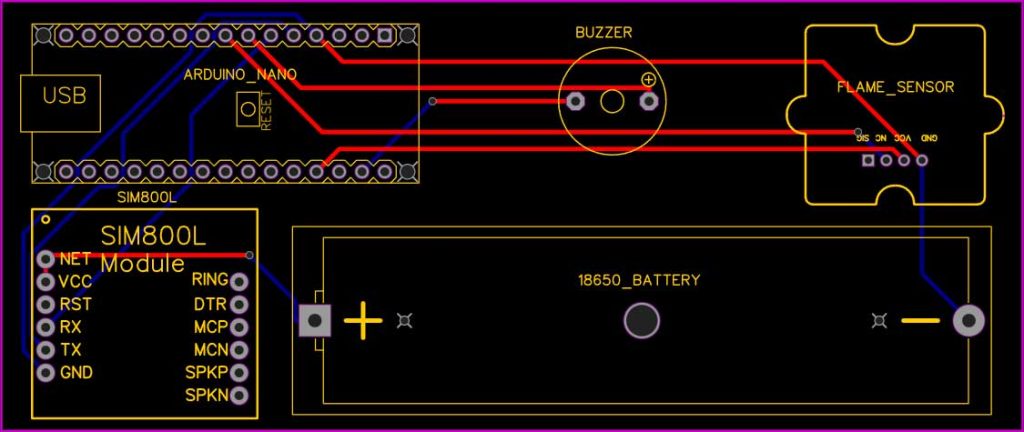
I provided the Gerber File for GSM-based Fire Alert System Using Arduino and Flame Detector Sensor PCB below.
You can simply download the Gerber File and order your custom PCB from PCBWay

Visit the PCBWay official website by clicking here: https://www.PCBWay.com/. Simply upload your Gerber File to the Website and place an order. The reason behind most of the people trusting PCBWay for PCB & PCBA Services is because of their quality. The PCB quality is superb and has a very high finish, as expected.
Also Read:
- Fire Security System using Arduino
- IoT Based Fire Detector & Automatic fire extinguisher
- Arduino based GSM Mobile phone using SIM800L Module
- DIY Mobile phone using Arduino & Nextion display with GSM Module
Source Code/Program Explanation
In this program code, you can enter up to three phone numbers. It is necessary for receiving fire alert SMS and phone calls. If you want to send fire alerts on multiple phone numbers then you can add the second and third numbers here. Otherwise, leave these variables empty.
//Alert reciever's phone number with country code
const String PHONE_1 = "xxx-xxxx-xxxxx";
const String PHONE_2 = ""; //optional
const String PHONE_3 = ""; //optional
Here I have created a software serial object for GSM Module.
#define rxPin 2
#define txPin 3
SoftwareSerial sim800L(rxPin,txPin);
I have also defined the flame sensor and buzzer pins connected to Arduino.
int Flame_sensor = 5;
int Flame_detected;
//-----------------------------------------------------------------------------------

//-----------------------------------------------------------------------------------
#define buzzer_pin 4
In the setup function, I have started the serial communication with SIM800L Module. Then I set the flame sensor pin as an Input for reading the sensor value. Similarly, I have also set the buzzer pin to Output, and the default state of the buzzer is LOW.
void setup()
{
  //-----------------------------------------------------------------------------------
  //Begin serial communication: Arduino IDE (Serial Monitor)
  Serial.begin(115200);

  //-----------------------------------------------------------------------------------
  //Begin serial communication: SIM800L
  sim800L.begin(9600);

  //-----------------------------------------------------------------------------------
  pinMode(Flame_sensor, INPUT);

  //-----------------------------------------------------------------------------------
  pinMode(buzzer_pin, OUTPUT);
  digitalWrite(buzzer_pin,LOW);
Inside LOOP, I am reading the flame sensor value and storing it in the flame_detected variable. If the flame sensor value is low. Then the fire is detected and we will turn the buzzer and send the fire alert to the phone number we have entered earlier. Here, Buzzer is turned ON, and send multi SMS function is called. It will send SMS to multiple phone numbers. Similarly, I am calling the make multi-call function to make multiple phone calls.
void loop()
{
  while(sim800L.available()){
  Serial.println(sim800L.readString());
  }

  Flame_detected = digitalRead(Flame_sensor);
  Serial.println(Flame_detected);
  //delay(100);
  //-----------------------------------------------------------------------------------
  //The fire is detected, trigger Alarm and send sms
  if (Flame_detected == 0)
  {
    digitalWrite(buzzer_pin,HIGH);
      Serial.println("Fire detected...! take action immediately.");
      send_multi_sms();
      make_multi_call();
    }
Next, if no fire is detected then turn off the buzzer.
//-----------------------------------------------------------------------------------
  //No fire is detected, turn OFF Alarm
  else
  {
    digitalWrite(buzzer_pin,LOW);
    }
In send multi SMS function, it sends the fire alert SMS to all the phone numbers.
//-----------------------------------------------------------------------------------
void send_multi_sms()
{
  if(PHONE_1 != ""){
    Serial.print("Phone 1: ");
    send_sms("Fire detected...! take action immediately.", PHONE_1);
  }
  if(PHONE_2 != ""){
    Serial.print("Phone 2: ");
    send_sms("Fire detected...! take action immediately.", PHONE_2);
  }
  if(PHONE_3 != ""){
    Serial.print("Phone 3: ");
    send_sms("Fire detected...! take action immediately.", PHONE_3);
  }
}
In the multi-call function, it will call all the phone numbers that we have entered above.
//-----------------------------------------------------------------------------------
void make_multi_call()
{
  if(PHONE_1 != ""){
    Serial.print("Phone 1: ");
    make_call(PHONE_1);
  }
  if(PHONE_2 != ""){
    Serial.print("Phone 2: ");
    make_call(PHONE_2);
  }
  if(PHONE_3 != ""){
    Serial.print("Phone 3: ");
    make_call(PHONE_3);
  }
}
//-----------------------------------------------------------------------------------
Lastly, in the make call function, It will dial a phone number and then, wait for 20 seconds and after 20 seconds it will terminate the call by using the ATH command.
void make_call(String phone)
{
    Serial.println("calling....");
    sim800L.println("ATD"+phone+";");
    delay(20000); //20 sec delay
    sim800L.println("ATH");
    delay(1000); //1 sec delay
}
Final Program Code
This is the final program code for the Fire Alert system using Arduino and GSM Module.
#include <SoftwareSerial.h>

//-----------------------------------------------------------------------------------
//Alert reciever's phone number with country code
const String PHONE_1 = "+9779800990088";
const String PHONE_2 = ""; //optional
const String PHONE_3 = ""; //optional
//-----------------------------------------------------------------------------------

//-----------------------------------------------------------------------------------
#define rxPin 2
#define txPin 3
SoftwareSerial sim800L(rxPin,txPin);
//-----------------------------------------------------------------------------------

//-----------------------------------------------------------------------------------
int Flame_sensor = 5;
int Flame_detected;
//-----------------------------------------------------------------------------------

//-----------------------------------------------------------------------------------
#define buzzer_pin 4
//-----------------------------------------------------------------------------------

void setup()
{
  //-----------------------------------------------------------------------------------
  //Begin serial communication: Arduino IDE (Serial Monitor)
  Serial.begin(115200);

  //-----------------------------------------------------------------------------------
  //Begin serial communication: SIM800L
  sim800L.begin(9600);

  //-----------------------------------------------------------------------------------
  pinMode(Flame_sensor, INPUT);

  //-----------------------------------------------------------------------------------
  pinMode(buzzer_pin, OUTPUT);
  digitalWrite(buzzer_pin,LOW);

  //----------------------------------------------------------------------------------
  Serial.println("Initializing...");
  //Once the handshake test is successful, it will back to OK
  sim800L.println("AT");
  delay(1000);
  sim800L.println("AT+CMGF=1");
  delay(1000);
  //-----------------------------------------------------------------------------------
}

void loop()
{
  while(sim800L.available()){
  Serial.println(sim800L.readString());
  }

  Flame_detected = digitalRead(Flame_sensor);
  Serial.println(Flame_detected);
  //delay(100);
  //-----------------------------------------------------------------------------------
  //The fire is detected, trigger Alarm and send sms
  if (Flame_detected == 0)
  {
    digitalWrite(buzzer_pin,HIGH);
      Serial.println("Fire detected...! take action immediately.");
      send_multi_sms();
      make_multi_call();
    }
 //-----------------------------------------------------------------------------------
  //No fire is detected, turn OFF Alarm
  else
  {
    digitalWrite(buzzer_pin,LOW);
    }
//-----------------------------------------------------------------------------------
}

//-----------------------------------------------------------------------------------
void send_multi_sms()
{
  if(PHONE_1 != ""){
    Serial.print("Phone 1: ");
    send_sms("Fire detected...! take action immediately.", PHONE_1);
  }
  if(PHONE_2 != ""){
    Serial.print("Phone 2: ");
    send_sms("Fire detected...! take action immediately.", PHONE_2);
  }
  if(PHONE_3 != ""){
    Serial.print("Phone 3: ");
    send_sms("Fire detected...! take action immediately.", PHONE_3);
  }
}
//-----------------------------------------------------------------------------------

//-----------------------------------------------------------------------------------
void make_multi_call()
{
  if(PHONE_1 != ""){
    Serial.print("Phone 1: ");
    make_call(PHONE_1);
  }
  if(PHONE_2 != ""){
    Serial.print("Phone 2: ");
    make_call(PHONE_2);
  }
  if(PHONE_3 != ""){
    Serial.print("Phone 3: ");
    make_call(PHONE_3);
  }
}
//-----------------------------------------------------------------------------------

//-----------------------------------------------------------------------------------
void send_sms(String text, String phone)
{
    Serial.println("sending sms....");
    delay(50);
    sim800L.print("AT+CMGF=1r");
    delay(1000);
    sim800L.print("AT+CMGS=""+phone+""r");
    delay(1000);
    sim800L.print(text);
    delay(100);
    sim800L.write(0x1A); //ascii code for ctrl-26 //Serial2.println((char)26); //ascii code for ctrl-26
    delay(5000);
}
//-----------------------------------------------------------------------------------

//-----------------------------------------------------------------------------------
void make_call(String phone)
{
    Serial.println("calling....");
    sim800L.println("ATD"+phone+";");
    delay(20000); //20 sec delay
    sim800L.println("ATH");
    delay(1000); //1 sec delay
}
Now copy the above program in your Arduino IDE. Then compile & upload the code by selecting the correct board and its COM port.
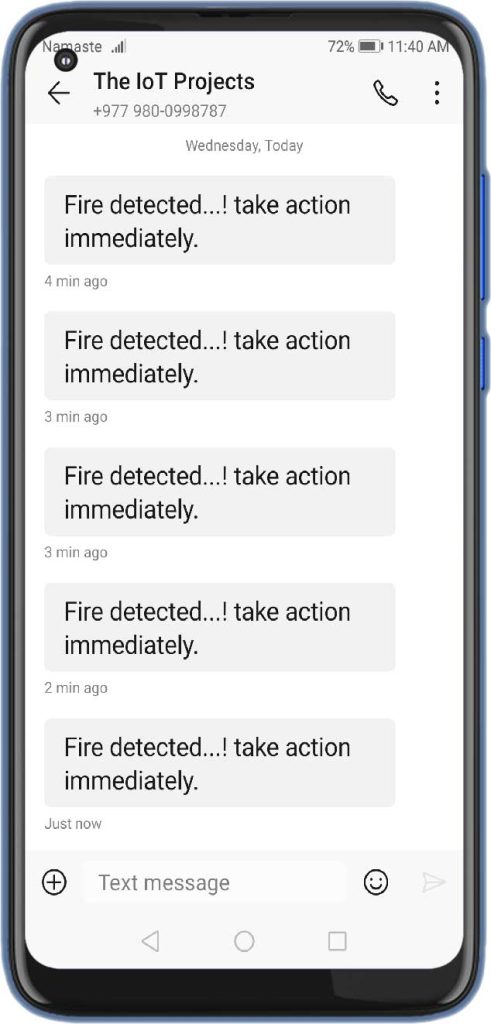
Demonstration: GSM based Fire Alert system using Arduino
As soon as the flame detector sensor detects fire Arduino activates the GSM module to send fire Alert SMS and Call for Alerts.
Here you can watch the video tutorial and guide of this GSM-based Fire Alert System Using Arduino and Flame Detector Sensor project.
Conclusion
So, this is how we can make a GSM-based Fire Alert System Using Arduino and Flame Detector Sensor. This mini-project has a wide range of applications. If you have any doubts and queries regarding this project then do let me know in the comment section below.


in my project automatic call and message is send.
hi
can i use esp32 dev board instead of arduino nano