DHT11 Temperature and Humidity Monitor with NodeMCU on ThingSpeak
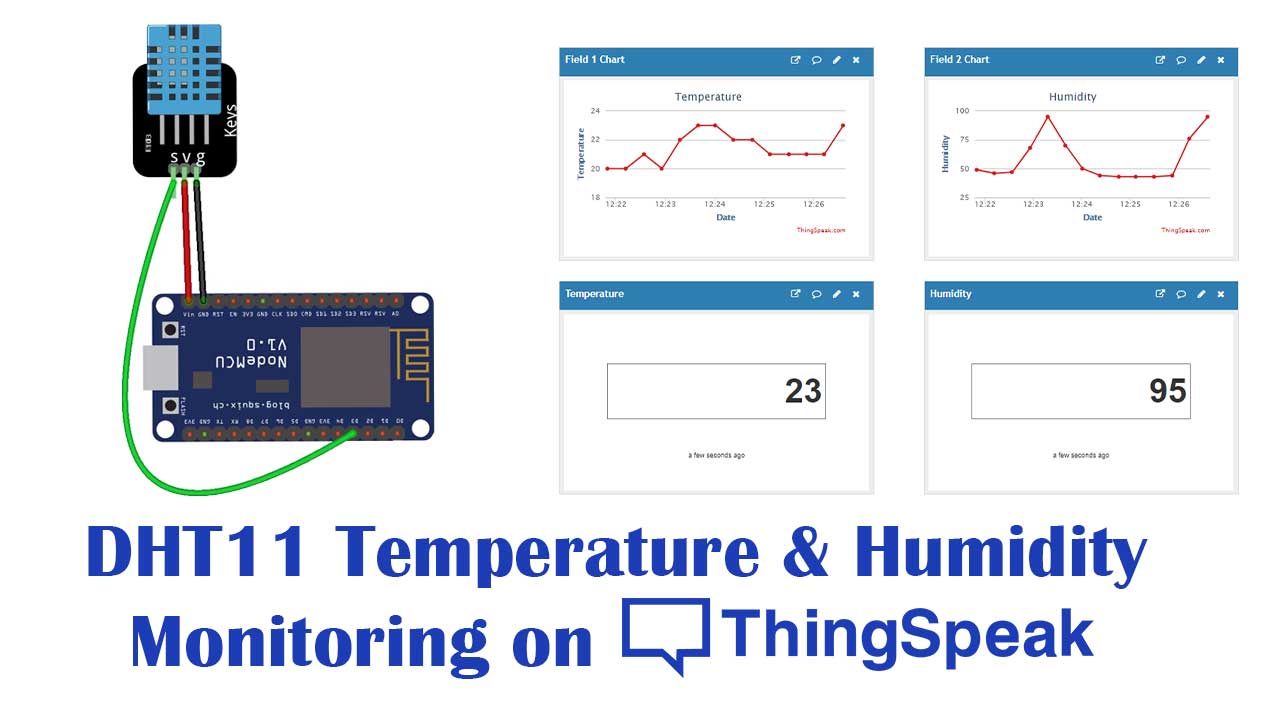
This tutorial is all about DHT11 Temperature and Humidity Monitor with NodeMCU on the ThingSpeak server. It clarifies how we can use the ThingSpeak cloud service provider to log DHT11 Temperature and Humidity data using NodeMCU.
Here I am using Arduino IDE to program NodeMCU ESP8266. Actually, you will learn to configure NodeMCU ESP8266 board to monitor DHT11 sensor temperature and humidity values.
Also check these previous articles:
- Interfacing DHT11 Humidity & Temperature Sensor with Arduino & LCD
- IoT Weather Station using DHT11 Sensor
- NodeMCU ESP8266 Monitoring DHT11/DHT22 Temperature and Humidity with Local Web Server
Components Required
You just need a NodeMCU ESP-12E Wi-Fi Development board and a humidity sensor DHT11 or DHT22. Besides this, it requires a breadboard and connecting wires.
| S.N | Components Name | Description | Quantity | |
|---|---|---|---|---|
| 1 | NodeMCU | ESP8266 12E Board | 1 | https://amzn.to/3mTuL95 |
| 2 | DHT11 Sensor | DHT11 Temperature & Humidity Sensor | 1 | https://amzn.to/35QzwcT |
| 3 | Breadboard | Solderless Breadboard MIni | 1 | https://amzn.to/3n33uRT |
| 4 | Jumper Wires | Connecting Wires | 4 | https://amzn.to/2JWSR44 |
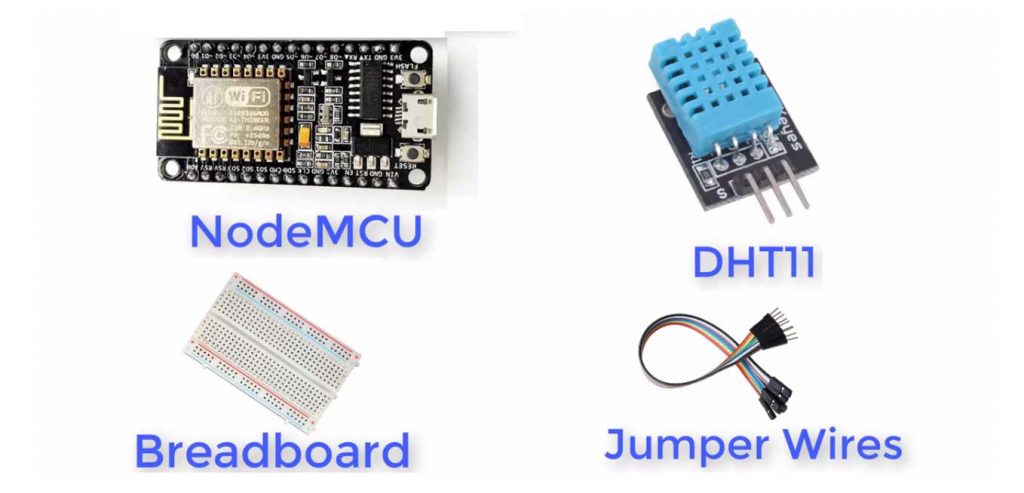
DHT11 Temperature & Humidity Sensor:
The DHT11 is a primary, ultra-low-cost digital temperature, and humidity sensor. To measure the surrounding air DHT11 uses a capacitive humidity sensor and a thermistor. And then spits out a digital signal on the data pin (no analog input pins needed).
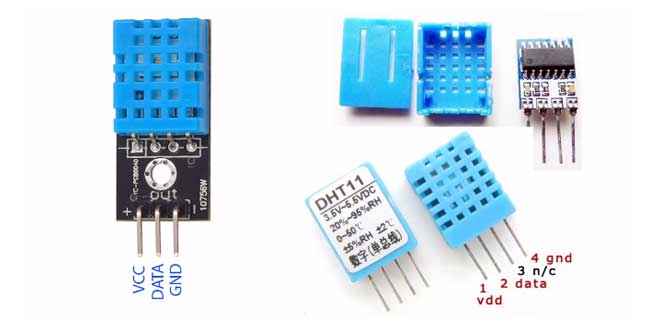
It’s quite simple to use but requires precise timing to capture data. The entire real drawback of this sensor is you can only get new data from it once every 2 seconds. So when using the DHT library, sensor readings are up to 2 seconds old.
Circuit Diagram & Connection:
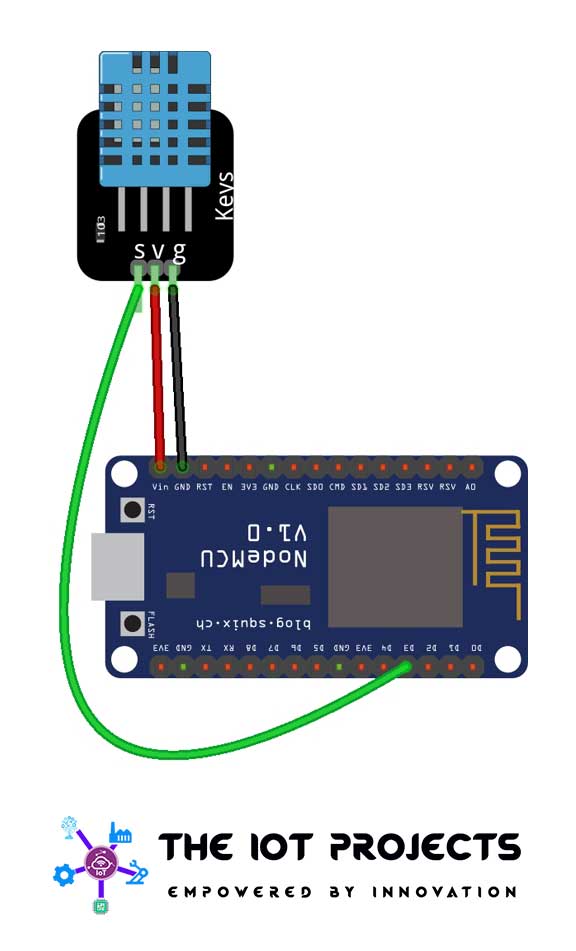
The wiring of DHT11 sensor with NodeMCU is very simple. You can follow below schematic diagram to assemble the circuit.
Setting ThingSpeak & Getting API Key:
- Go to https://thingspeak.com/ and set up an account if you do not have one. Login to your account.
- Create a new channel by clicking on the button. Enter the basic details of the channel. Then Scroll down and save the channel. You can follow the video guide below.
- Then go to API keys, copy and paste this key in a separate file. You will require it again while programming.
Source Code/Program:
We have provided the program code for DHT11 Temperature and Humidity Monitor with NodeMCU on ThingSpeak below.
But, before that make sure you have the DHT library and ESP8266 Library are installed. If not, install them from the library manager on Arduino IDE.
#include <DHT.h>  // Including library for dht

#include <ESP8266WiFi.h>

String apiKey = "xxxxxxxxxxx";     //  Enter your Write API key from ThingSpeak

const char *ssid =  "xxxxxxxxxx";     // replace with your wifi ssid and wpa2 key
const char *pass =  "YYYYY";
const char* server = "api.thingspeak.com";

#define DHTPIN 0          //pin where the dht11 is connected

DHT dht(DHTPIN, DHT11);

WiFiClient client;

void setup()
{
       Serial.begin(115200);
       delay(10);
       dht.begin();

       Serial.println("Connecting to ");
       Serial.println(ssid);


       WiFi.begin(ssid, pass);

      while (WiFi.status() != WL_CONNECTED)
     {
            delay(500);
            Serial.print(".");
     }
      Serial.println("");
      Serial.println("WiFi connected");

}

void loop()
{

      float h = dht.readHumidity();
      float t = dht.readTemperature();

              if (isnan(h) || isnan(t))
                 {
                     Serial.println("Failed to read from DHT sensor!");
                      return;
                 }

                         if (client.connect(server,80))   //   "184.106.153.149" or api.thingspeak.com
                      {

                             String postStr = apiKey;
                             postStr +="&field1=";
                             postStr += String(t);
                             postStr +="&field2=";
                             postStr += String(h);
                             postStr += "rnrn";

                             client.print("POST /update HTTP/1.1n");
                             client.print("Host: api.thingspeak.comn");
                             client.print("Connection: closen");
                             client.print("X-THINGSPEAKAPIKEY: "+apiKey+"n");
                             client.print("Content-Type: application/x-www-form-urlencodedn");
                             client.print("Content-Length: ");
                             client.print(postStr.length());
                             client.print("nn");
                             client.print(postStr);

                             Serial.print("Temperature: ");
                             Serial.print(t);
                             Serial.print(" degrees Celcius, Humidity: ");
                             Serial.print(h);
                             Serial.println("%. Send to Thingspeak.");
                        }
          client.stop();

          Serial.println("Waiting...");

  // thingspeak needs minimum 15 sec delay between updates
  delay(1000);
}- Copy this program and paste it on Arduino IDE.
- Download the DHT11/DHT22 library from GitHub and include it to your library manager.
- Select the NodeMCU ESP-12E board from the board manager.
- Paste your API Key from ThingSpeak, which you created earlier.
- Edit the program to change the Wi-Fi SSID and password with your own.
- Compile the code and upload it to the NodeMCU board
Monitor Temperature & Humidity Data on ThingSpeak
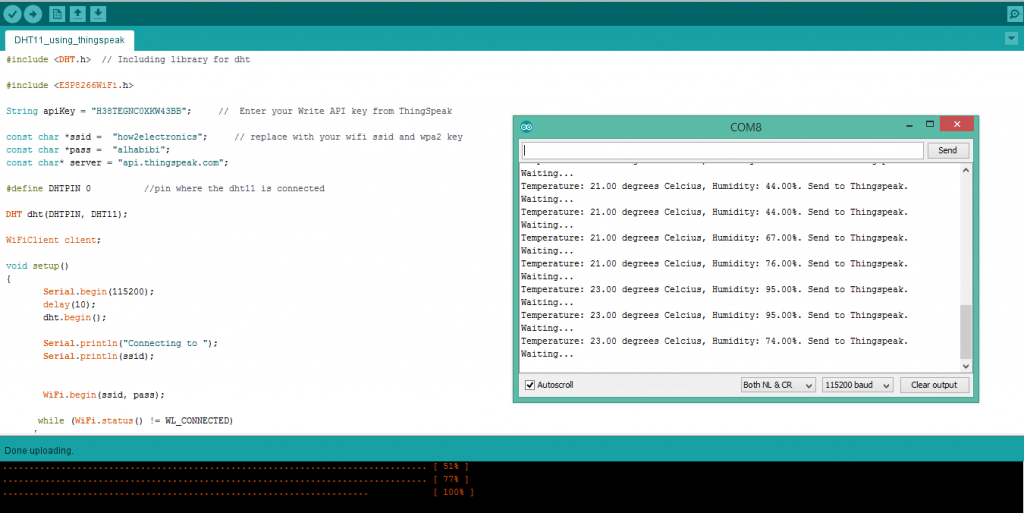
After successful upload of a program code. Open the Serial Monitor and you should be able to see the Temperature and Humidity data sent to the ThingSpeak IoT server.
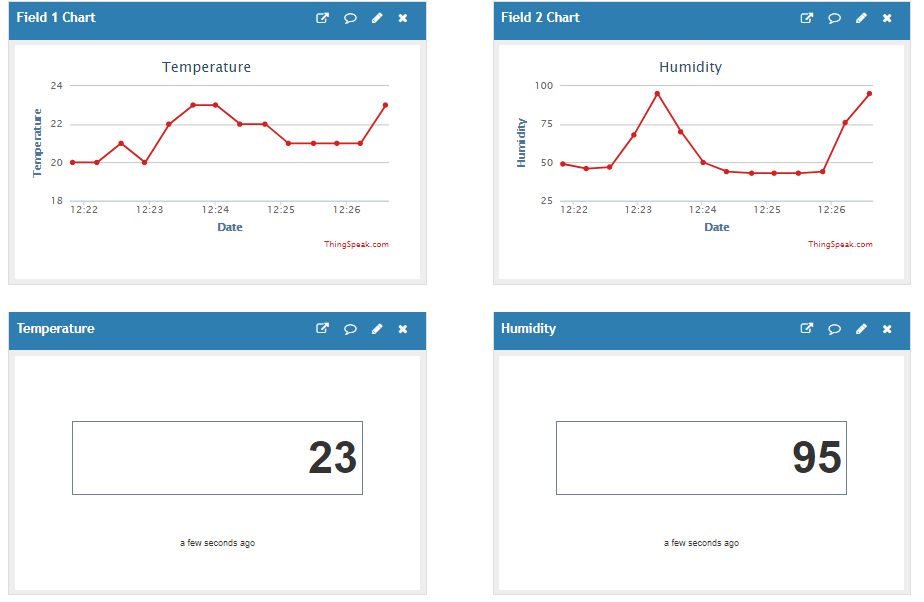
Similarly, on the Thingspeak Private View, you can see the Temperature and Humidity log data.
Conclusion
So, I hope you have learned to monitor DHT11 Temperature and Humidity data with NodeMCU on the ThingSpeak server. If you have any doubts and queries then, do let me know in the comment section below:
Recommended Readings

لم أتعلم شيء سوى التركيب
It took me a whole day. I have newer version of NodeMCU- ESP32 (DevkitV1). It has CP2102 chip.
The firs thing is that don’t connect sensor to node while it is uploading program.
Sensor is conected to 3V3, GND and D2.
My working code is:
#include
#include
#include “DHT.h”
// WiFi and ThingSpeak settings
const char* ssid = “YOUR_WIFI_SSID”;
const char* password = “YOUR_WIFI_PASSWORD”;
const String server = “http://api.thingspeak.com/update”;
const String apiKey = “YOUR_THINGSPEAK_API_KEY”;
// DHT11 sensor settings
#define DHTPIN 2 // Pin where the DHT sensor is connected
#define DHTTYPE DHT11 // DHT type (DHT11)
DHT dht(DHTPIN, DHTTYPE);
void setup() {
Serial.begin(115200);
WiFi.begin(ssid, password);
// Wait for the WiFi connection
while (WiFi.status() != WL_CONNECTED) {
delay(1000);
Serial.println(“Connecting to WiFi…”);
}
Serial.println(“Connected to WiFi.”);
dht.begin();
}
void loop() {
// Read temperature and humidity
float h = dht.readHumidity();
float t = dht.readTemperature();
// Check if data is correctly read
if (isnan(h) || isnan(t)) {
Serial.println(“Failed to read from sensor!”);
return;
}
Serial.print(“Temperature: “);
Serial.print(t);
Serial.print(“°C, Humidity: “);
Serial.print(h);
Serial.println(“%”);
// Send data to ThingSpeak
if(WiFi.status() == WL_CONNECTED){
HTTPClient http;
String url = server + “?api_key=” + apiKey + “&field1=” + String(t) + “&field2=” + String(h);
http.begin(url);
int httpResponseCode = http.GET();
if(httpResponseCode > 0){
Serial.print(“HTTP Response code: “);
Serial.println(httpResponseCode);
} else {
Serial.print(“Failed to send data. HTTP Response code: “);
Serial.println(httpResponseCode);
}
http.end(); // Close connection
} else {
Serial.println(“WiFi not connected.”);
}
// Wait 90 seconds before the next reading and sending
delay(90000);
}