IoT Based Pulse Oximeter Using ESP8266 & Blynk
ESP8266 based Pulse Oximeter using Blynk BPM & SpO2
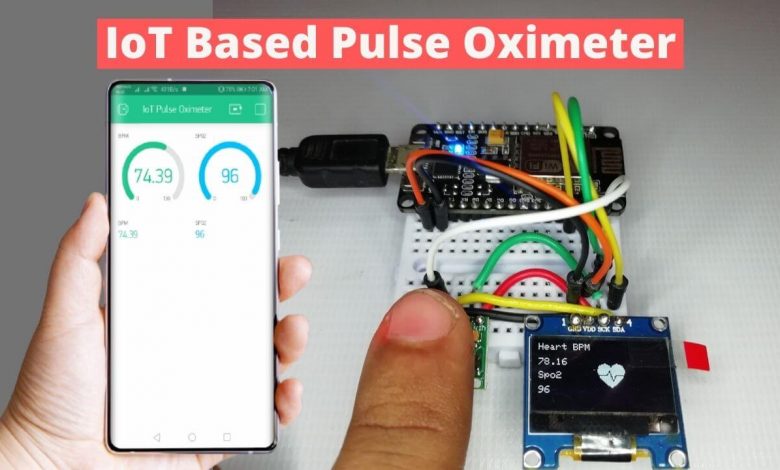
Overview: IoT Pulse Oximeter
In this project, you will learn to make IoT based Pulse Oximeter using NodeMCU ESP8266, MAX30100, and Blynk Application. In our previous project, we have made a compact Arduino-based Pulse oximeter in which Pulse rate and Sp02 level are shown in OLED Display. But in today’s project, we can monitor those values from anywhere in the world using the Blynk IoT cloud platform.
Components Required
To make this IoT based Pulse oximeter you will need the NodeMCU ESP8266 Development board. A 0.96″ SSD1306 OLED Display, MAX30100 Pulse oximeter sensor, few jumper cables, and breadboard. You can buy all these components from the Amazon link provided below.
| S.N | Components Name | Description | Quantity | |
|---|---|---|---|---|
| 1 | NodeMCU | ESP8266 12E Board | 1 | https://amzn.to/3mTuL95 |
| 2 | MAX30100 Oximeter Sensor | MAX30100 Heart Rate Oximeter Sensor Arduino Module | 1 | https://amzn.to/3hdjkt2 |
| 3 | OLED Display | 0.96" I2C OLED Display | 1 | https://amzn.to/32WRubSv |
| 4 | Jumper Wires | Jumper Cables breadboard friendly | 20 | https://amzn.to/3vw9ZAt |
| 5 | Breadboard | Mini Breadboard | 1 | https://amzn.to/2NP2UKL |
Working of MAX30100 Pulse Oximeter Sensor
The sensor has two LEDs, one emitting red light, the other emitting infrared light. Infrared light is required for pulse rate. But, Both red light and infrared light are required for measuring Sp02 levels in the blood.
When the heart pumps the blood, the oxygen level is increased because there is more blood. But, when the heart rests, there is a decrease in oxygenated blood. Hence, the pulse rate is determined by getting the time between the rise and fall of oxygenated blood.
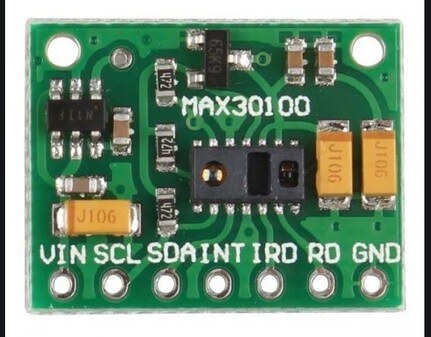
The oxygenated blood absorbs more infrared light and passes more red light. But, deoxygenated blood absorbs red light and passes more infrared light. Basically, the MAX30100 sensor reads the absorption levels for both light sources and stores them in a buffer that can be read via I2C pins.
Interfacing MAX30100 & OLED Display with ESP8266
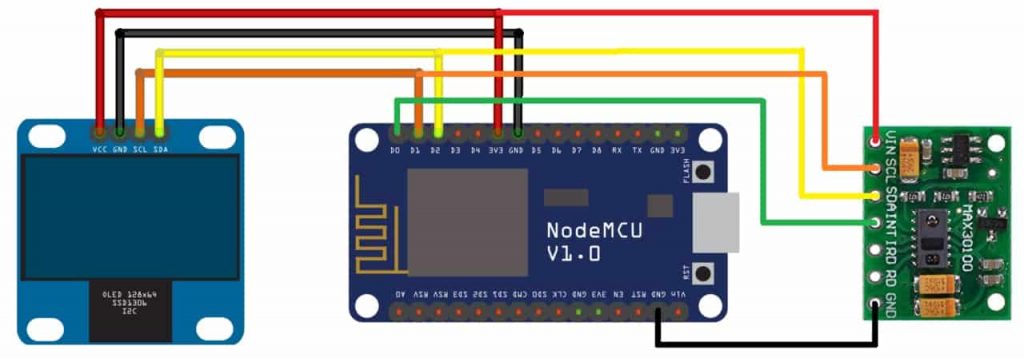
The Circuit assembly for this IoT Pulse oximeter is very simple. Both OLED display and MAX30100 Oximeter Sensor works with the I2C bus. So, Interface the I2C pins (SCL &SDA) of both modules with D1 and D2 pins of NodeMCU. Connect the INT pin of the MAX30100 oximeter sensor to the NodeMCU D0 pin. Similarly, provide 3.3V power to the VCC and Ground the GND pin of both sensors. Basically, you can follow the circuit diagram to make your connections.
PCB Designing for IoT Pulse Oximeter
The PCB for IoT Based Pulse Oximeter has been designed in PCB making tool. Here, you can see the View of the PCB.
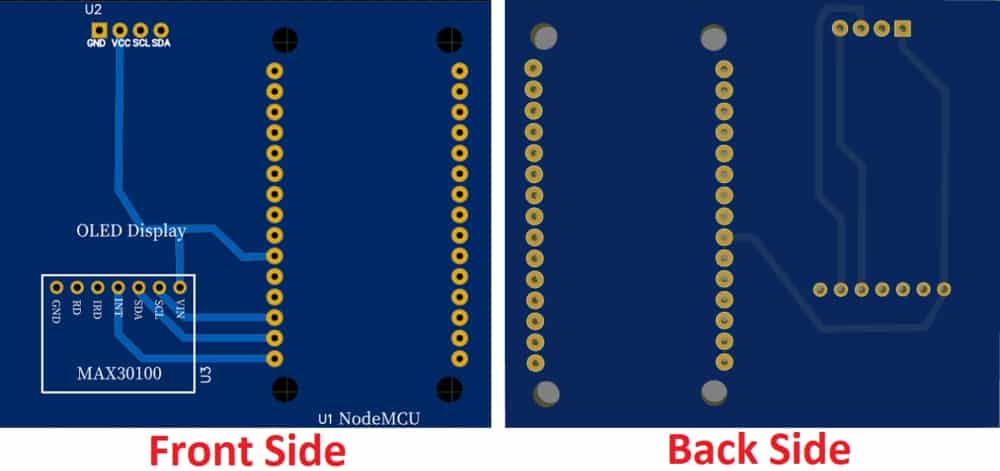
The Gerber file for the PCB is given below. You can download the Gerber file and order the PCB online from PCBWay.
PCB Ordering & Assembly
Now you can visit https://www.PCBWay.com/ and order the PCB. It is one of the biggest PCB manufacturer companies in China. They offer very good quality PCB at a reasonable price.

So after a week you will get the PCB from PCBWay. The PCB quality is good and excellent.
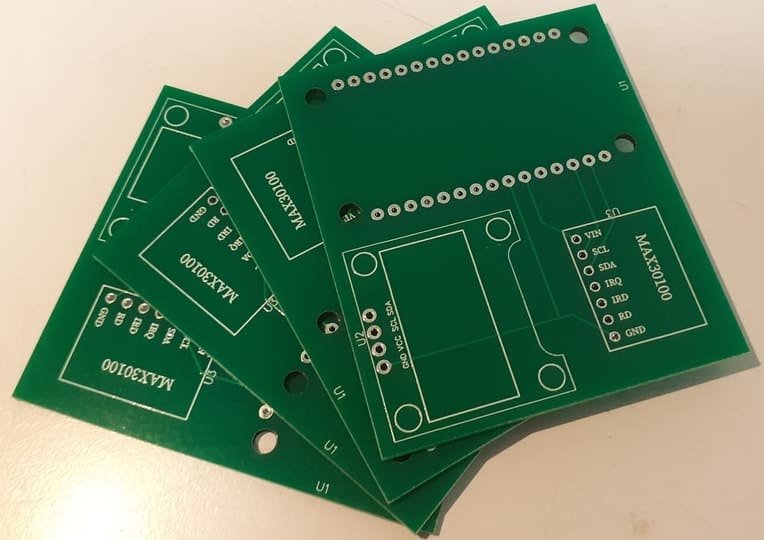
Now, you can solder all the necessary components as per circuit diagram.
Setting up Blynk Application for IoT Pulse Oximeter
Now download this blink application from the play store/App store available for both Android and iOS. Sign up to the Blynk IoT cloud using your email address and password.
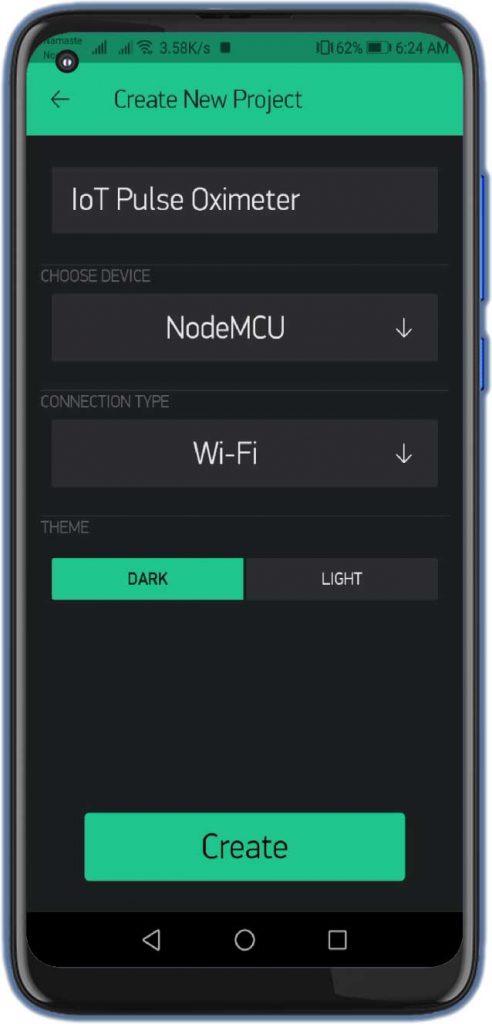
Now, click on the new project give your project a name. I am giving the “IoT pulse oximeter” select the NodeMCU board and then set the connection type as WiFi. Finally, click on create button.
The Blynk Authentication token will be sent to your email address. We will need it later on programming.
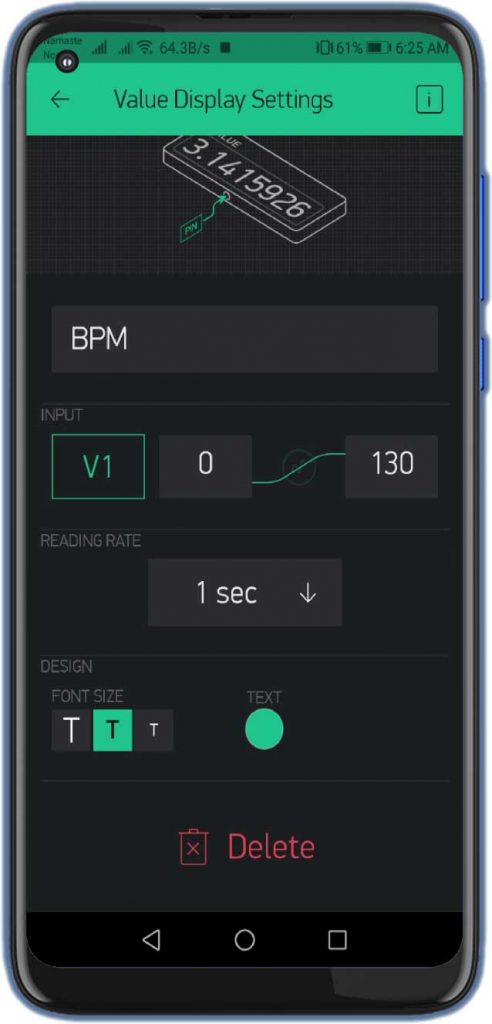
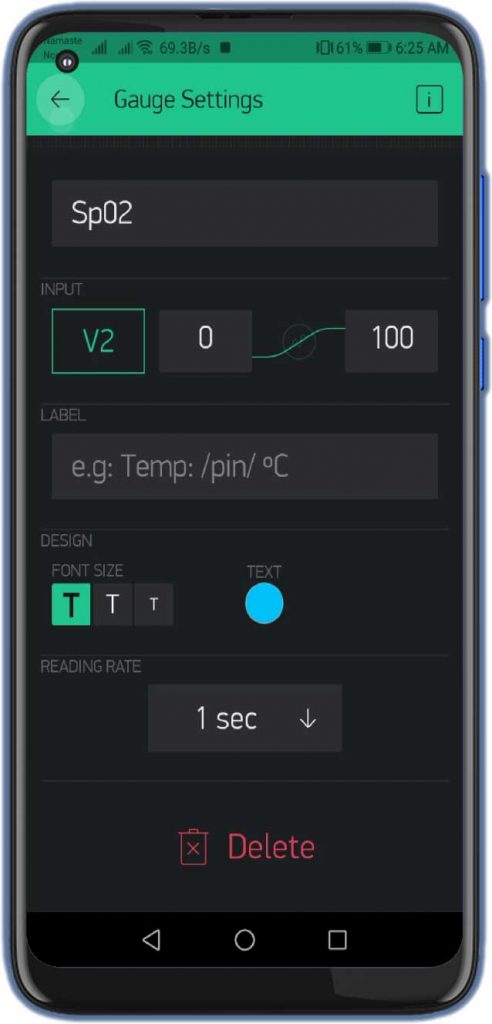
Tap on the plus (+) icon on your main screen and add two gauges then we will add two value display widgets.
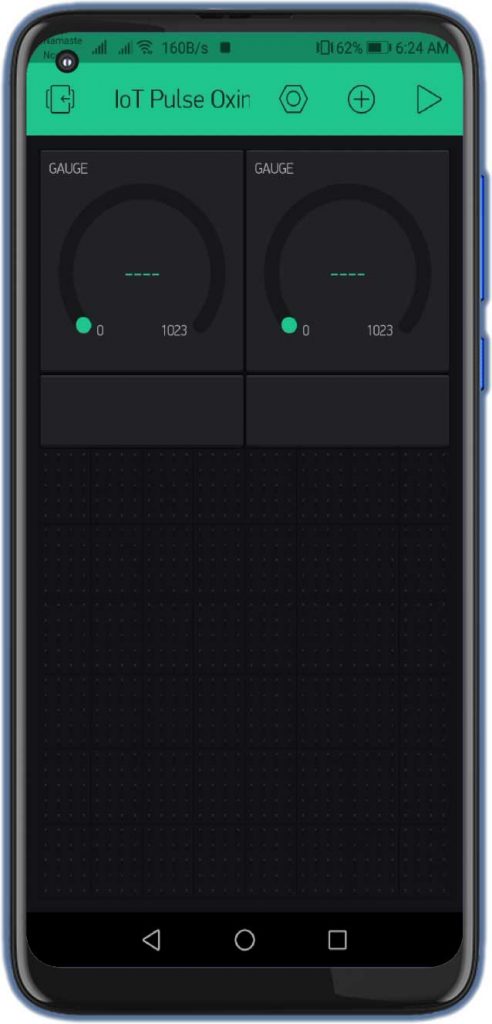
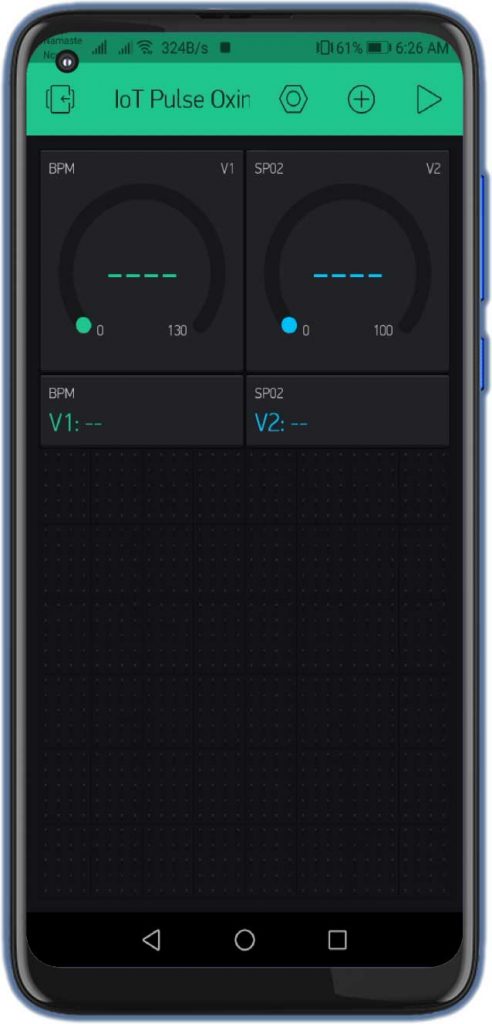
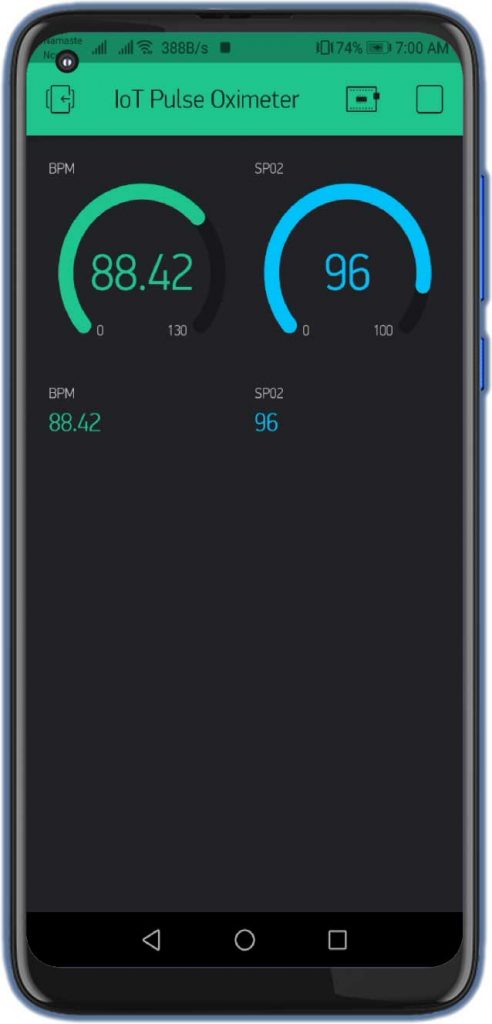
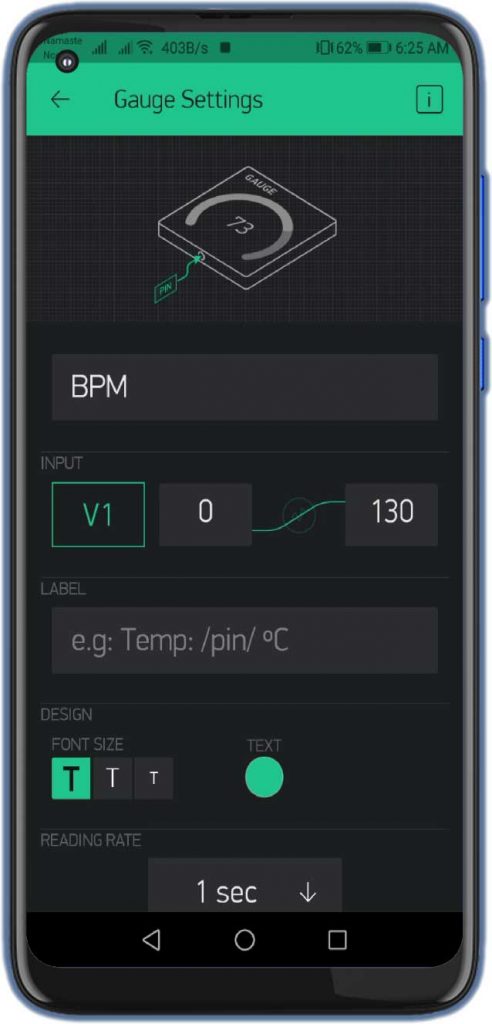
One will show you the BPM values and others will show you the oxygen level (Sp02). For BPM We’ll select the virtual pin V1 and we’ll set the value from 0 to 130 you can also set the colors for this gauge. Now we’ll set the Value Display. we’ll add the same values in the value display also because they both will act the same.
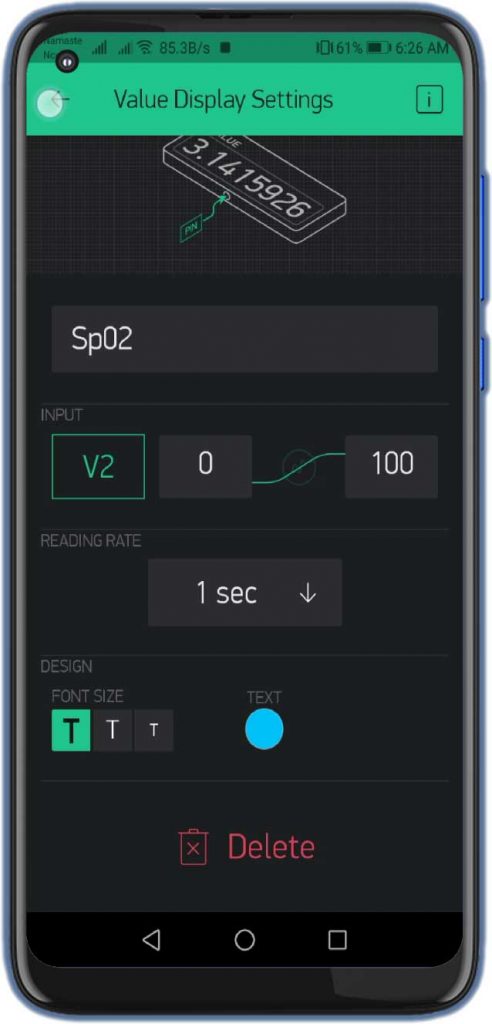
Now we’ll do for the oxygen level. we’ll select the virtual V2 pin and we’ll select the values from 0 to 100 give it some color I’m giving blue and we’ll set the one-second refresh rate. we will do the same for value display settings with the same pin that is V2 same values 0 to 100 & one-second refresh rate and color.
That’s it with the application setup for IoT Based Pulse Oximeter Using ESP8266 & Blynk. Your final app look like below screenshot.
Program Code: IoT Pulse Oximeter
Once we complete the hardware connection and Blynk App configuration. We need to upload the IoT Pulse Oximeter Source code to NodeMCU ESP8266 Board. Before uploading the code we need to install few libraries for code compilation. Download the library files from below:
//IoT Based Pulse Heart Rate BPM and Oxygen SpO2 Monitor

#include <Wire.h>
#include "MAX30100_PulseOximeter.h"
#define BLYNK_PRINT Serial
#include <Blynk.h>
#include <ESP8266WiFi.h>
#include <BlynkSimpleEsp8266.h>
#include "Adafruit_GFX.h"
#include "OakOLED.h"

#define REPORTING_PERIOD_MS 1000
OakOLED oled;

char auth[] = "xxxxx-xxxx-xxx";             // Authentication Token Sent by Blynk
char ssid[] = "xxxxx-xxxx-xxx";        //WiFi SSID
char pass[] = "xxxxx-xxxx-xxx";        //WiFi Password

// Connections : SCL PIN - D1 , SDA PIN - D2 , INT PIN - D0
PulseOximeter pox;

float BPM, SpO2;
uint32_t tsLastReport = 0;

const unsigned char bitmap [] PROGMEM =
{
  0x00, 0x00, 0x00, 0x00, 0x01, 0x80, 0x18, 0x00, 0x0f, 0xe0, 0x7f, 0x00, 0x3f, 0xf9, 0xff, 0xc0,
  0x7f, 0xf9, 0xff, 0xc0, 0x7f, 0xff, 0xff, 0xe0, 0x7f, 0xff, 0xff, 0xe0, 0xff, 0xff, 0xff, 0xf0,
  0xff, 0xf7, 0xff, 0xf0, 0xff, 0xe7, 0xff, 0xf0, 0xff, 0xe7, 0xff, 0xf0, 0x7f, 0xdb, 0xff, 0xe0,
  0x7f, 0x9b, 0xff, 0xe0, 0x00, 0x3b, 0xc0, 0x00, 0x3f, 0xf9, 0x9f, 0xc0, 0x3f, 0xfd, 0xbf, 0xc0,
  0x1f, 0xfd, 0xbf, 0x80, 0x0f, 0xfd, 0x7f, 0x00, 0x07, 0xfe, 0x7e, 0x00, 0x03, 0xfe, 0xfc, 0x00,
  0x01, 0xff, 0xf8, 0x00, 0x00, 0xff, 0xf0, 0x00, 0x00, 0x7f, 0xe0, 0x00, 0x00, 0x3f, 0xc0, 0x00,
  0x00, 0x0f, 0x00, 0x00, 0x00, 0x06, 0x00, 0x00, 0x00, 0x00, 0x00, 0x00, 0x00, 0x00, 0x00, 0x00
};

void onBeatDetected()
{
  Serial.println("Beat Detected!");
  oled.drawBitmap( 60, 20, bitmap, 28, 28, 1);
  oled.display();
}

void setup()
{
  Serial.begin(115200);
  oled.begin();
  oled.clearDisplay();
  oled.setTextSize(1);
  oled.setTextColor(1);
  oled.setCursor(0, 0);

  oled.println("Initializing pulse oximeter..");
  oled.display();

  pinMode(16, OUTPUT);
  Blynk.begin(auth, ssid, pass);

  Serial.print("Initializing Pulse Oximeter..");

  if (!pox.begin())
  {
    Serial.println("FAILED");
    oled.clearDisplay();
    oled.setTextSize(1);
    oled.setTextColor(1);
    oled.setCursor(0, 0);
    oled.println("FAILED");
    oled.display();
    for (;;);
  }
  else
  {
    oled.clearDisplay();
    oled.setTextSize(1);
    oled.setTextColor(1);
    oled.setCursor(0, 0);
    oled.println("SUCCESS");
    oled.display();
    Serial.println("SUCCESS");
    pox.setOnBeatDetectedCallback(onBeatDetected);
  }

  // The default current for the IR LED is 50mA and it could be changed by uncommenting the following line.
  //pox.setIRLedCurrent(MAX30100_LED_CURR_7_6MA);

}

void loop()
{
  pox.update();
  Blynk.run();

  BPM = pox.getHeartRate();
  SpO2 = pox.getSpO2();
      if (millis() - tsLastReport > REPORTING_PERIOD_MS)
  {
    Serial.print("Heart rate:");
    Serial.print(BPM);
    Serial.print(" SpO2:");
    Serial.print(SpO2);
    Serial.println(" %");

    Blynk.virtualWrite(V1, BPM);
    Blynk.virtualWrite(V2, SpO2);

    oled.clearDisplay();
    oled.setTextSize(1);
    oled.setTextColor(1);
    oled.setCursor(0, 16);
    oled.println(pox.getHeartRate());

    oled.setTextSize(1);
    oled.setTextColor(1);
    oled.setCursor(0, 0);
    oled.println("Heart BPM");

    oled.setTextSize(1);
    oled.setTextColor(1);
    oled.setCursor(0, 30);
    oled.println("Spo2");

    oled.setTextSize(1);
    oled.setTextColor(1);
    oled.setCursor(0, 45);
    oled.println(pox.getSpO2());
    oled.display();

    tsLastReport = millis();
  }
}
Now connect your ESP8266 NodeMCU board with your computer. Copy the above source code. first, enter the authentication token sent to you by the blink while configuring the app. Now, enter your WiFi name and your WiFi password. Finally, select the board that is NodeMCU 12 E-board and select the COM port, and upload the code.
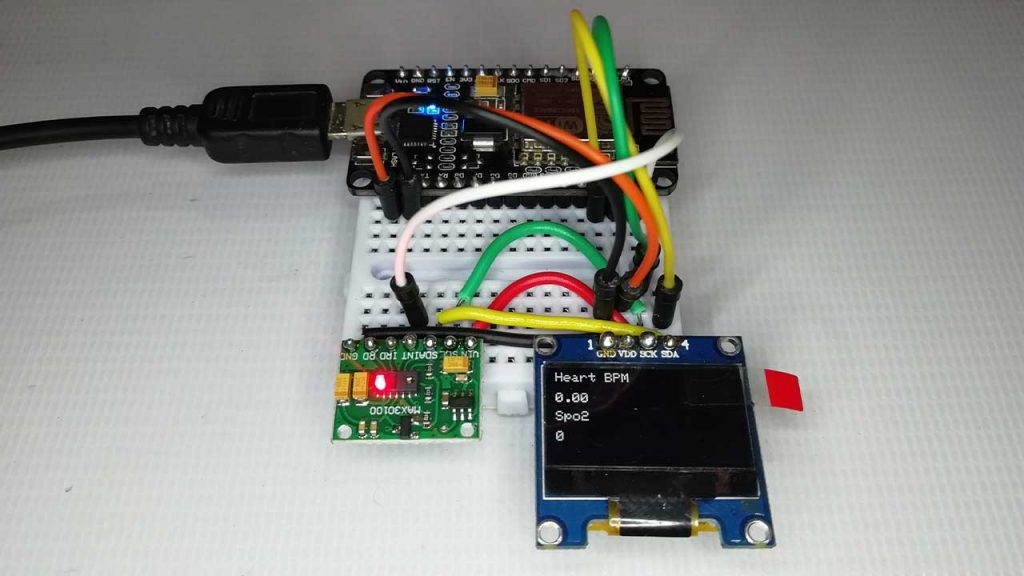
Testing IoT Pulse Oximeter
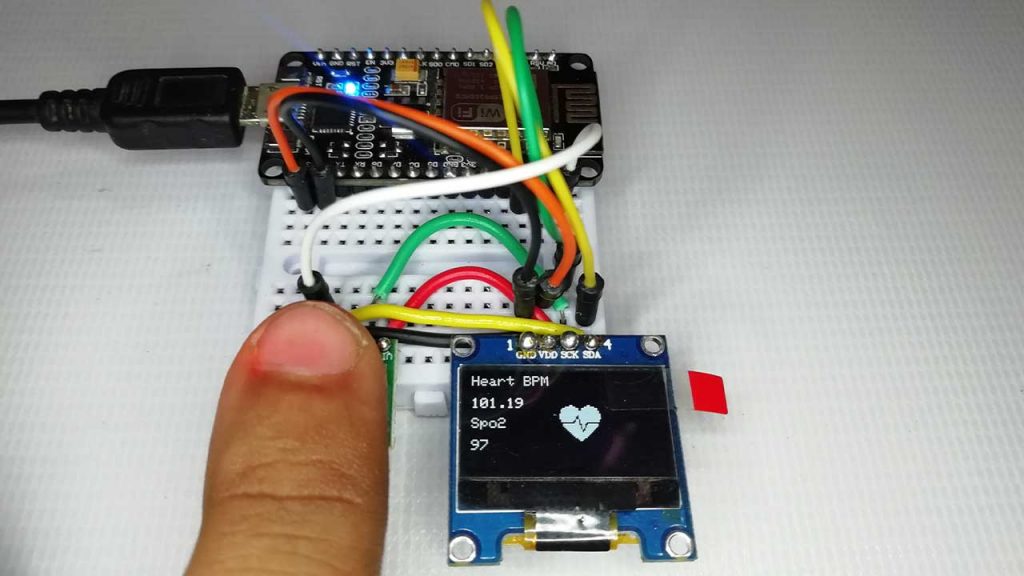
So now this project is ready. just place your finger on the sensor and it will display the values of your pulse rate and the oxygen level in your body. Similarly, you can view these values on display as well as on a smartphone using the blynk application. You can monitor BPM and Sp02 values from anywhere in the world using Blynk Cloud.
Video Tutorial & Guide
Conclusion
That’s all about IoT Based Pulse Oximeter Using ESP8266 & Blynk. So friends I hope you like this tutorial. Please share it with your friends. If you face any problem with this project feel free to comment down below.

Great project, but Blynk 2.0 is active, this project would be interesting updated.
while executing the project code it is showing fatal error in arduino uno….please tell how to resolve this .
yes pls update this