ESP8266 Monitor its Own Battery Level using IoT
IoT Based Battery Monitoring System using ESP8266
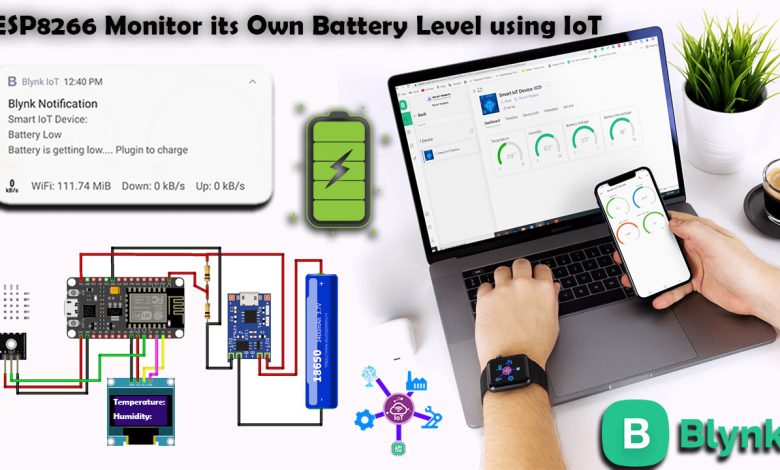
In this project, we will build an IoT based Projects in which ESP8266 Monitor its Own Battery Level using Blynk IoT Cloud. We can monitor the sensor data as well as battery charging/discharging status along with Battery Voltage & Percentage. So we can recharge it on time. This can be easily done using a voltage divider circuit and the analog input on the NodeMCU ESP8266 board.
- Overview: Monitor Battery Level using ESP8266 & Blynk IoT
- Components Required
- Circuit Diagram: ESP8266 Battery Level Monitoring
- Setting up Blynk IoT Dashboard
- Source Code/Program: ESP8266 Monitor its Own Battery Level using IoT
- Blynk IoT 2.0 Mobile application setup
- ESP8266 Monitor its Own Battery Level using Blynk IoT
Overview: Monitor Battery Level using ESP8266 & Blynk IoT
Here for the demonstration, we will build an IoT weather station using DHT22 Temperature & Humidity sensor, ESP8266 development board, and Blynk IoT Cloud for remote monitoring. The whole system is powered by a single 3.7V lithium-ion battery. This battery can power nodemcu boards for around 10 hours. We need to charge the battery again using the TP4056 charging module. But sometimes I forget to charge and the whole system is down. So, to overcome this problem I thought of adding a battery monitoring system to the same project.
In our earlier battery status monitoring system we can only monitor battery voltage and percentage. But now with the help of the Blynk IoT, we can directly notify the users remotely when the battery percentage is below a threshold value.
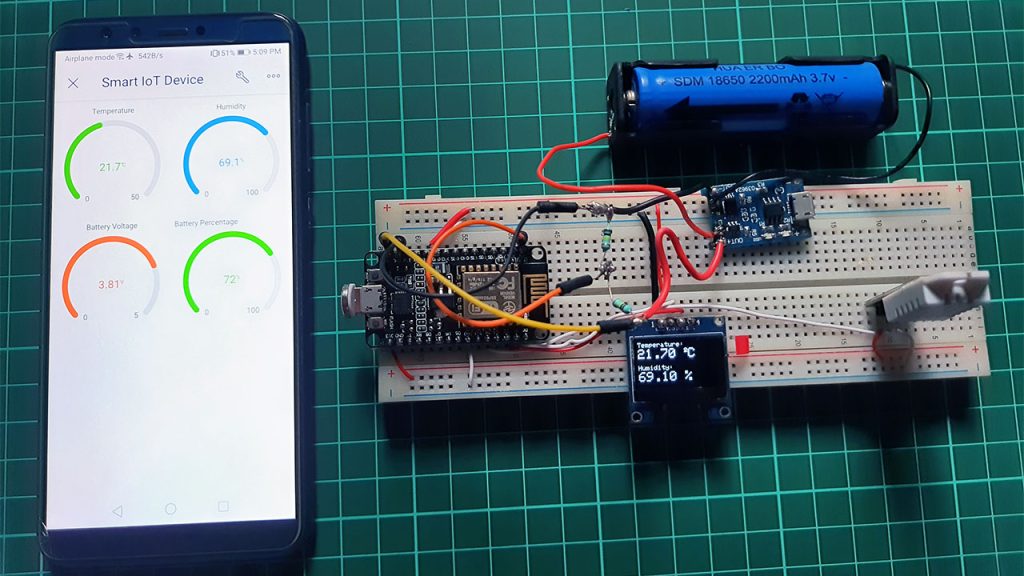
We can check the Temperature & Humidity sensor data along with the battery voltage and battery percentage in both the charging and discharging case on their smartphones or Computer Dashboard from anywhere in the world.
Components Required
You will need the following components for the IoT Based Weather & Battery Level Monitoring System Project. You can purchase all the components online from Amazon.
| S.N | Components Name | Quantity | |
|---|---|---|---|
| 1 | NodeMCU ESP8266 Development Board | 1 | https://amzn.to/3zRiok7 |
| 2 | DHT22 Temperature & Humidity Sensor | 1 | https://amzn.to/32VEw1X |
| 3 | TP4056 Charging Module | 1 | https://amzn.to/3yfP5Hp |
| 4 | 18650 Lithium Ion Battery | 1 | https://amzn.to/3iafIrL |
| 5 | Jumper cables | 6 | https://amzn.to/376GkDD |
| 6 | 100k resistor | 2 | https://amzn.to/3zML4dX |
*Please Note: These are affiliate links. I may make a commission if you buy the components through these links. I would appreciate your support in this way!
Lithium-Ion Batteries
A lithium-ion battery or Li-ion battery is a rechargeable battery. They are commonly used for portable electronics and IoT devices.
In a lithium-ion battery, ions move from the negative electrode through an electrolyte to the positive electrode during discharge, and back when charging. It uses an intercalated lithium compound at the positive electrode and graphite at the negative electrode. The batteries have a high energy density, and low self-discharge.
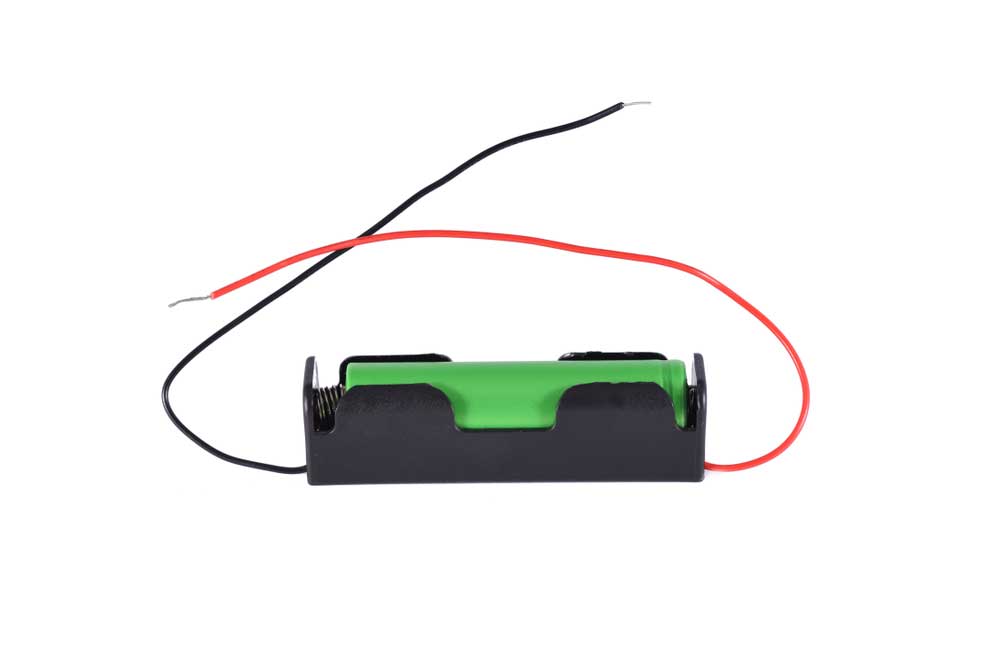
Nominal, Maximum & Cut-off Voltage
This type of Lithium-Ion battery has a Battery Management System Circuit for over-voltage protection, balanced charging, short-circuit protection, etc.
Most of the Lithium-Ion batteries have a nominal voltage of 3.7V. When the battery charges to full the maximum voltage is 4.2V. If you see the manufacturer’s datasheet then it is clearly mentioned that the cut-off voltage is 3V. It varies depending upon the battery type and applications. The battery I am using has a discharge cut-off voltage of 2.8V. You can also get some batteries with a cut-off voltage of 2.5V.
Circuit Diagram: ESP8266 Battery Level Monitoring
We will design a system to monitor DHT22 temperature & Humidity, battery voltage along with charging and discharging status. For the microcontroller, we use NodeMCU which has an ESP8266 wifi-enabled chip. You can also use a smaller board like the Wemos D1 Mini. This WiFi chip can connect to the WiFi network and uploads the data regularly to the server.
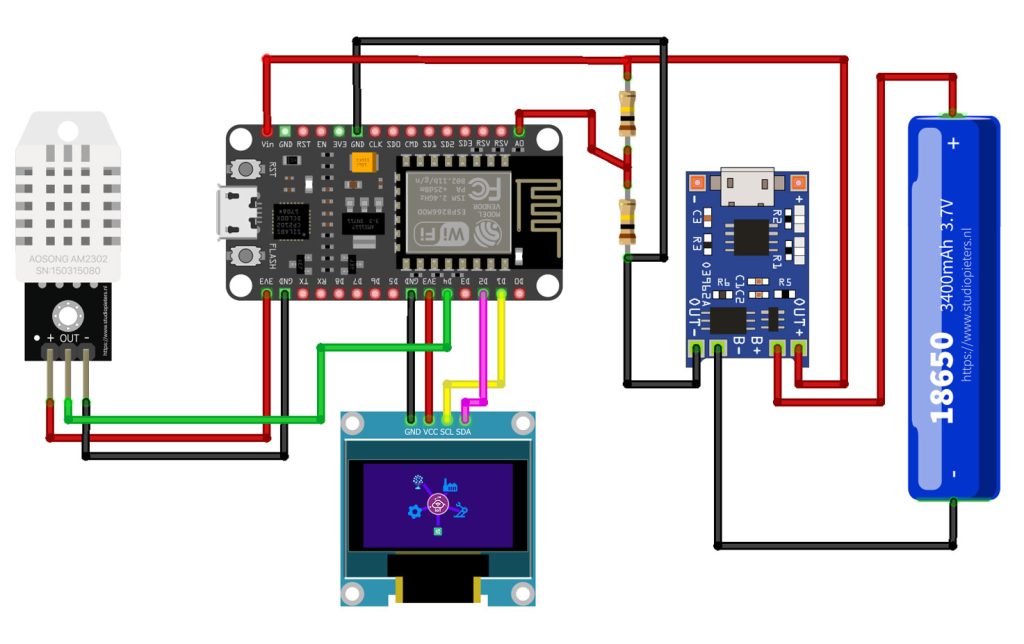
The Out pin of the DHT22 sensor is connected to the D4 pin of the NodeMCU. SCL and SDA pins are connected to D1 and D2 pins. Whereas VCC and GND of DHT22 sensor and OLED are connected to 3.3V and GND pins respectively.
You can use the TP4056 module to charge the battery as it is best suited for Battery Management Applications. The ESP8266 Chip can only support the input analog voltage of 3.3V. But Battery voltage goes up to 4.2V. Hence we have to form a voltage divider network to lower the input voltage.
Voltage Divider Network Calculations
The Battery Maximum voltage is 4.2V and the cut-off voltage is 2.8V. Anything lesser than 3.3V will be easily supported by ESP8266 Analog Pin.
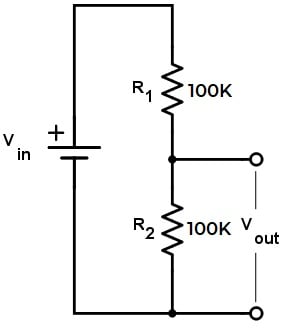
We have to first step down the upper voltage level. The source voltage is 4.2V and there is a pair of 100K resistors. This will give an output of 2.1V. Similarly, the minimum voltage is 2.8V as a cut-off voltage which steps down to 1.4V using the same voltage divider network. Hence, both the upper and lower voltage is supported by ESP8266 Analog Pin.
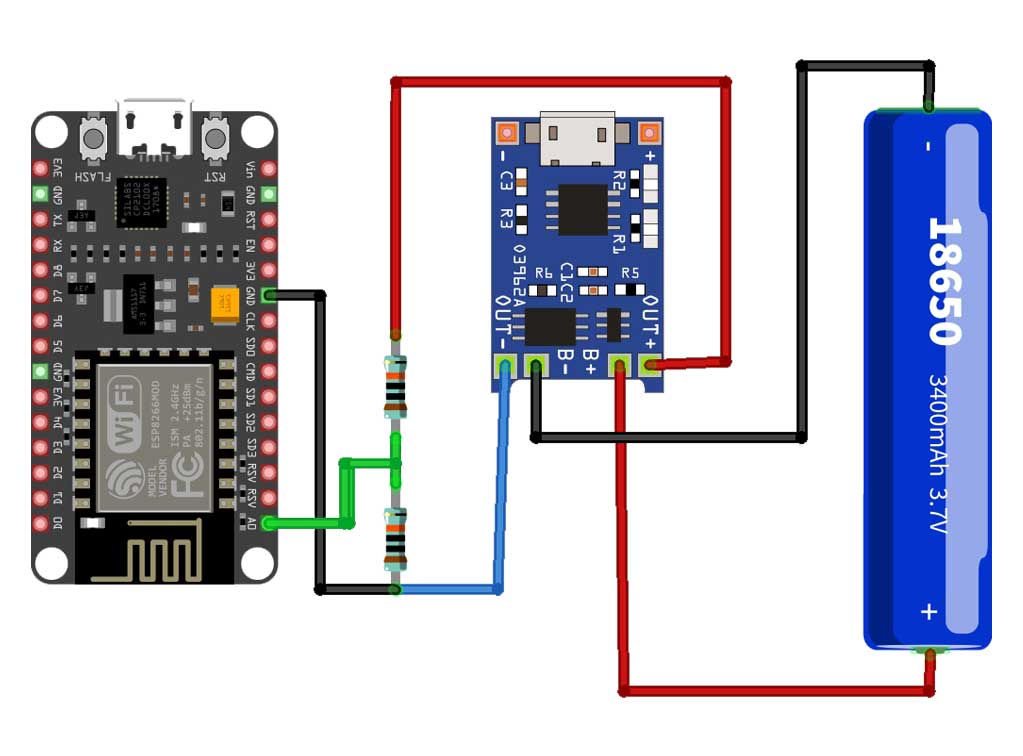
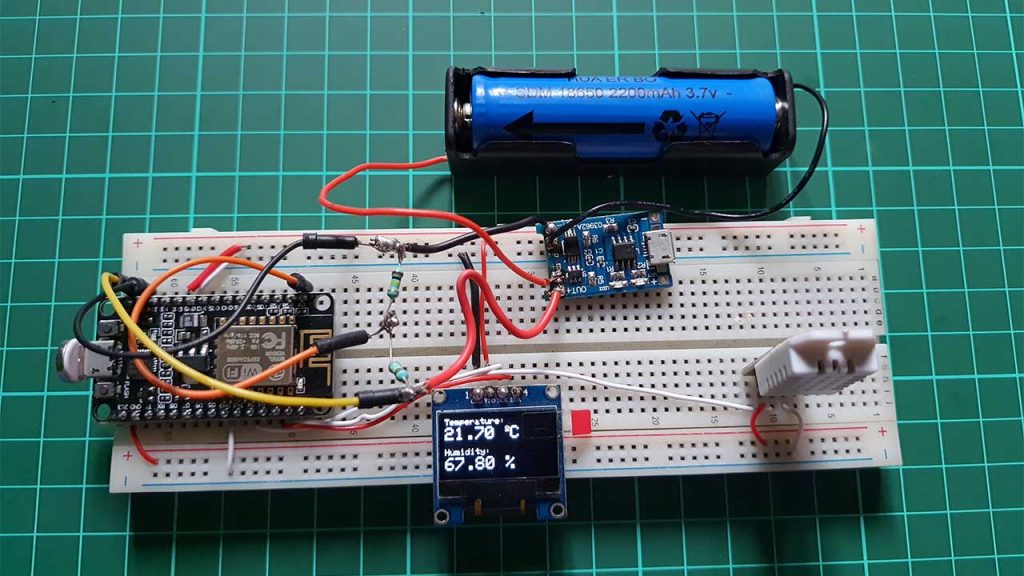
Here is a complete assembly of the project. This is the same connection as shown in the circuit diagram. For testing, you can use a Lithium-Ion Battery of any capacity. For example, I am using a Battery with a capacity of 2200mAh.
Project PCB Gerber File & PCB Ordering Online
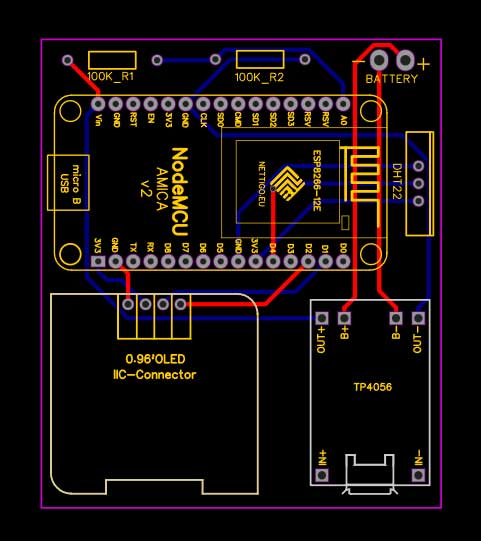
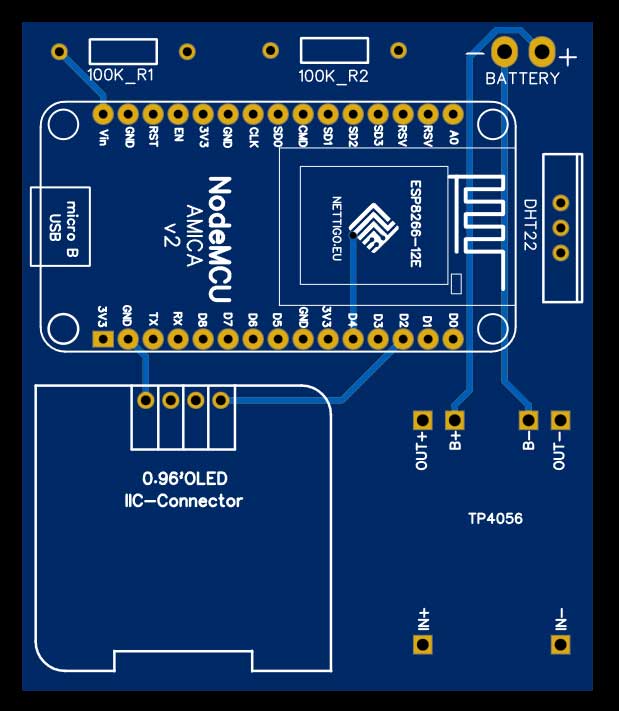
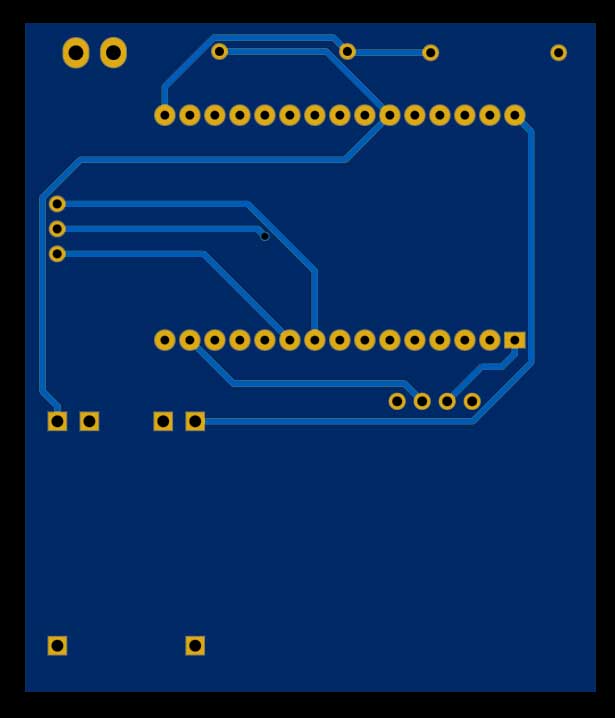
You can simply assemble the circuit on a breadboard. But To remove messy wiring and give a clean look, I designed a PCB prototype for this project. It is also helpful for troubleshooting without any errors. You can download the Gerber file of my PCB Design from the link attached below. The PCB looks like the image shown below.
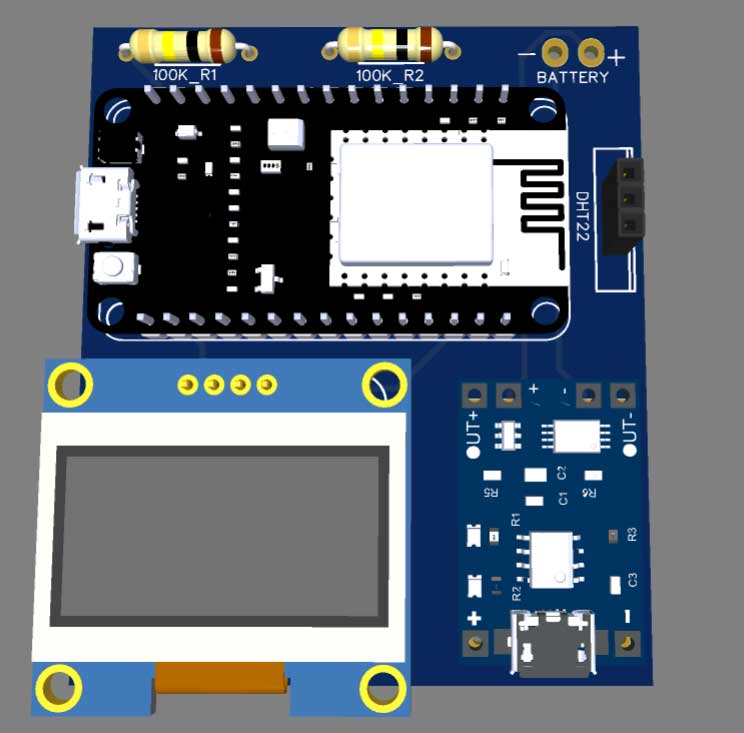
I provided the Gerber File for ESP8266 Monitor its Own Battery Level using IoT for battery-powered projects PCB below.
You can simply download the Gerber File and order your custom PCB from PCBWay

Visit the PCBWay official website by clicking here: https://www.PCBWay.com/. Simply upload your Gerber File to the Website and place an order. I prefer PCBWay for ordering custom PCBs. PCBWay is a place that brings manufacturers and customers together. They have more than a decade of experience in this field of fabrication, prototyping, and assembling PCBs. PCBWay have proved their focus to their customers’ needs in terms of cost-effectiveness, delivery, and quality. And this can be proved by their outstanding customer reviews.
Setting up Blynk IoT Dashboard
In order to monitor the sensor data and Battery Data on Blynk IoT Server, you first need to set up the Blynk IoT Cloud dashboard. To set up the Blynk Server, visit https://blynk.cloud/. Create an account or simply sign in if you created the account earlier.
Creating Blynk New template
A template is a project in which we can create a web and mobile dashboard for specific hardware. In our case, it’s an IoT Smart Device. For creating a project, first, you have to click on the New Template.
- Enter a template name. I am Giving it “Smart IoT ”.
- Select the hardware board (ESP8266).
- The connection type will be wifi.
- You can add a description of your project if required.
- Click on Done.
- Now the template is created.
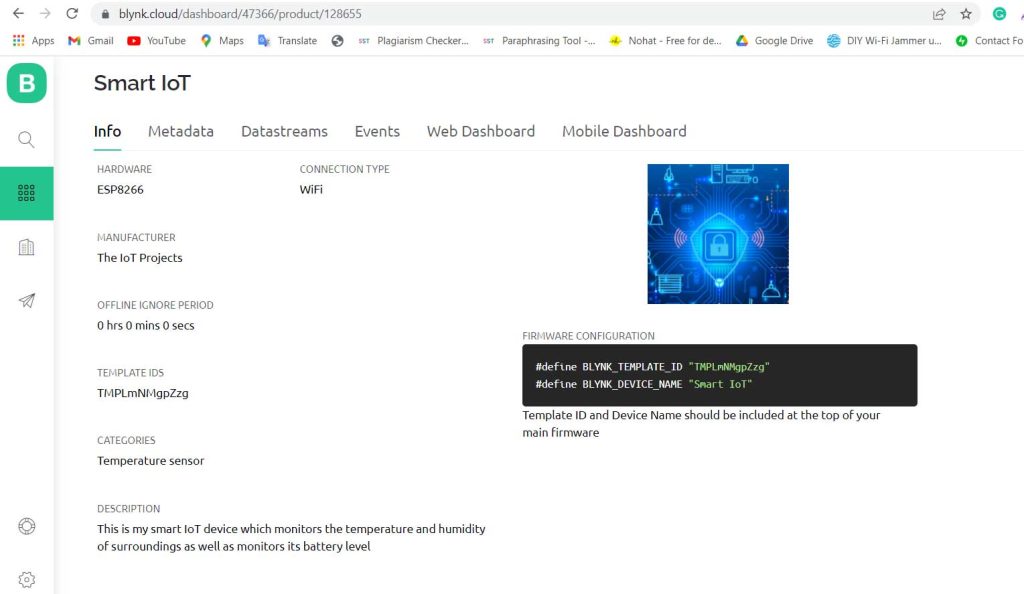
After that, you can choose a category according to your project. Don’t worry if you are not getting your category in this list you can choose others. I am selecting a temperature sensor.
Here are two important things that you should remember one is template id and another one is device name which is required in the time of programming.
Creating New Blynk Datastream
A data stream is like a pipeline or channel. The data will be sent or received through these data channels.
In a single project or template, there can be multiple DataStream. In our project, we are receiving four data: Temperature, Humidity, Battery Voltage, and Battery Percentage. So in this project, we created Four DataStream.
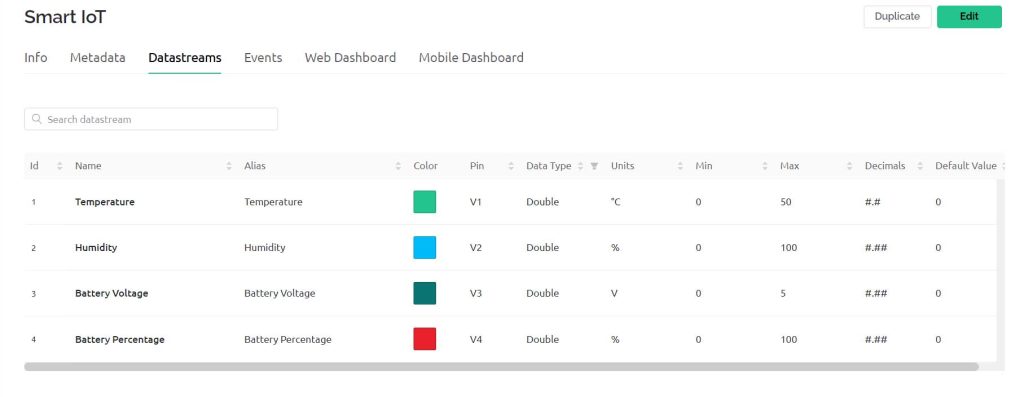
Click on the new DataStream. Now choose a virtual pin. Now you have to give a name for every data stream. After that, you have to choose virtual pins for DataStream. For Temperature, Humidity, Battery Voltage, and Battery Percentage I choose virtual pins V1, V2, V3, and V4 respectively.
I choose the datatype as Double. You also need to set units for DataStream as per the variable. I choose a degree centigrade for temperature. The percentage for Humidity & Battery Percent then Volt for battery voltage. Also, set the minimum and maximum values for the data streams.
Creating Events on Blynk for Notification Alerts
Events are used for notification alert systems. So, here I am creating events to monitor Battery Percentage. If the battery percent reaches below the threshold value an event is triggered and a notification is sent to your mobile phone.
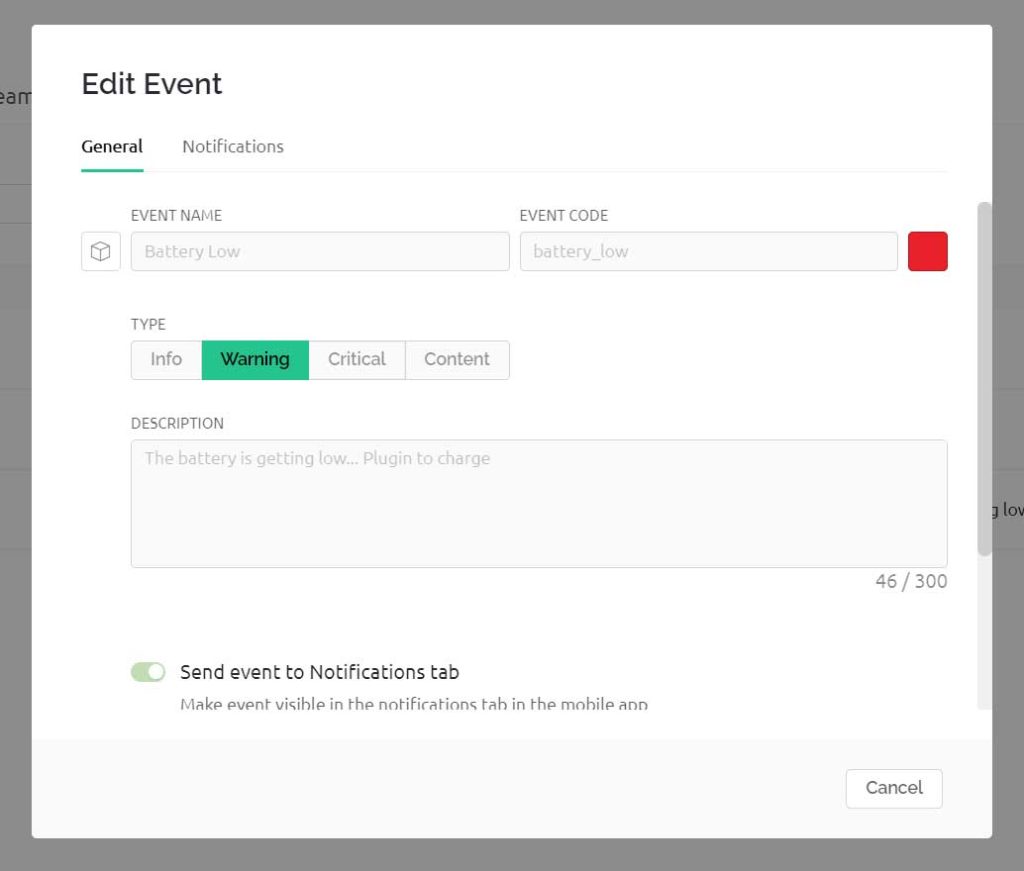
So to create an event:
- Click on the add event.
- Enter the event Name. For me it’s “Battery Low“
- Choose your event color. I am selecting Red.
- Select the type of event. I am choosing Critical.
- Enter the description of your event.
- Now go to the notification tab then enable notification.
- then select push notification to device owner every 1 minute.
- Click on save.
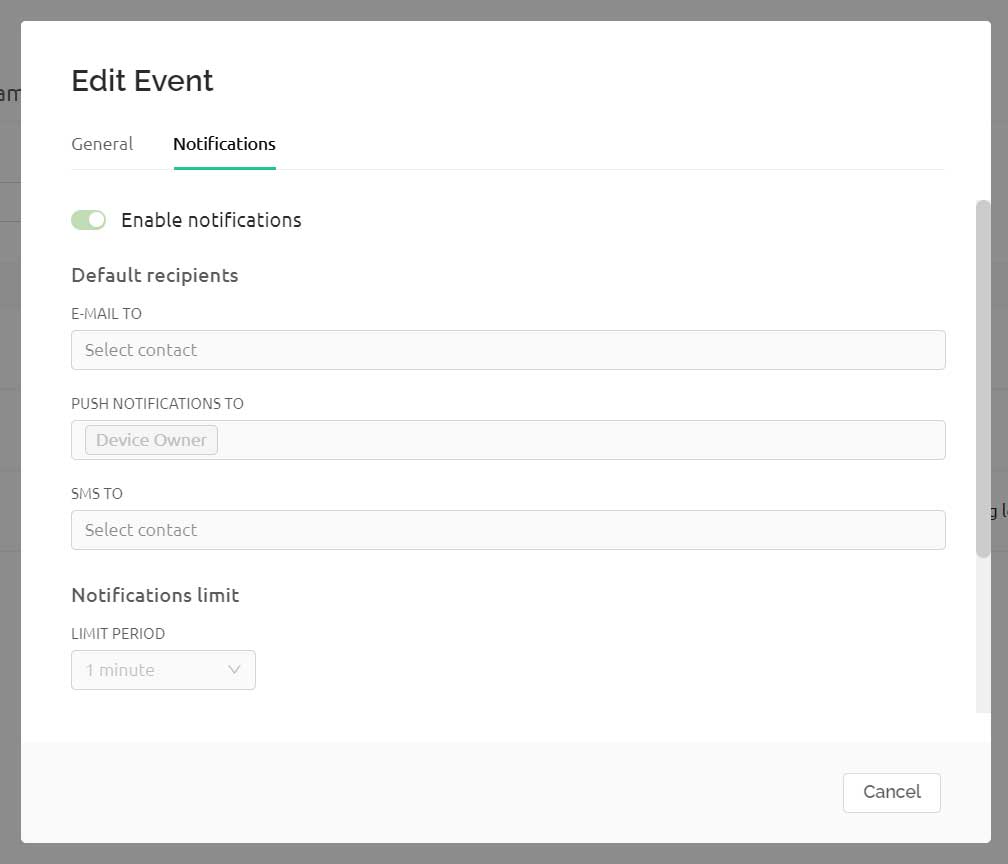
So, we have successfully created our first events.
Design the Blynk 2.0 Web Dashboard
After that move on to the web dashboard. In this section, you will be able to see some widgets for making your cool-looking web dashboard. But all the widgets are not free. You will get it all if you purchase their upgrade plan.
For showing the value of Temperature, Humidity, Battery Percentage, and Battery Voltage I have selected four Gauges. But, you can choose any widget according to your project.
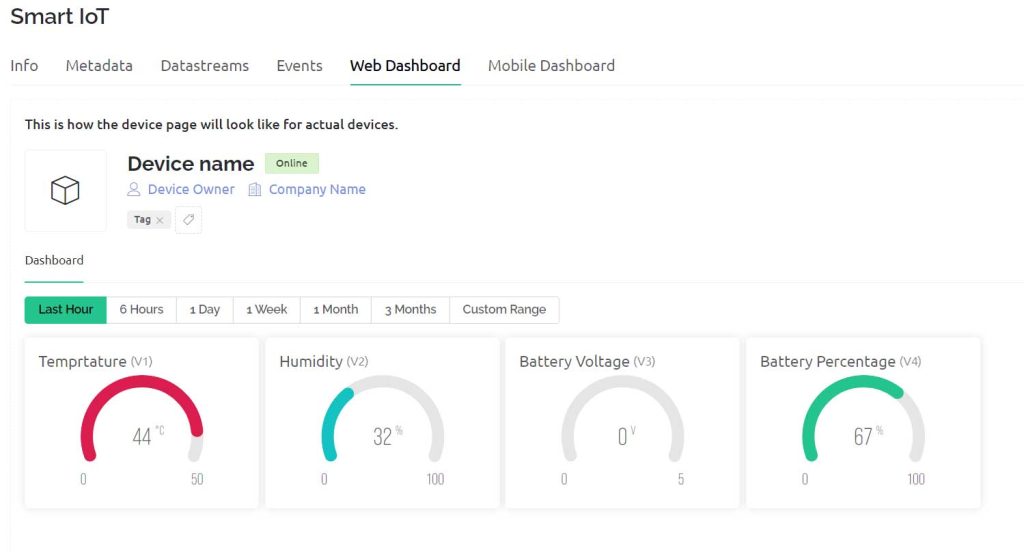
Now change the settings of the label. In settings, you have to give a name to the widget and you have to choose the data stream with which the widget will be connected. After setting up the widgets click on the save button to save the entire project. That’s all for setting up the Blynk IoT dashboard. We will set up the Blynk Mobile dashboard after uploading the program code.
Source Code/Program: ESP8266 Monitor its Own Battery Level using IoT
Here is the source code for the IoT Based Weather and Battery Status Monitoring System using ESP8266. But, First, install the required libraries in your Arduino IDE.
Now open your Arduino IDE. Go to File >> Examples >> Blynk >> Blynk.Edgent >> ESP8266_Edgent. Just copy the code provided below and paste it into your Arduino IDE ESP8266_Edgent page. Do not make any changes to other files. You just need to replace your Blynk Template ID and Blynk Device Name which is available in the blynk template. Simply after making necessary changes upload the code to NodeMCU ESP8266 12E Board.
/*
  -----------------------
  ESP8266 Monitor its Own Battery Level using IoT
  -----------------------
  Website: https://iotprojectsideas.com/
  -----------------------

*/

// Fill-in information from your Blynk Template here
#define BLYNK_TEMPLATE_ID "TMPxxx-xxx-xxx"
#define BLYNK_DEVICE_NAME "Smart IoT"

#define BLYNK_FIRMWARE_VERSION        "0.1.0"

#define BLYNK_PRINT Serial
//#define BLYNK_DEBUG

#define APP_DEBUG

// Uncomment your board, or configure a custom board in Settings.h
//#define USE_SPARKFUN_BLYNK_BOARD
#define USE_NODE_MCU_BOARD
//#define USE_WITTY_CLOUD_BOARD
//#define USE_WEMOS_D1_MINI

#include "BlynkEdgent.h"
#include <DHT.h>
#include <Adafruit_GFX.h>
#include <Adafruit_SSD1306.h>

#define SCREEN_WIDTH 128    // OLED display width, in pixels
#define SCREEN_HEIGHT 64    // OLED display height, in pixels
#define OLED_RESET -1       // Reset pin # (or -1 if sharing Arduino reset pin)

#define DHTTYPE DHT22     // DHT 22
#define DHTPIN D4 //DHT22 Pin D4(GPIO 2)


DHT dht(DHTPIN, DHTTYPE);
Adafruit_SSD1306 display(SCREEN_WIDTH, SCREEN_HEIGHT, &Wire, OLED_RESET);

float voltage;
int bat_percentage;
int analogInPin  = A0;    // Analog input pin
int sensorValue;
float calibration = 0.40; // Check Battery voltage using multimeter & add/subtract the value


void setup()
{
  Serial.begin(115200);
  delay(100);

  BlynkEdgent.begin();

  dht.begin();
  display.begin(SSD1306_SWITCHCAPVCC, 0x3C); //initialize with the I2C addr 0x3C (128x64)
  display.clearDisplay();
  display.setTextColor(WHITE);

  delay(100);

}

void loop() {
  BlynkEdgent.run();
  float t = dht.readTemperature();
  float h = dht.readHumidity();

  sensorValue = analogRead(analogInPin);
  voltage = (((sensorValue * 3.3) / 1024) * 2 + calibration); //multiply by two as voltage divider network is 100K & 100K Resistor

  bat_percentage = mapfloat(voltage, 2.8, 4.2, 0, 100); //2.8V as Battery Cut off Voltage & 4.2V as Maximum Voltage

  if (bat_percentage >= 100)
  {
    bat_percentage = 100;
  }
  if (bat_percentage <= 0)
  {
    bat_percentage = 1;
  }

      //send data to blynk
    Blynk.virtualWrite(V1, t); //for Temperature
    Blynk.virtualWrite(V2, h); //for Humidity
    Blynk.virtualWrite(V3, voltage);  // for battery voltage
    Blynk.virtualWrite(V4, bat_percentage);  // for battery percentage

    //Print data on serial monitor
  Serial.print("Temperature: ");
  Serial.print(t);
  Serial.println(" *C");

  Serial.print("Humidity: ");
  Serial.print(h);
  Serial.println(" %");

  Serial.print("Analog Value = ");
  Serial.println(sensorValue);
  Serial.print("Output Voltage = ");
  Serial.println(voltage);
  Serial.print("Battery Percentage = ");
  Serial.println(bat_percentage);

  Serial.println();
  Serial.println("****************************");
  Serial.println();
  delay(1000);

       if (bat_percentage <=30)
    {
      Serial.println("Battery level below 30%, Charge battery on time");
      //send notification
      Blynk.logEvent("battery_low", "Battery is getting low.... Plugin to charge") ;
      delay(500);
    }

  // display temperature on OLED
  display.clearDisplay();
  display.setTextColor(WHITE);
  display.setTextSize(1);
  display.setCursor(0, 0);
  display.print("Temperature: ");
  display.setTextSize(2);
  display.setCursor(0, 10);
  display.print(t);
  display.print(" ");
  display.setTextSize(1);
  display.cp437(true);
  display.write(167);
  display.setTextSize(2);
  display.print("C");

  // display humidity on OLED
  display.setTextSize(1);
  display.setCursor(0, 35);
  display.print("Humidity: ");
  display.setTextSize(2);
  display.setCursor(0, 45);
  display.print(h);
  display.print(" %");

  display.display();
  delay(1500);
}
float mapfloat(float x, float in_min, float in_max, float out_min, float out_max)
{
  return (x - in_min) * (out_max - out_min) / (in_max - in_min) + out_min;
}
Blynk IoT 2.0 Mobile application setup
Download the blynk application into your mobile.
- New Blynk Mobile App (Android)
- New Blynk Mobile App (iOS)
After installing the application login into your account. Turn on the developer mode if it is not turned on by going into your profile.
- Click on Add new device
- Click on Ready
- Choose the wifi which is created by the NodeMCU
- Give the wifi credentials of the router with which you want to connect the NodeMCU
- Click on Continue
- Now the board will connect to the router if the given wifi credentials are true
- Click on –> Continue
- Provide your Device Name and click Continue
- Select your Template then click on Done
- –> OK, great! –> Finish and exit.
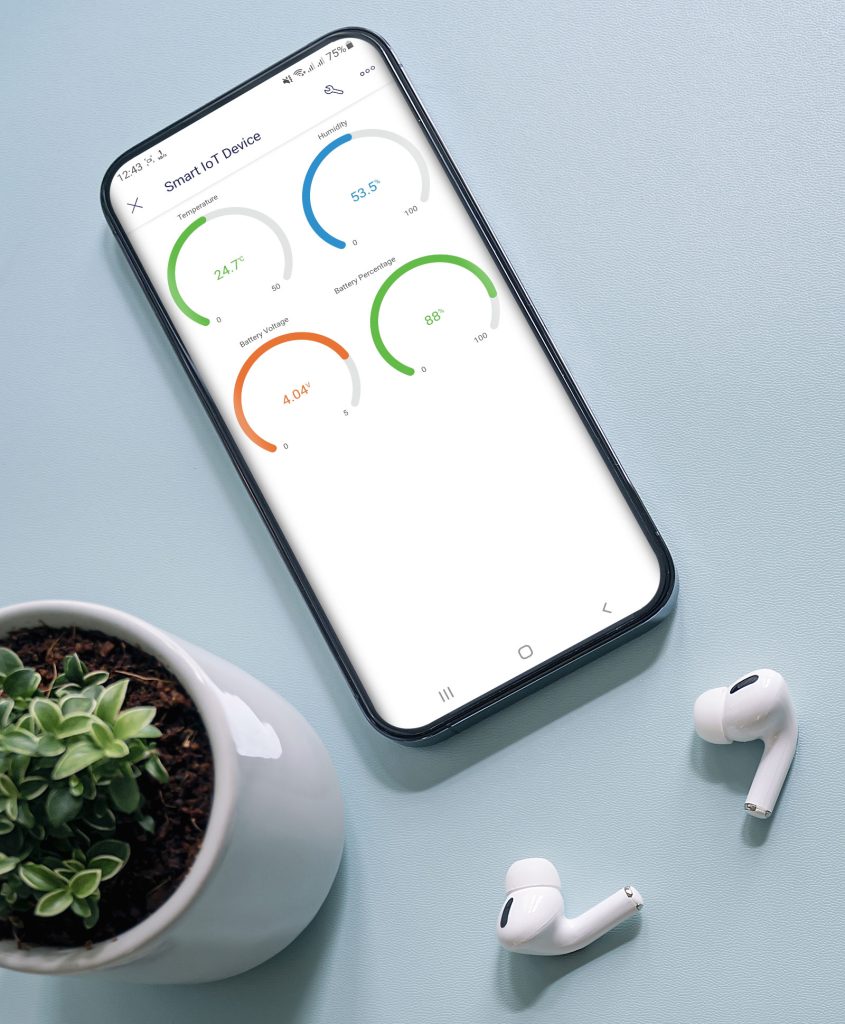
So, that’s all for the Mobile dashboard setup. Now you can see the data of your blynk device into your mobile app and in the web dashboard as well.
Reconfiguring wi-fi credentials on device without hardcoding
To reconfigure the wifi credentials on the new blynk platform you don’t have to hardcode the device. Under device settings, choose the reconfigure device option to reconfigure your device to the new WiFi network.
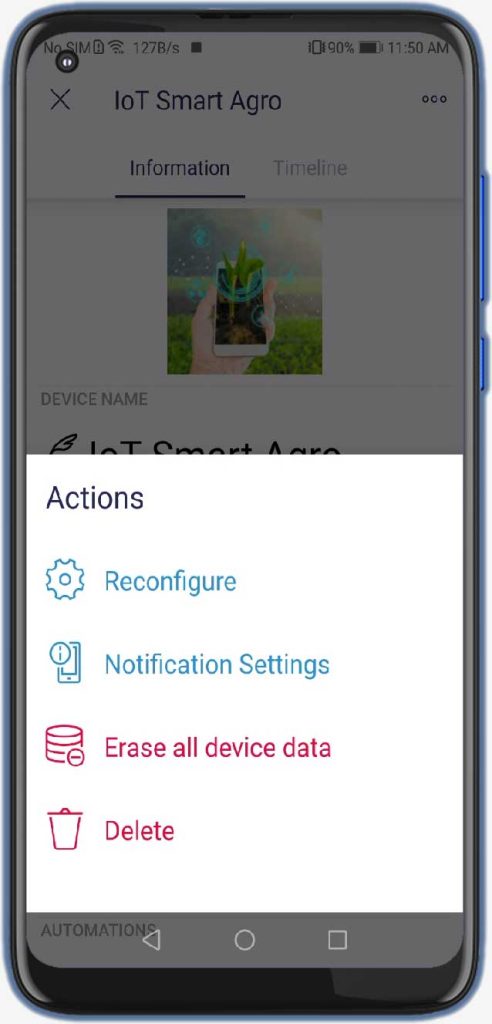
Alternatively, You can also press the flash button on NodeMCU for 10 seconds to erase WiFi credentials from EEPROM. Then you can reconfigure the wifi credentials again by adding it as a new device.

ESP8266 Monitor its Own Battery Level using Blynk IoT
Open the Serial Monitor after uploading the code. The ESP8266 will try connecting to the WiFi Network. Once it connects to the WiFi Network, it will display the temperature humidity and battery Analog Value along with Battery Voltage & Percentage. We can also monitor the Temperature & Humidity data on OLED Display.
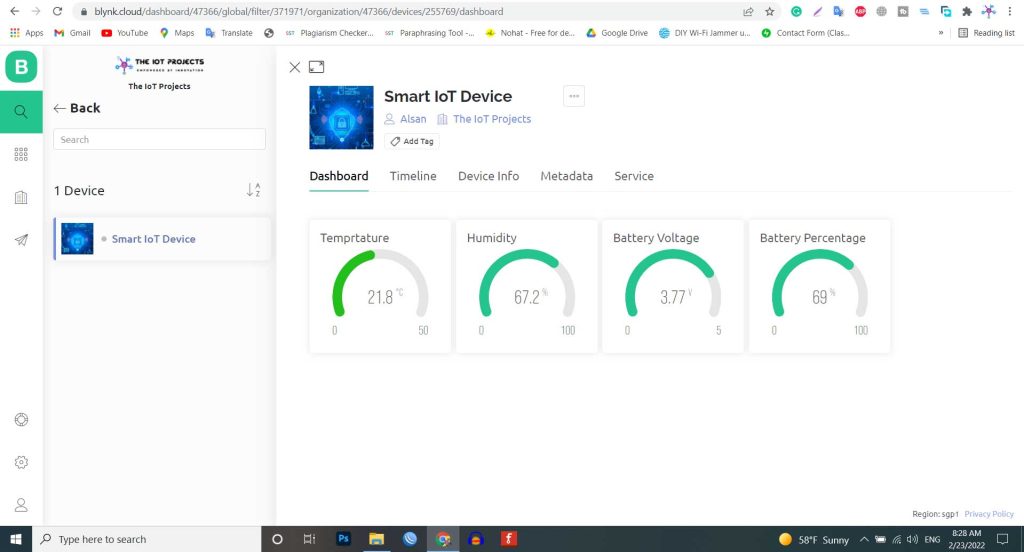
Same data can be monitored through Blynk IoT Mobile App and Web Dashboard.
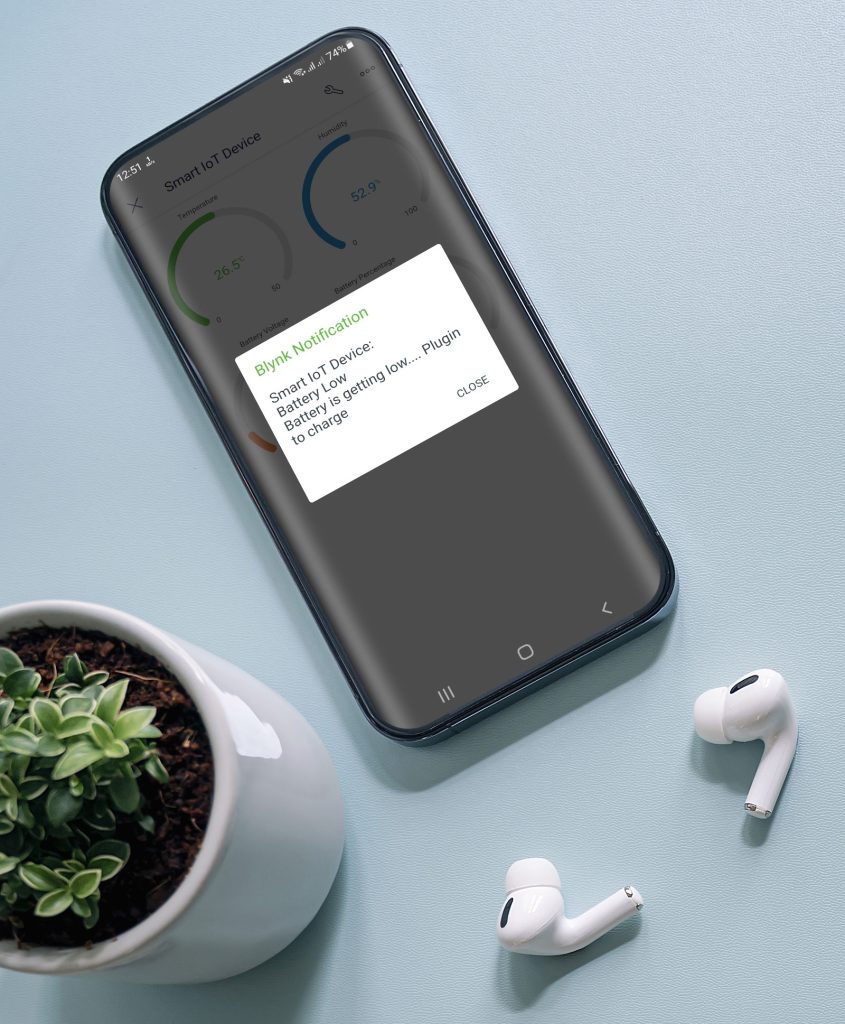
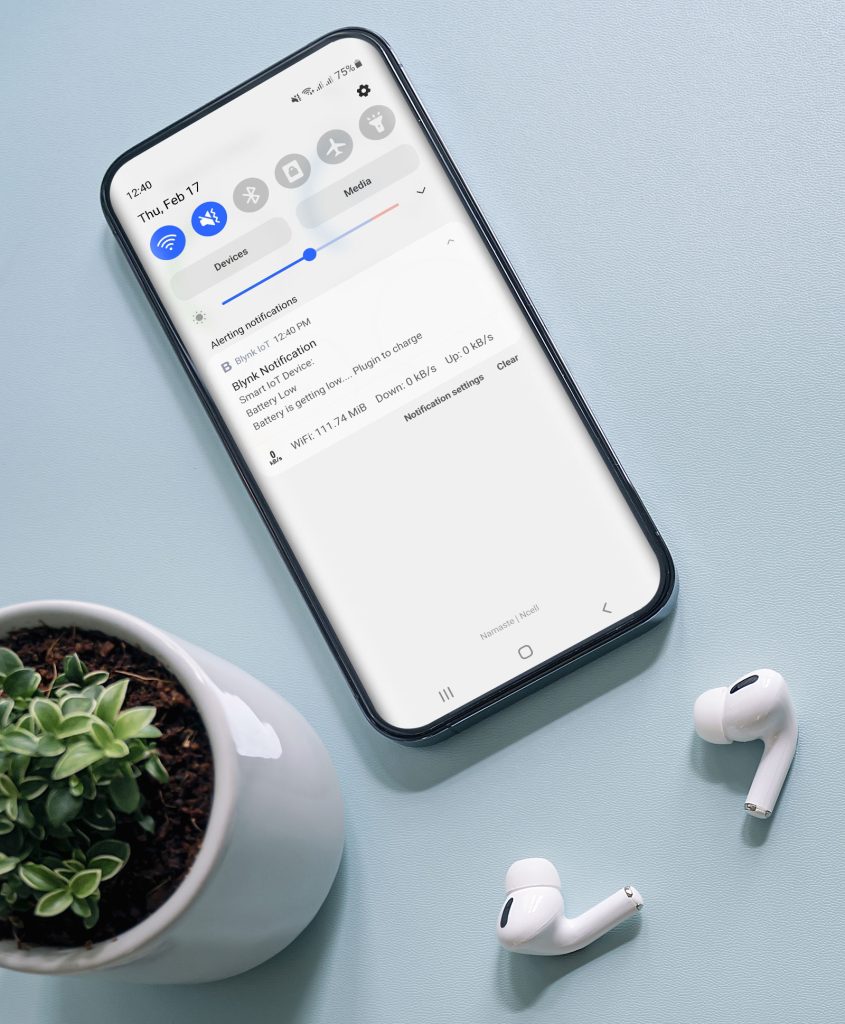
As soon as battery percent reaches below threshold value a notification is sent to a mobile device. For demonstration, I’m using 30% as a threshold value.
Fixing Voltage Value and Calibration
The circuit is designed to fix 100K pairs of resistors. But most of the resistors have a tolerance of ±5%. Because of this resistor values may be between 95K to 105K. As a result, the output voltage and the analog signal output both are affected.
In order to fix this issue, you can compare the voltage difference between the Serial Monitor reading and the Multimeter reading. Read the output voltage value at the TP4056 output terminal using a multimeter.
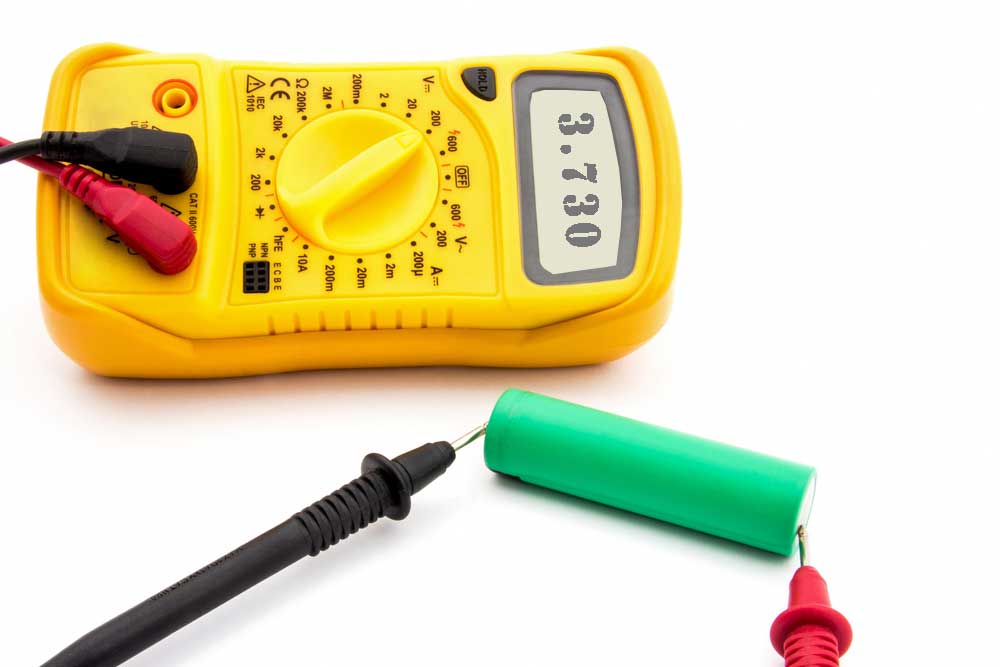
Subtract the Multimeter voltage value from the value obtained on Serial Monitor.
float calibration = 0.40; // Check Battery voltage using multimeter & add/subtract the value
In the following line of the code add this calibration factor. This will fix any error in the voltage reading. So this is how we can design an IoT Based Battery Status Monitoring System using ESP8266 and get the reading on Blynk IoT Cloud.

How to edit the gerber file?
Great lesson!!!!!! Many details!!! Congratulations!!!! The best!!!
Sir Compilation error: ‘BLYNK_DEVICE_NAME’ was not declared in this scope; did you mean ‘BLYNK_TEMPLATE_NAME’? i got this error
Nice article, thanks.
I have one question, though. When calculating the battery percentage:
bat_percentage = mapfloat(voltage, 2.8, 4.2, 0, 100);
This correctly maps the 2.8-4.2 range to the 1-100% scale, however, as the ESP needs 3.3V it powers off when the battery reaches around 35-40%. At least, that’s what I experience with a similar setup. Do you manage to use the whole 2.8-4.2 range in some way?
If not, wouldn’t it make more sense to consider the 3.3-4.2 range as 1-100% instead?
Sir i am not able to ctonnect my mobile to the network. the wifi network is visible in the mobille but not able to connect to it. Can you give me a solution for it
There are many errors it will be great if u can provide some assistance in code compilation. thank you
I think there is no need for the external voltage divider, as the ESP8266 has already an internal one.
You need only one resistor connected to the analog input of the ESP
See for detailed information:
https://arduino.stackexchange.com/questions/71949/voltage-divider-and-nodemcu-inputs