Capacitive Soil Moisture Sensor with OLED Display & Arduino
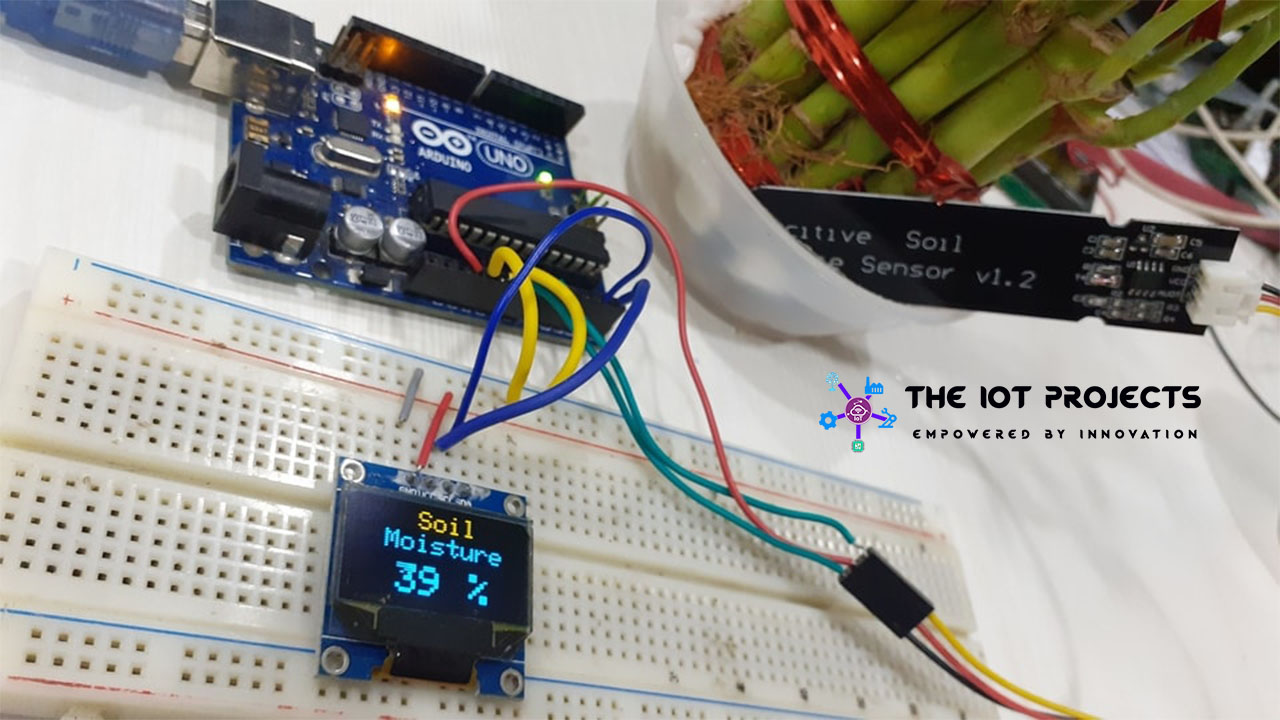
In this tutorial, we are about to interface Capacitive Soil Moisture Sensor with OLED & Arduino to display the soil moisture value in percentage (%). Here we will display the value in both Serial Monitor and 0.96″ OLED Display. We will also teach you the calibration method for displaying the correct value.
Overview
This is the Interfacing Tutorial about Arduino and Capacitive Soil Moisture Sensor with the OLED Display project. Actually, Soil moisture is the amount/content of water present in the soil. Soil moisture can be measured using a soil moisture sensor either resistive or capacitive. Here we are going to use version 1.2 Capacitive Soil Moisture Sensor. This sensor gives us the moisture level as output by measuring the volumetric content of soil inside the soil.
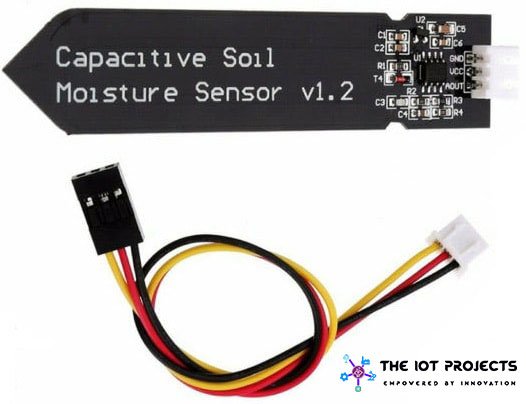
Unlike other, resistive sensing this soil moisture sensor measures soil moisture levels by capacitive sensing, found in the market. It is made of corrosion-resistant material. Due to which it provides excellent service life. All you have to do is, just Insert the sensor into the soil around your plants and monitor the real-time soil moisture data. This module has a built-in onboard voltage regulator. It has an operating voltage range of 3.3 ~ 5.5V, which is perfect for a low-voltage microcontroller with both 3.3V and 5V power supply.
Components Required
The following are the components required for making Capacitive Soil Moisture using Arduino. You can purchase all the components from the Amazon. We have made a complete list of all the components required to complete this project.
- Arduino Uno Board
- 0.96″ SSD1306 OLED Display
- Capacitive Soil Moisture Sensor v1.2
- Connecting Wires
- Breadboard
Introduction to Capacitive Soil Moisture Sensor v1.2
The picture you have seen above is an analog capacitive soil moisture sensor. It measures soil moisture levels by capacitive sensing. Which Means, capacitance is varied on the basis of water content present in the soil. The capacitance is converted into voltage level usually from 1.2V to a maximum of 3.0V. The main advantage of Capacitive Soil Moisture Sensor is that they are durable. Because they are made up of corrosion-resistant material giving it long service life.
Features & Specifications
- Supports 3-Pin Sensor interface
- Analog output
- Operating Voltage: DC 3.3-5.5V
- Output Voltage: DC 0-3.0V
- Interface: PH2.0-3P
- Size: 99x16mm/3.9×0.63″
Capacitive Soil Moisture Sensor Hardware Schematic
The Hardware Schematic for Capacitive Soil Moisture Sensor is provided below.
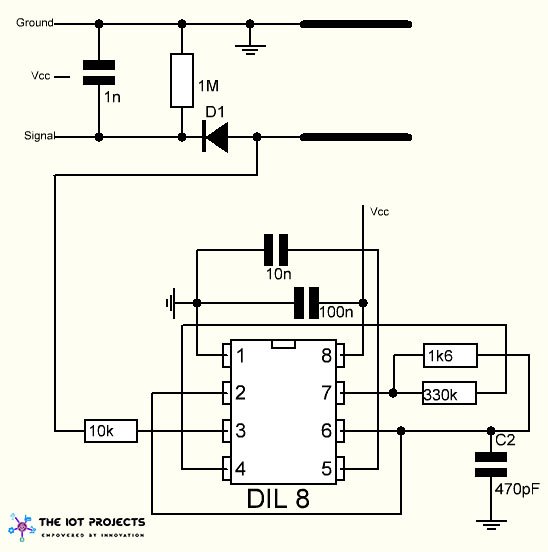
It has a fixed frequency oscillator which is built using a 555 Timer IC. The square wave produced is then fed to the sensor like a capacitor. To a square wave signal that capacitor, basically, has a certain reactance, or for argument’s sake a resistance which forms a voltage divider with a pure ohm type resistor (the 10k one on pin 3). The logic we will be using here is “Higher the soil moisture, the higher the capacitance of the sensor”. Consequently, we found a smaller reactance to the square wave, so we lowered the voltage on the signal line. The voltage on the Analog signal pin can be measured by an analog pin using the Arduino which represents the humidity in the soil.
0.96″ I2C OLED Display
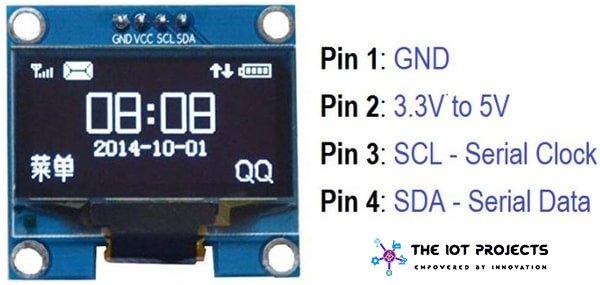
In the Display module, we will be using a 0.96 inch blue OLED display module. We can easily interface this module with any microcontroller using SPI/IIC protocols. The Display has a resolution of 128×64. The package includes a display panel, display,4 pin male header pre-soldered to board.
I2C OLED Display
OLED stands for Organic Light-Emitting Diode. it’s a self light-emitting technology composed of a tiny, multi-layered organic film placed between an anode and cathode. Unlike, LCD technology, OLED does not require a backlight. OLED possesses high application potential for all types of displays. OLED is additionally considered the ultimate technology for the future generation of flat-panel displays.
Interface Capacitive Soil Moisture Sensor with OLED Display & Arduino
Now let us interface the Capacitive Soil Moisture Sensor with OLED Display & Arduino. Which displays the soil moisture value in percentage. The circuit diagram for this project is very simple to understand.
Connecting Capacitive Soil Moisture Sensor, Arduino & OLED
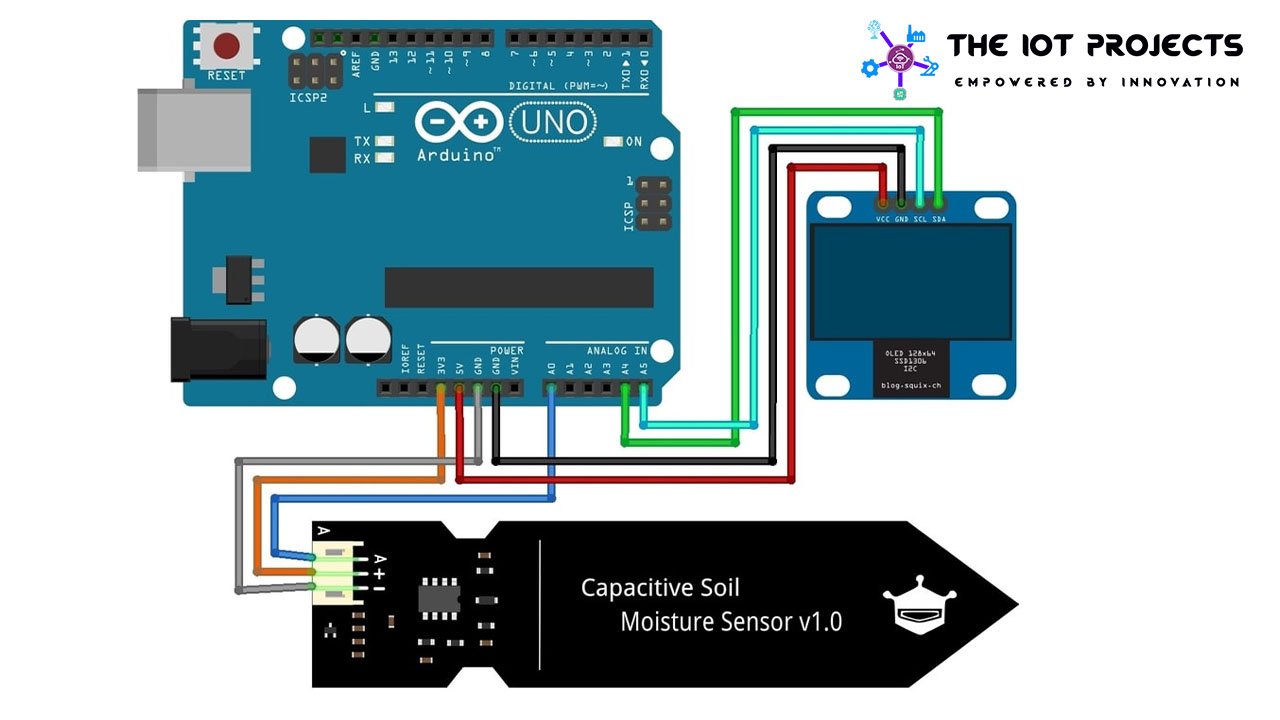
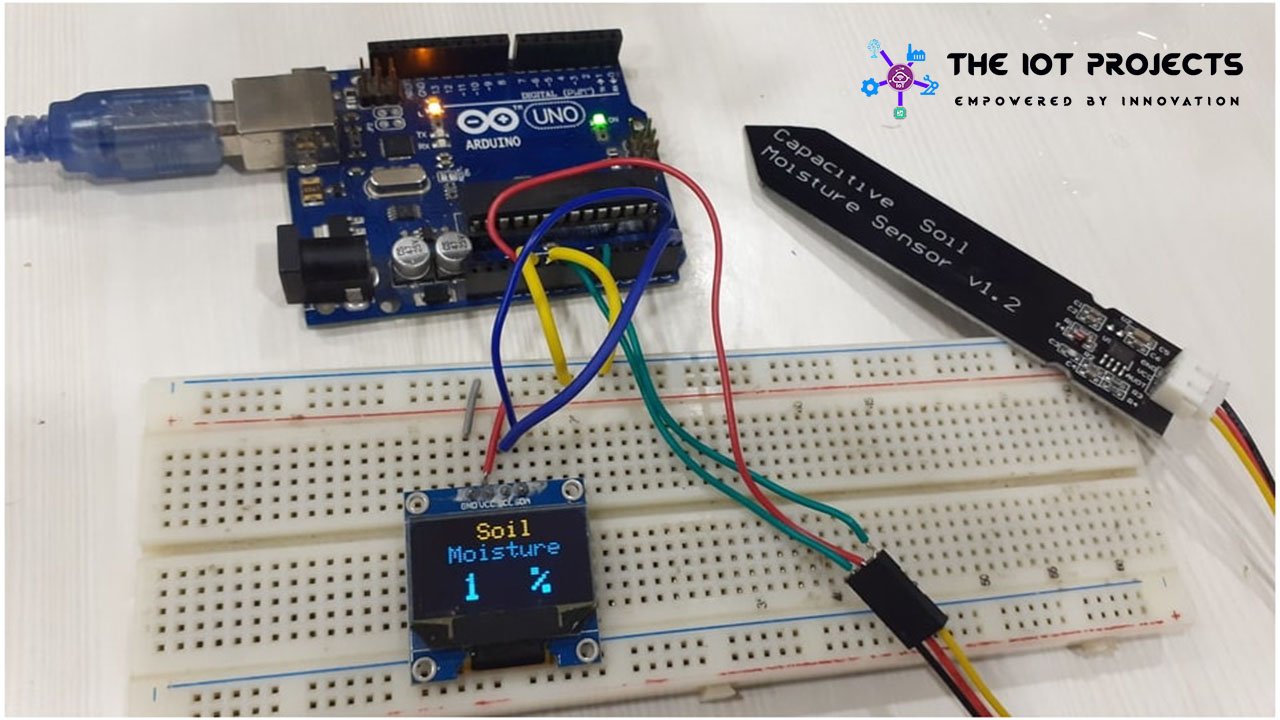
Connect the VCC pin to 3.3V of Arduino and connect GND to GND. Similarly, connect the Analog output pin to the A0 pin of Arduino. Basically, The I2C OLED Display has 4 pins as VCC, GND, SDA & SCL. Therefore, Connect VCC to 5V of Arduino and connect GND to GND. Finally, its SDA pin is connected to A4 of Arduino & SCL to A5.
Source Code/Program
This is a simple source code for Interfacing Capacitive Soil Moisture Sensor with OLED Display & Arduino. Simply, Copy these lines of code from below and upload it to your Arduino board.
#include <Wire.h>
#include <Adafruit_GFX.h>
#include <Adafruit_SSD1306.h>

#define OLED_RESET 4
Adafruit_SSD1306 display(OLED_RESET);

const int AirValue = 620;   //you need to replace this value with Value_1
const int WaterValue = 310;  //you need to replace this value with Value_2
int soilMoistureValue = 0;
int soilmoisturepercent=0;
void setup() {
  Serial.begin(9600); // open serial port, set the baud rate to 9600 bps
  display.begin(SSD1306_SWITCHCAPVCC, 0x3C); //initialize with the I2C addr 0x3C (128x64)
  display.clearDisplay();
}
void loop() {
soilMoistureValue = analogRead(A0);  //put Sensor insert into soil
Serial.println(soilMoistureValue);
soilmoisturepercent = map(soilMoistureValue, AirValue, WaterValue, 0, 100);
if(soilmoisturepercent > 100)
{
  Serial.println("100 %");

  display.setCursor(45,0);  //oled display
  display.setTextSize(2);
  display.setTextColor(WHITE);
  display.println("Soil");
  display.setCursor(20,15);
  display.setTextSize(2);
  display.setTextColor(WHITE);
  display.println("Moisture");

  display.setCursor(30,40);  //oled display
  display.setTextSize(3);
  display.setTextColor(WHITE);
  display.println("100 %");
  display.display();

  delay(250);
  display.clearDisplay();
}
else if(soilmoisturepercent <0)
{
  Serial.println("0 %");

  display.setCursor(45,0);  //oled display
  display.setTextSize(2);
  display.setTextColor(WHITE);
  display.println("Soil");
  display.setCursor(20,15);
  display.setTextSize(2);
  display.setTextColor(WHITE);
  display.println("Moisture");

  display.setCursor(30,40);  //oled display
  display.setTextSize(3);
  display.setTextColor(WHITE);
  display.println("0 %");
  display.display();

  delay(250);
  display.clearDisplay();
}
else if(soilmoisturepercent >0 && soilmoisturepercent < 100)
{
  Serial.print(soilmoisturepercent);
  Serial.println("%");

  display.setCursor(45,0);  //oled display
  display.setTextSize(2);
  display.setTextColor(WHITE);
  display.println("Soil");
  display.setCursor(20,15);
  display.setTextSize(2);
  display.setTextColor(WHITE);
  display.println("Moisture");

  display.setCursor(30,40);  //oled display
  display.setTextSize(3);
  display.setTextColor(WHITE);
  display.println(soilmoisturepercent);
  display.setCursor(70,40);
  display.setTextSize(3);
  display.println(" %");
  display.display();

  delay(250);
  display.clearDisplay();
}
}
Once you upload the code, the OLED Display will start showing the soil moisture value in percentage(%). Now you can calculate the soil moisture value by dipping the soil moisture sensor in the water or in soil or any liquid.

Capacitive Soil Moisture Sensor Calibration
Here we need to talk about accuracy as well. The capacitive soil moisture sensor does not provide accurate data as expected. But, after calibration, we can get the closest accurate value.
You just have to upload the simple code to the Arduino and check the sensor analog reading when the sensor is in dry condition (like on-air) and when the sensor is in water. From this, we can get the maximum and minimum analog value that can be mapped to percentage value from 0 to 100% as per the program.
constintAirValue = 600; //you have to be compelled to replace this value with Value_1
constintWaterValue = 350; //you have to be compelled to replace this value with Value_2
From the above change the AirValue and WaterValue with the value that you just got.
Electronic Voting Machine Using Arduino & LCD Display
Temperature Controlled Home Automation using Arduino
DIY Mobile Phone using GSM Module & Arduino with Nextion Display
IoT Based RFID Attendance System using ESP32

It doesnt work.Only displays “Soil Moisture”?
I have had the same problem. i think your display shows only Soil Moisture because your display is a little bit smaller as the one in the article. You have to change the values from display.setCursor(30,40); and display.setTextSize(3) to make it work. This worked for me. Now everything is working fine, exept the % sign is missing after the moisture value. Do you have a hint for me?