Waterproof Ultrasonic Sensor with Arduino to Measure Water Level
Interfacing Waterproof Ultrasonic Sensor JSN-SR04T/AJ-SR04M with Arduino
- Overview: Ultrasonic Sensor JSN-SR04T with Arduino
- Components Required
- How Ultrasonic Distance Sensors Work:
- JSN-SR04T/AJ-SR04M Waterproof Ultrasonic Sensor:
- Interfacing JSN-SR04T Ultrasonic Sensor with Arduino
- Project PCB Gerber File & PCB Ordering Online
- Source Code/Program
- Testing & Demonstrations
- Conclusion
Overview: Ultrasonic Sensor JSN-SR04T with Arduino
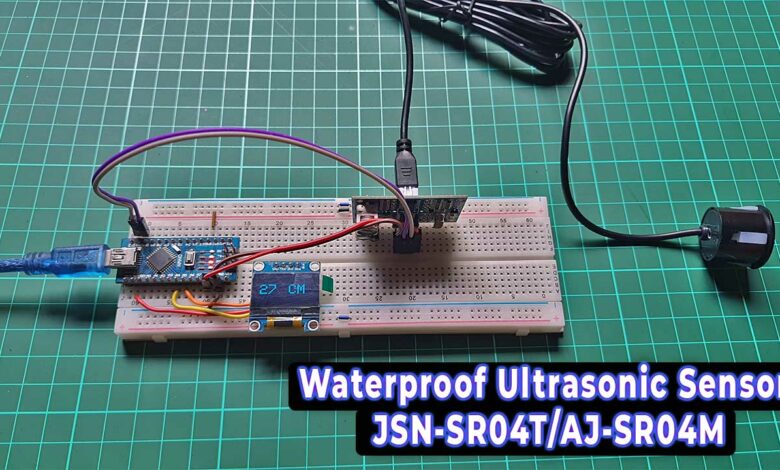
Today, we’re going to explore an exciting project: where we will interface a Waterproof Ultrasonic Sensor with Arduino to Measure Water Level accurately on SSD1306 OLED Display. This project is perfect for applications such as monitoring water tanks, pools, or even rainwater harvesting systems.
This tutorial covers the Waterproof Ultrasonic Sensor JSN-SR04T/AJ-SR04M interface with Arduino and SSD1306 OLED Display.
When working on distance measurement or object detection projects in outdoor environments, the HC-SR04 ultrasonic sensor may not be suitable due to its fragility and lack of waterproofing. However, there are alternatives like the JSN-SR04T and AJ-SR04M waterproof ultrasonic sensors, which are durable and perfect for outdoor applications. These sensors can measure distances from 25 to 450 cm and work well with Arduino boards.
Components Required
To complete this tutorial, you will need the following components. You can purchase them from the provided links.
| S.N | COMPONENTS NAME | QUANTITY | PURCHASE LINKS |
|---|---|---|---|
| 1 | Arduino Nano | 1 | Amazon | AliExpress |
| 2 | JSN-SR04T Ultrasonic Sensor | 1 | Amazon | AliExpress |
| 3 | 0.96" I2C OLED Display | 1 | Amazon | AliExpress |
| 4 | Breadboard | 1 | Amazon | AliExpress |
| 5 | Jumper Cables | 10 | Amazon | AliExpress |
How Ultrasonic Distance Sensors Work:
Ultrasonic sensors operate by emitting sound waves at frequencies beyond human hearing, typically in the ultrasonic range. These sound waves travel through the air until they encounter an obstacle, causing them to bounce back toward the sensor. This functioning principle is similar to radar and sonar systems and is often referred to as “echolocation,” as it mimics how bats navigate.
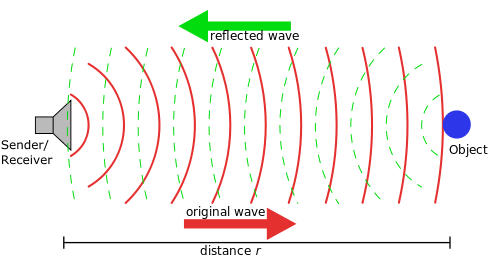
Working of Ultrasonic Distance Sensors:
- Emitting Ultrasonic Waves: The sensor activates the ultrasonic transmitter, which emits a burst of ultrasonic sound waves.
- Travel and Reflection of Waves: These sound waves propagate through the air until they reach an object, where they rebound back toward the sensor.
- Receiving the Echo: The ultrasonic receiver detects the reflected sound waves, also known as echoes.
- Time Calculation: The sensor measures the time taken for the sound waves to travel to the object and back, known as “Time of Flight.”
- Distance Calculation: Using the speed of sound through air, which is approximately 343 meters per second at sea level under normal conditions, the sensor calculates the distance to the object. The distance is determined using the formula: Distance = (Time of Flight x Speed of Sound) / 2. The division by 2 accounts for the round trip of the sound wave.
Ultrasonic sensors find applications in various fields, including robotics (for obstacle detection and avoidance), liquid level sensing (for measuring tank levels), and even in certain car parking assist technologies, among others.
JSN-SR04T/AJ-SR04M Waterproof Ultrasonic Sensor:
The JSN-SR04T/AJ-SR04M is a waterproof ultrasonic sensor module known for its versatility and durability in non-contact distance measurement. It offers an impressive range of 25cm to 450cm and achieves high accuracy with a precision of up to 2mm. These qualities make it a reliable choice for various applications.
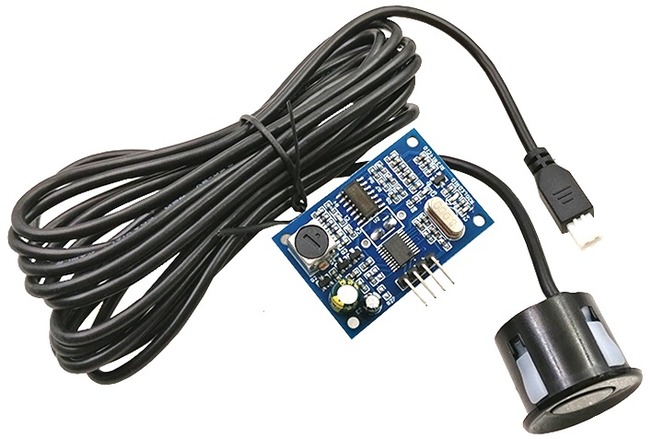
Some Useful Features/Specifications
Now, let’s talk about some useful features of using a waterproof ultrasonic sensor. Using a waterproof ultrasonic sensor offers several advantages for water level measurement. Firstly, it can withstand harsh conditions, making it ideal for outdoor applications. Secondly, it provides accurate and reliable readings, allowing for precise monitoring. Finally, its waterproof feature ensures long-term durability and stability, even in wet environments.
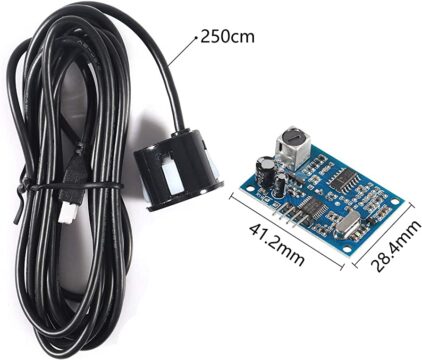
Specifications:
- Operating Voltage: Typically 5V DC
- Operating Frequency: 40kHz
- Range: 25cm to 450cm
- Ranging Accuracy: Up to 2mm
- Interface: 4-pin (VCC, GND, Trig, Echo)
- Operating Temperature: -20°C to +70°C
- Detection Angle: Up to 70 degrees
JSN-SR04T/AJ-SR04M Pinout:
The JSN-SR04T ultrasonic sensor module features four pins:
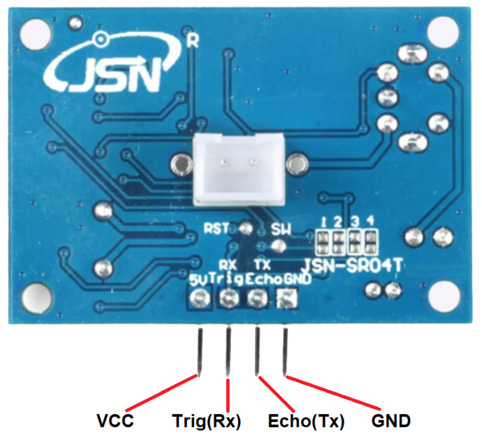
- VCC: Powers the sensor with a 5V DC supply.
- Trig (Rx): Initiates ultrasonic pulses when a high pulse is sent.
- Echo (Tx): Outputs a pulse proportional to the distance to the object.
- GND (Ground): Connects to the system ground to complete the circuit.
Interfacing JSN-SR04T Ultrasonic Sensor with Arduino
This guide explains how to connect and interface the waterproof ultrasonic sensor JSN-SR04T or AJ-SR04M with an Arduino board and display the output on an OLED display. For this demonstration, we will be using an Arduino Nano board and a 0.96″ I2C OLED display.
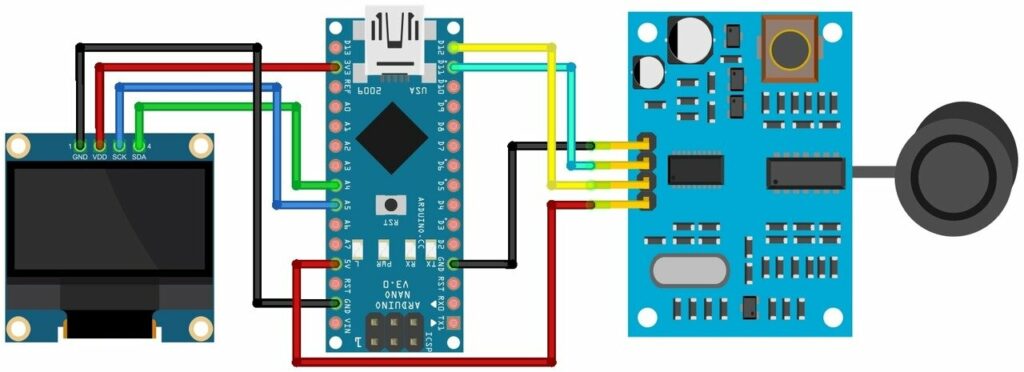
Interfacing Waterproof Ultrasonic Sensor JSN-SR04T/AJ-SR04M with Arduino
- The connection is straightforward and can be seen in the table below:
- Ultrasonic Sensor VCC – 5V
- Ultrasonic Sensor GND – GND
- Ultrasonic Sensor Trig pin – Digital pin 12
- Ultrasonic Sensor Echo pin – Digital pin 11
- OLED Display VCC – 3.3V
- OLED Display GND – GND
- OLED Display SDA – Analog 4 (A4)
- OLED Display SCL – Analog 5 (A5)
You can use a breadboard for the connections or, for a portable application, solder all the components onto a PCB.
Project PCB Gerber File & PCB Ordering Online
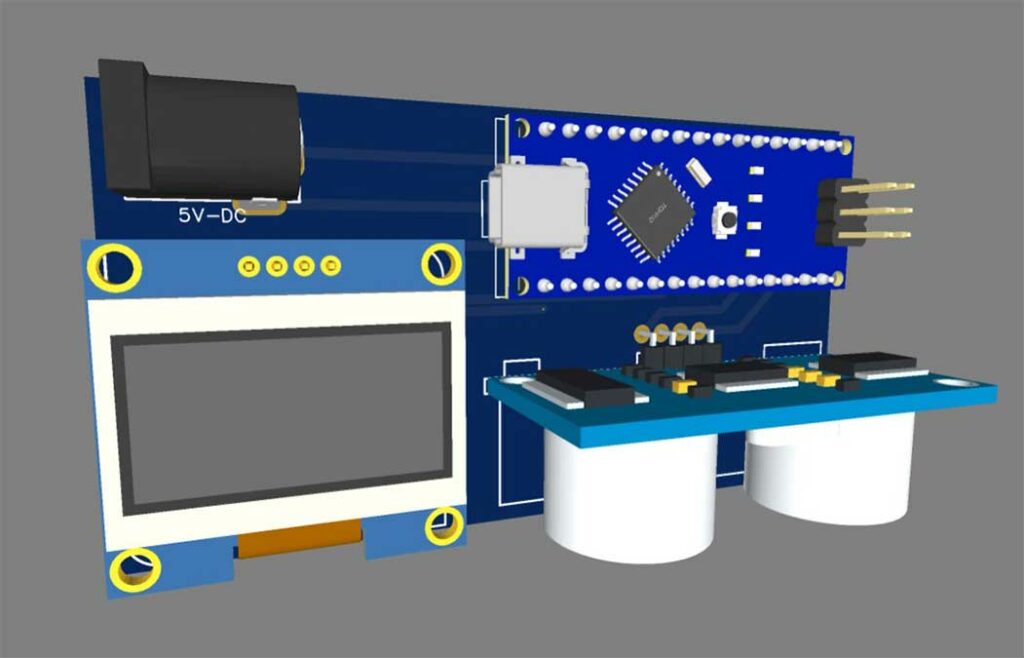
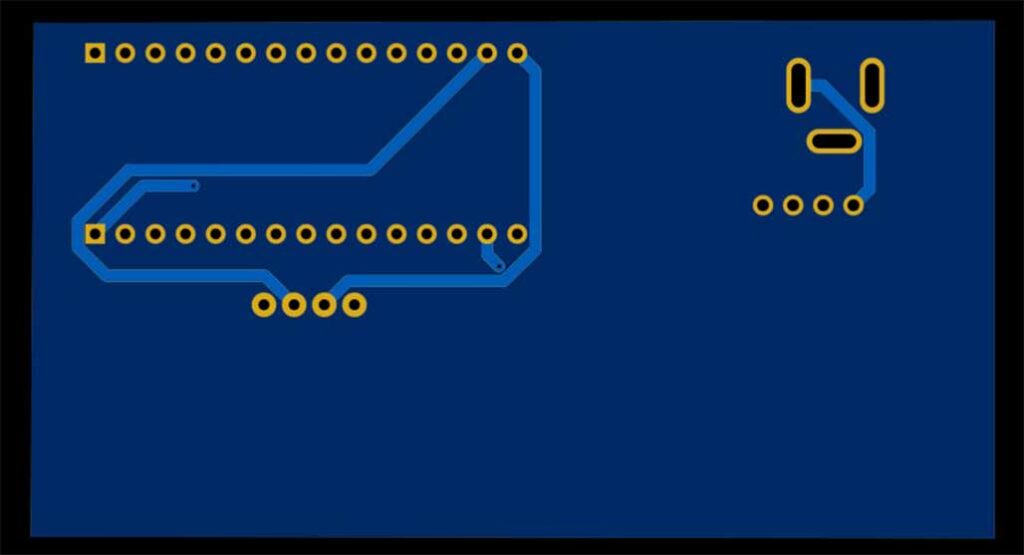
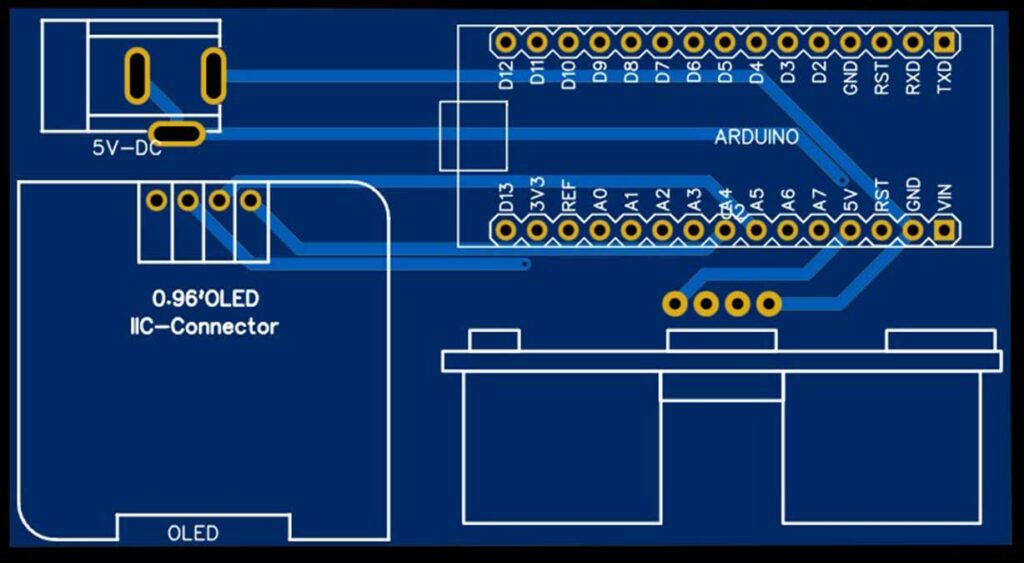
If you don’t want to assemble the circuit on a zero PCB and you want PCB for the project, then here is the PCB for you. The PCB Board for this project looks something like below.
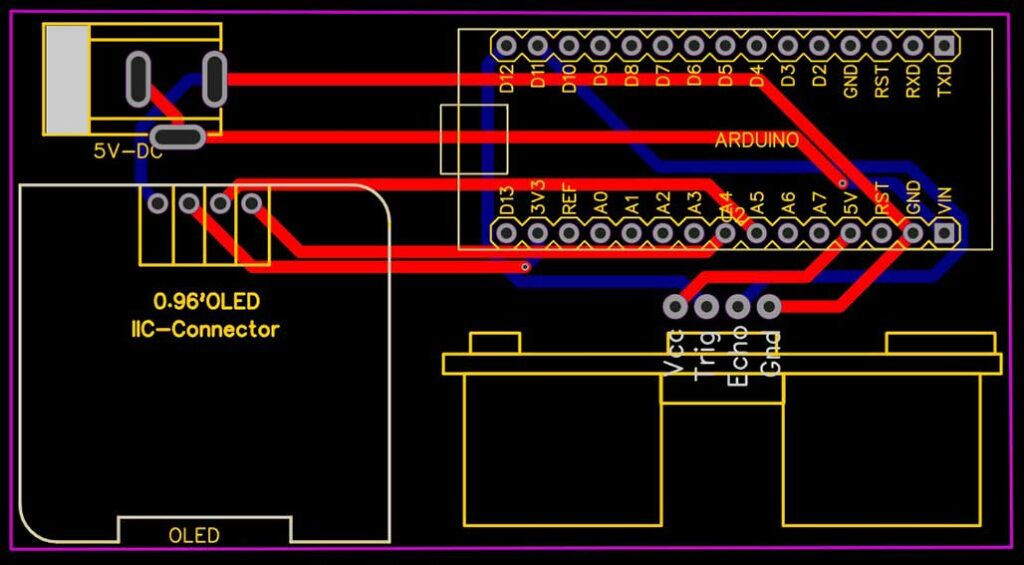
The Gerber File for the PCB is given below. You can simply download the Gerber File and order the PCB from PCBWay.com.
Now you can visit the PCBWay official website by clicking here: PCBWay.com. So you will be directed to the PCBWay website.

You can now upload the Gerber File to the Website and place an order. The PCB quality is superb & high standard. That is why most people trust PCBWay for PCB & PCBA Services. PCBWay is a leading manufacturer of high-quality PCBs and offers a wide range of services, including PCB fabrication, assembly, and components sourcing.
Source Code/Program
In the programming part, we will interface the Waterproof Ultrasonic Sensor JSN-SR04T/AJ-SR04M with Arduino and an OLED display in a similar way to how we interface the HC-SR04 sensor.
Before proceeding, ensure that you have the necessary libraries installed. You can download the Adafruit_SSD1306 library (for OLED) and Adafruit_GFX library (for graphics functions) from the Arduino Library Manager.
Here is a simple example code:
#include <Adafruit_GFX.h>
#include <Adafruit_SSD1306.h>

#define trigPin 12
#define echoPin 11

long duration;
int distance;

#define SCREEN_WIDTH 128
#define SCREEN_HEIGHT 64
#define OLED_RESET -1
Adafruit_SSD1306 display(SCREEN_WIDTH, SCREEN_HEIGHT, &Wire, OLED_RESET);

void setup() {
  pinMode(trigPin, OUTPUT);
  pinMode(echoPin, INPUT);
  display.begin(SSD1306_SWITCHCAPVCC, 0x3C);
  delay(2000);
  display.clearDisplay();
  display.setTextColor(WHITE);
  Serial.begin(9600);
}

void loop() {
  digitalWrite(trigPin, LOW);
  delayMicroseconds(5);

  digitalWrite(trigPin, HIGH);
  delayMicroseconds(10);
  digitalWrite(trigPin, LOW);

  duration = pulseIn(echoPin, HIGH);

  distance = duration*0.034/2;

  Serial.print("Distance = ");
  Serial.print(distance);
  Serial.println(" cm");
  display.clearDisplay();

  display.setTextSize(3);
  display.setCursor(10, 20);
  display.print(distance);

  display.setTextSize(3);
  display.setCursor(70, 20);
  display.print("CM");

  display.display();
}
This code enables the interface between an Arduino board, an ultrasonic sensor (like the JSN-SR04T or AJ-SR04M), and an OLED display.
The ultrasonic sensor operates by emitting a sound wave at a specific frequency and measuring the time it takes for the echo of the sound wave to return. To calculate distance, we divide the measured time by two and multiply it by the speed of sound (approximately 0.034 cm/µs). The OLED display then shows the distance that is measured.
Testing & Demonstrations
Once the wiring is completed and the code is uploaded to the Arduino, you can proceed with testing the functionality of the waterproof ultrasonic sensor (JSN-SR04T or AJ-SR04M) with the OLED display.
Connect the Arduino to your computer using a USB cable. The Arduino and the OLED display should power up if the wiring is correct.
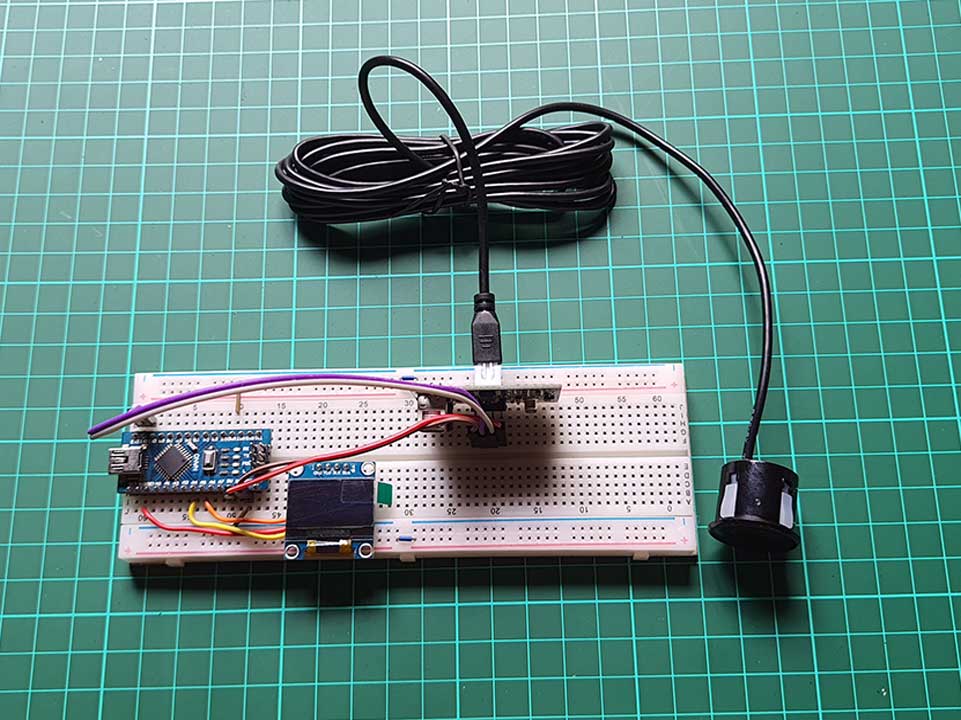
The sensor can detect distances starting from a minimum of 25cm. If an obstacle is detected at a distance of less than 25cm, the display will show 0 cm. As the distance increases slightly, the minimum distance will be displayed.
The OLED display will show the distance in centimeters, refreshing at a defined interval (usually every second). As you move objects, the displayed distance should change accordingly.
The sensor has a maximum range of 450cm. During our testing, we measured and verified the accuracy at a distance of 240cm, where the OLED display showed the exact distance.
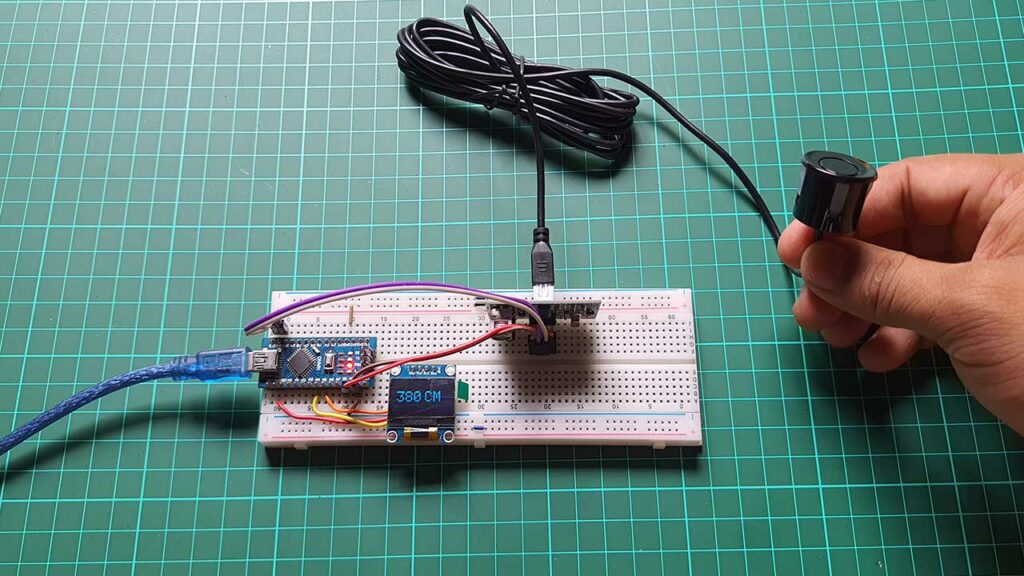
In our testing room, we measured distances up to 380cm, which was the distance to the wall.
For a more comprehensive demonstration, you can create real-world applications, such as measuring water levels, detecting object presence or distance, or even building a simple parking sensor.
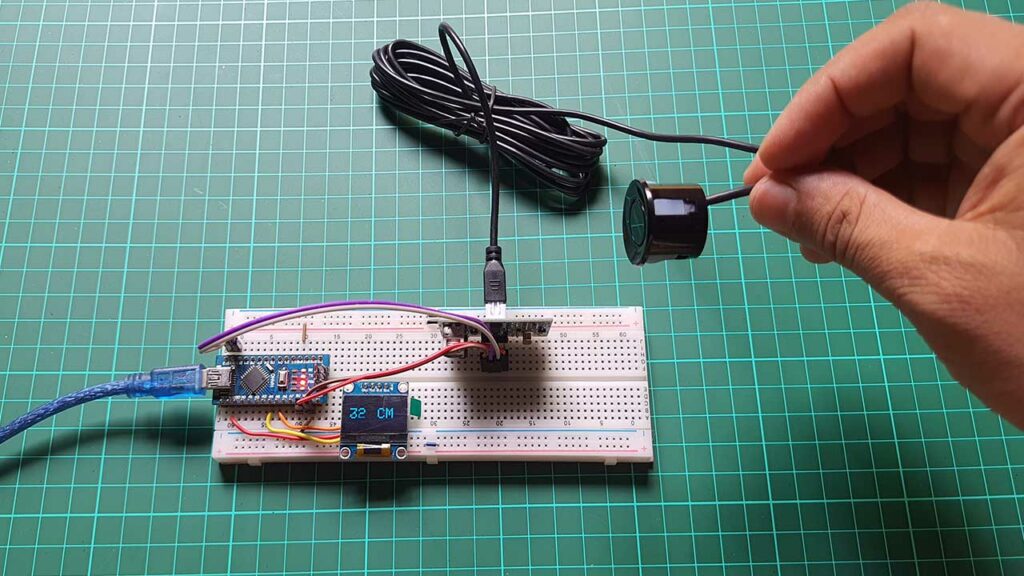
To test the waterproof capability of the JSN-SR04T/AJ-SR04M sensor, you can immerse the sensor (not the entire module) in water. Ensure that only the waterproof part of the sensor is submerged, keeping the electronics dry.
Video Tutorial & Guide
Conclusion
Once you have successfully tested and demonstrated the setup, you can implement the ultrasonic sensor and OLED display in various projects, such as robotics, object detection, distance measurement, or obstacle avoidance systems.

