Interfacing Arducam 5MP SPI Camera with ESP8266
How to use Arducam 5MP SPI Camera with ESP8266 WiFi Module
Overview: Arducam Mega with ESP8266
In this tutorial, we’ll be discussing the Interfacing Arducam 5MP SPI Camera with ESP8266 NodeMCU WiFi Module. Arducam has recently launched a camera solution that allows easy connection of one or more cameras to any microcontroller. Making it ideal for use in battery-powered IoT devices, embedded machine vision, and artificial intelligence applications. The Arducam Mega Camera is compatible with any microcontroller that has a standard SPI interface. It does not require memory for register settings or frame buffers. Additionally, it is fully compatible with 3.3V and 5V systems, making it a versatile choice for various applications.
This project involves interfacing the Arducam Mega Camera, which has a 5-megapixel resolution, with the NodeMCU ESP8266 Board. The project includes a variety of operations, such as capturing images with different pixel resolutions and streaming videos using only the ESP8266 Board. Arducam has developed the Arducam Mega SDK specifically for the Arducam Mega Camera, which simplifies programming. In this tutorial, we will explore the camera and its operations in detail.
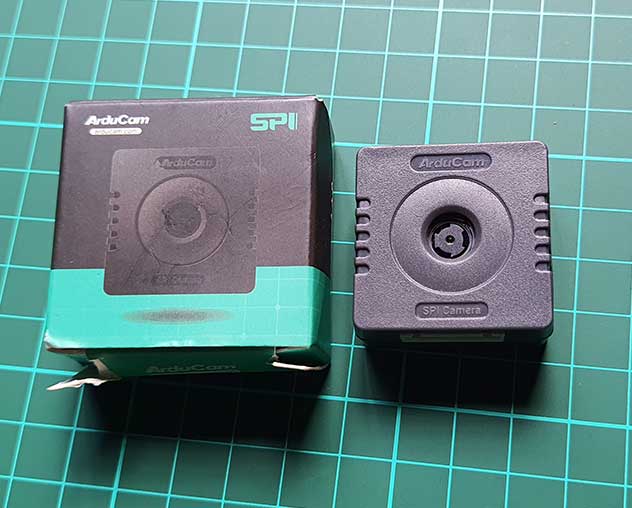
Arducam Mega Camera
The Arducam Mega Camera is a renowned camera solution designed to simplify the process of connecting one or multiple cameras to any microcontroller with minimal effort. This camera solution is primarily intended for use in battery-powered IoT devices, embedded machine vision, and artificial intelligence applications.
The Arducam Mega is compatible with any microcontroller that has a single standard SPI interface, and it only requires four pins (GPIOs) in addition to VCC and GND. No memory is needed for register settings or frame buffers. Furthermore, it is compatible with both 3.3V and 5V systems. The camera can be directly utilized with a variety of MCU systems, including Arduino, STM8/STM32, ESP8266/ESP32, MSP430, Nordic, Renesas, and others.
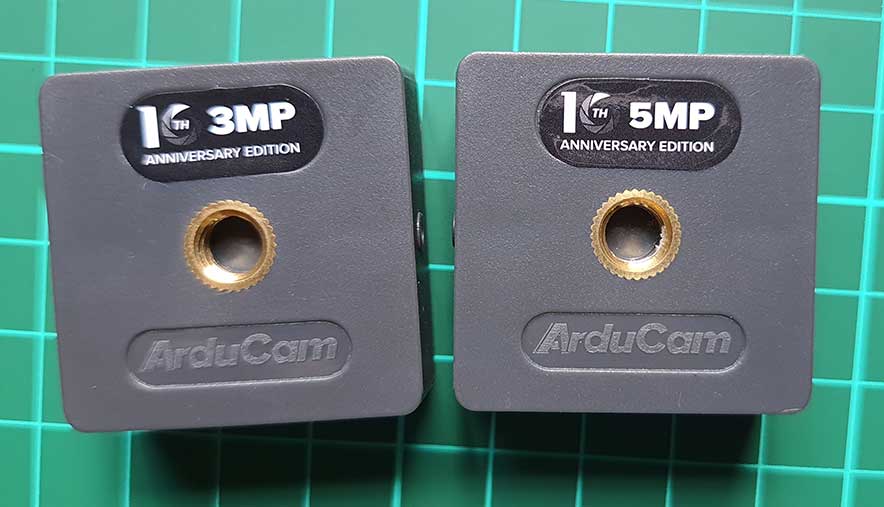
The camera is specifically designed for energy-efficient applications. You can turn off the camera completely while the MCU is in sleep mode without any concerns about lengthy register settings, as this process is performed instantaneously (in less than 100ms) and automatically. There are two variations of the Arducam Mega Camera: one with a fixed focus and a 3MP resolution, and another with autofocus and a 5MP resolution. The camera comes with a default enclosure, making it simple to mount in any desired location.
Details regarding this camera have been discussed in a previous post. To obtain a comprehensive understanding of this camera, you may refer to the Arducam Getting Started guide.
Interfacing 5MP Arducam Mega Camera with NodeMCU ESP8266
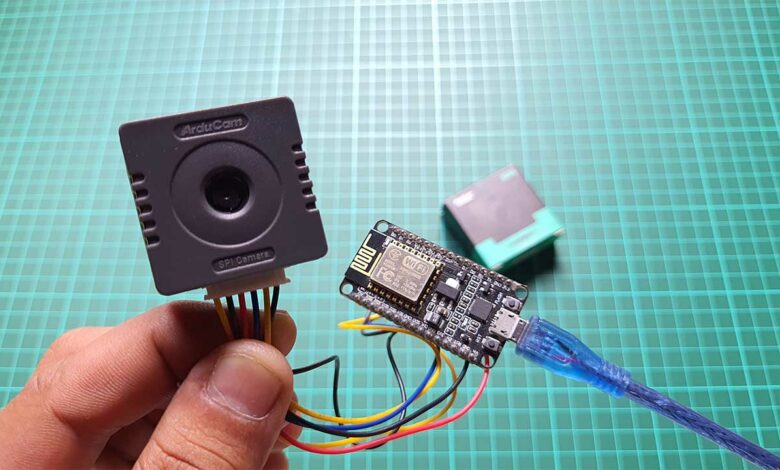
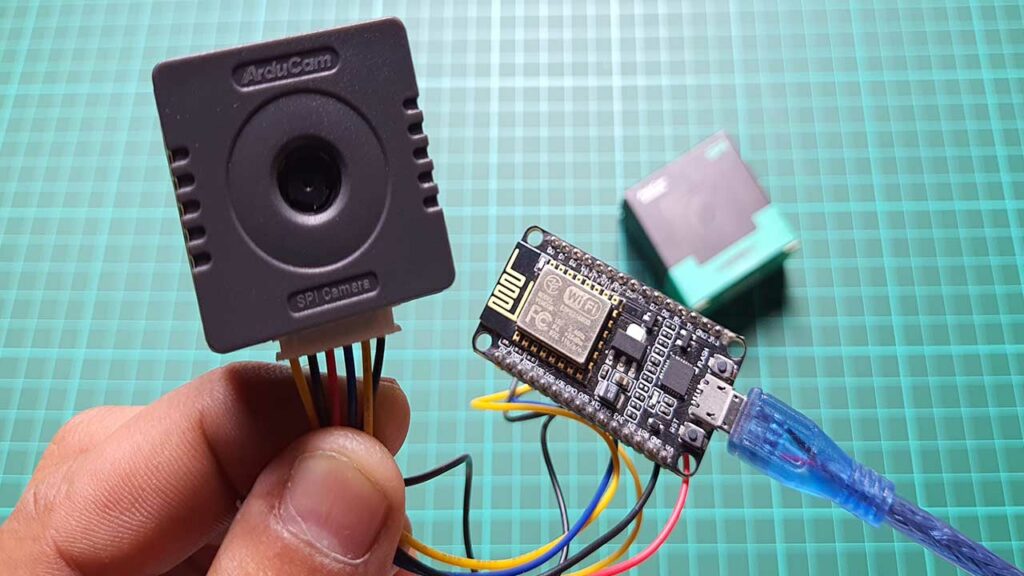
Let’s take a look at how we can connect the Arducam Mega, a 5-megapixel SPI Camera, with the NodeMCU ESP8266. The connection diagram is quite simple and can be seen in the image below.
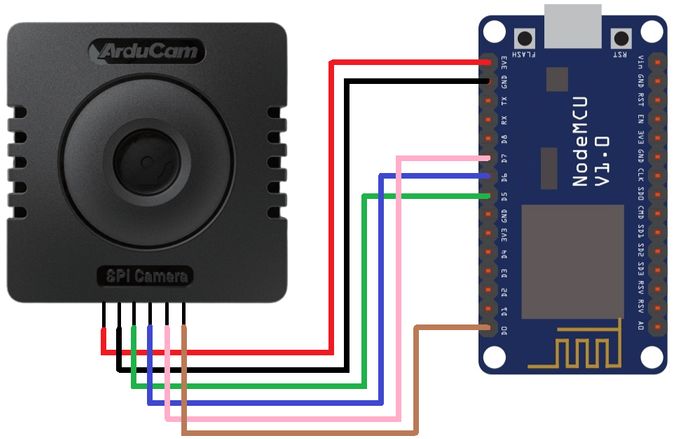
Following is the connection between NodeMCU ESP8266 Board & 5MP Arducam Mega Camera.
| Camera Pin | NodeMCU ESP8266 Board |
| VCC | 3.3V |
| GND | GND |
| SCK | D5 |
| MISO | D6 |
| MOSI | D7 |
| CS | D0 |
You can directly connect the Camera with NodeMCU ESP8266 Board using the jumper wires.
Project PCB Gerber File & PCB Ordering Online
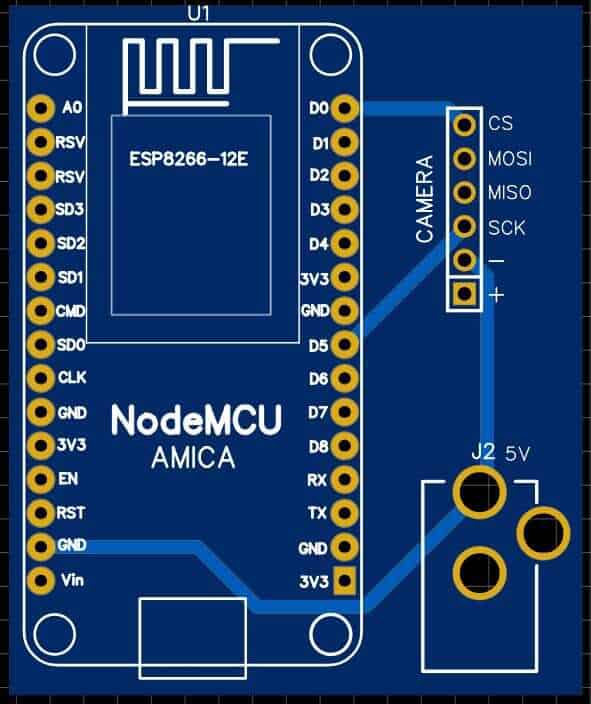
If you don’t want to assemble the circuit on a breadboard and you want PCB for the project, then here is the PCB for you. The PCB Board for the Arducam Board looks something like the one below.
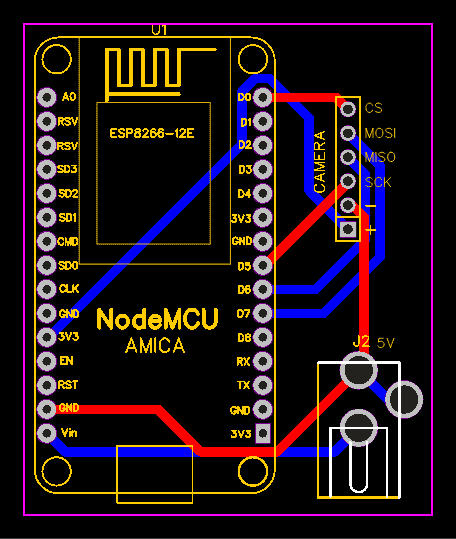
The Gerber File for the PCB is given below. You can simply download the Gerber File and order the PCB from https://www.pcbway.com/
Download Gerber File
Now you can visit the PCBWay official website by clicking here: https://www.pcbway.com/. So you will be directed to the PCBWay website.
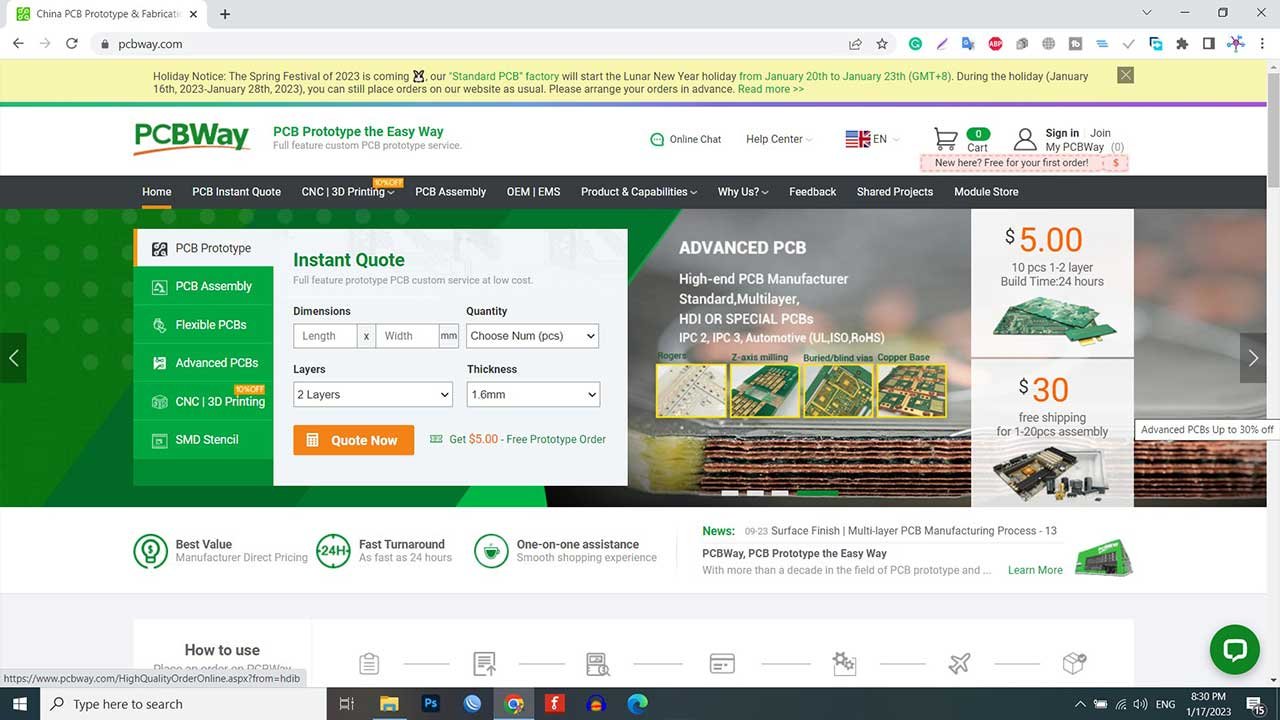
You can now upload the Gerber File to the Website and place an order. The PCB quality is superb & high. That is why most people trust PCBWay for PCB & PCBA Services.
You can assemble the components on the PCB Board.
Arducam Mega Library Installation
Arducam has made available a library for ESP8266 Boards and other microcontrollers. The library can be used in the Arduino IDE, and the process of configuration and utilization is straightforward.
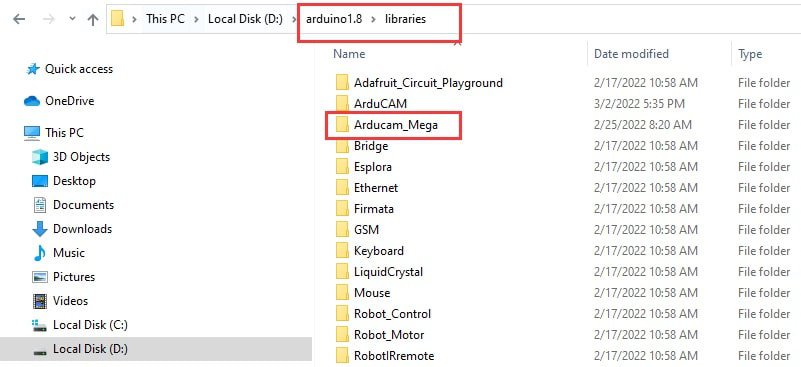
The library can be downloaded from this link: https://github.com/ArduCAM/Arducam_Mega Once downloaded, the library file should be extracted and the resulting folder copied to the Arduino library folder.
Source Code/Program
Once the library has been added to the Arduino Library folder, the Camera can be tested using example code from the library.
For testing the camera, we will utilize an example named “full_featured.“
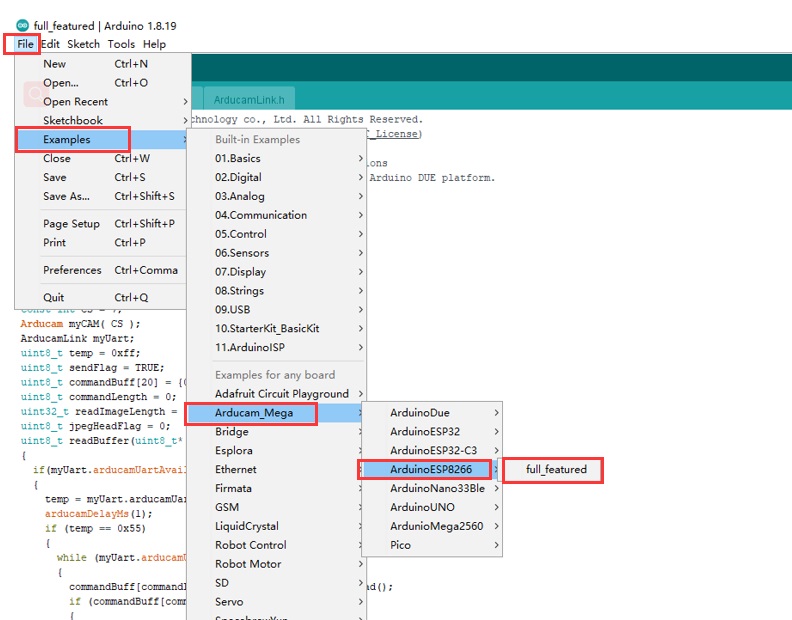
After selecting the “full_featured” example, choose the NodeMCU 1.0 Board from the Board list, and subsequently, upload the code to the ESP8266 Board by clicking on the upload button.

Testing the Camera
In order to test the functionality of the Camera, it is necessary to have some GUI visualization software. This can be accomplished by downloading the Arducam software from the following link:
https://github.com/ArduCAM/Arducam_Mega/releases/
Once downloaded, the software should be installed on your computer.
Upon successful installation, select the NodeMCU ESP8266 port number, set the baud rate to 921600, and click on the “Open” button.
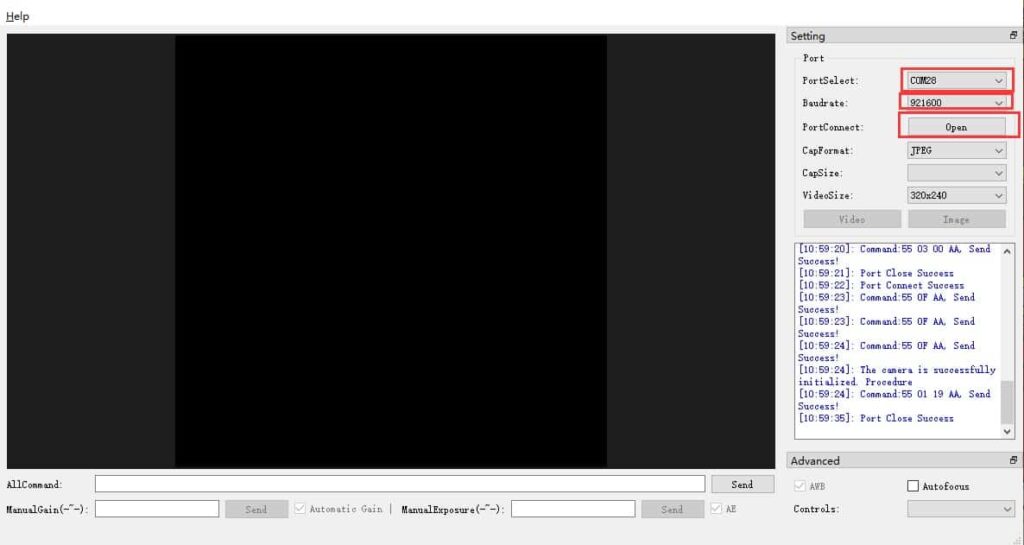
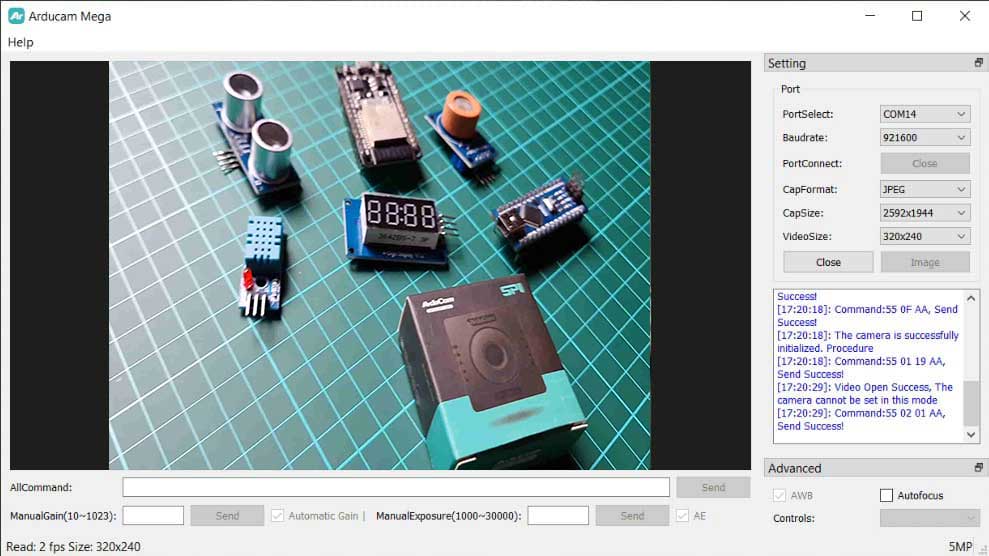
After establishing the connection between the camera and the visualization software, you can adjust the camera’s direction to view the desired area on the GUI screen.
The ESP8266 camera visualization software includes buttons for capturing images, closing the display window, and selecting the image resolution and format.
For video streaming mode, click the video button to enable it with the default resolution of 320×240. To disable video streaming mode, click the close button.
The auto-exposure and auto-gain functions are enabled by default. However, you can also choose to control these functions manually.
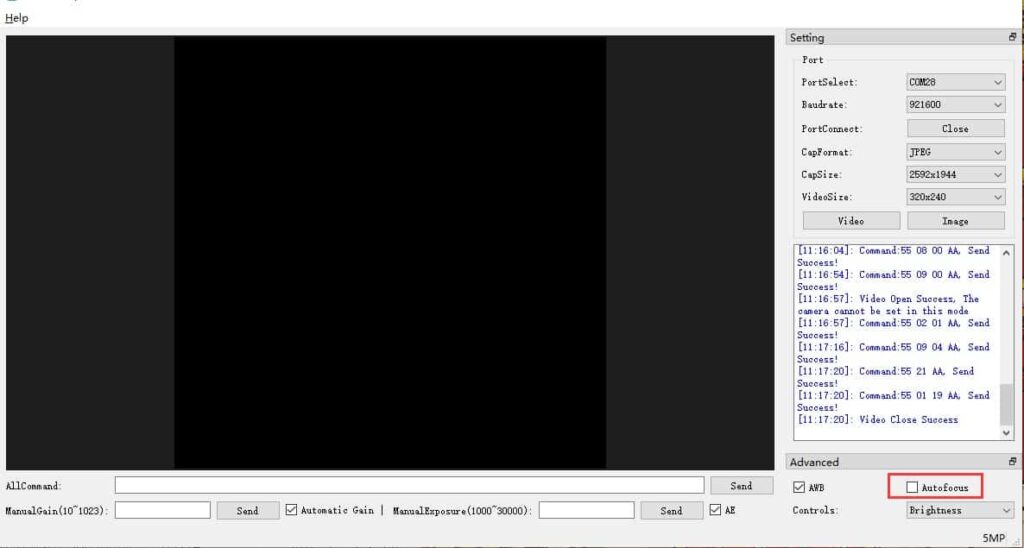
The visualization software also includes features for adjusting brightness, contrast, EV, saturation, special effects, white balance, and focus. Autofocus control is available only for the 5MP Arducam Mega Camera and can be enabled or disabled along with the continuous focus function.
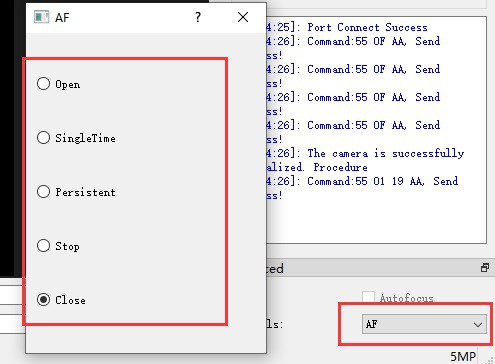
| Parameter | Function |
| Open | Enable the focus function |
| SingleTime | Enable single focus |
| Persistent | Enable continuous focus |
| Stop | Pause autofocus |
| Close | Turn off focus |
Video Tutorial
Conclusion
In conclusion, this tutorial has provided valuable information on the Arducam Mega Camera and its compatibility with the NodeMCU ESP8266 WiFi module. The Arducam Mega Camera is a powerful and innovative camera solution that offers effortless connectivity with any microcontroller. It is specifically designed for low-power IoT and embedded vision applications, making it an ideal solution for battery-powered devices.
The camera’s compatibility with various microcontrollers, including Arduino, STM8/STM32, ESP8266/ESP32, MSP430, Nordic, Renesas, and others. This makes it a versatile option for developers working on different projects. Additionally, the camera’s energy-saving capabilities allow users to switch it off completely when the MCU is sleeping, without worrying about long register settings.
Overall, the Arducam Mega Camera offers an efficient and effective solution for IoT and embedded vision applications, empowering the future of technology in this field.